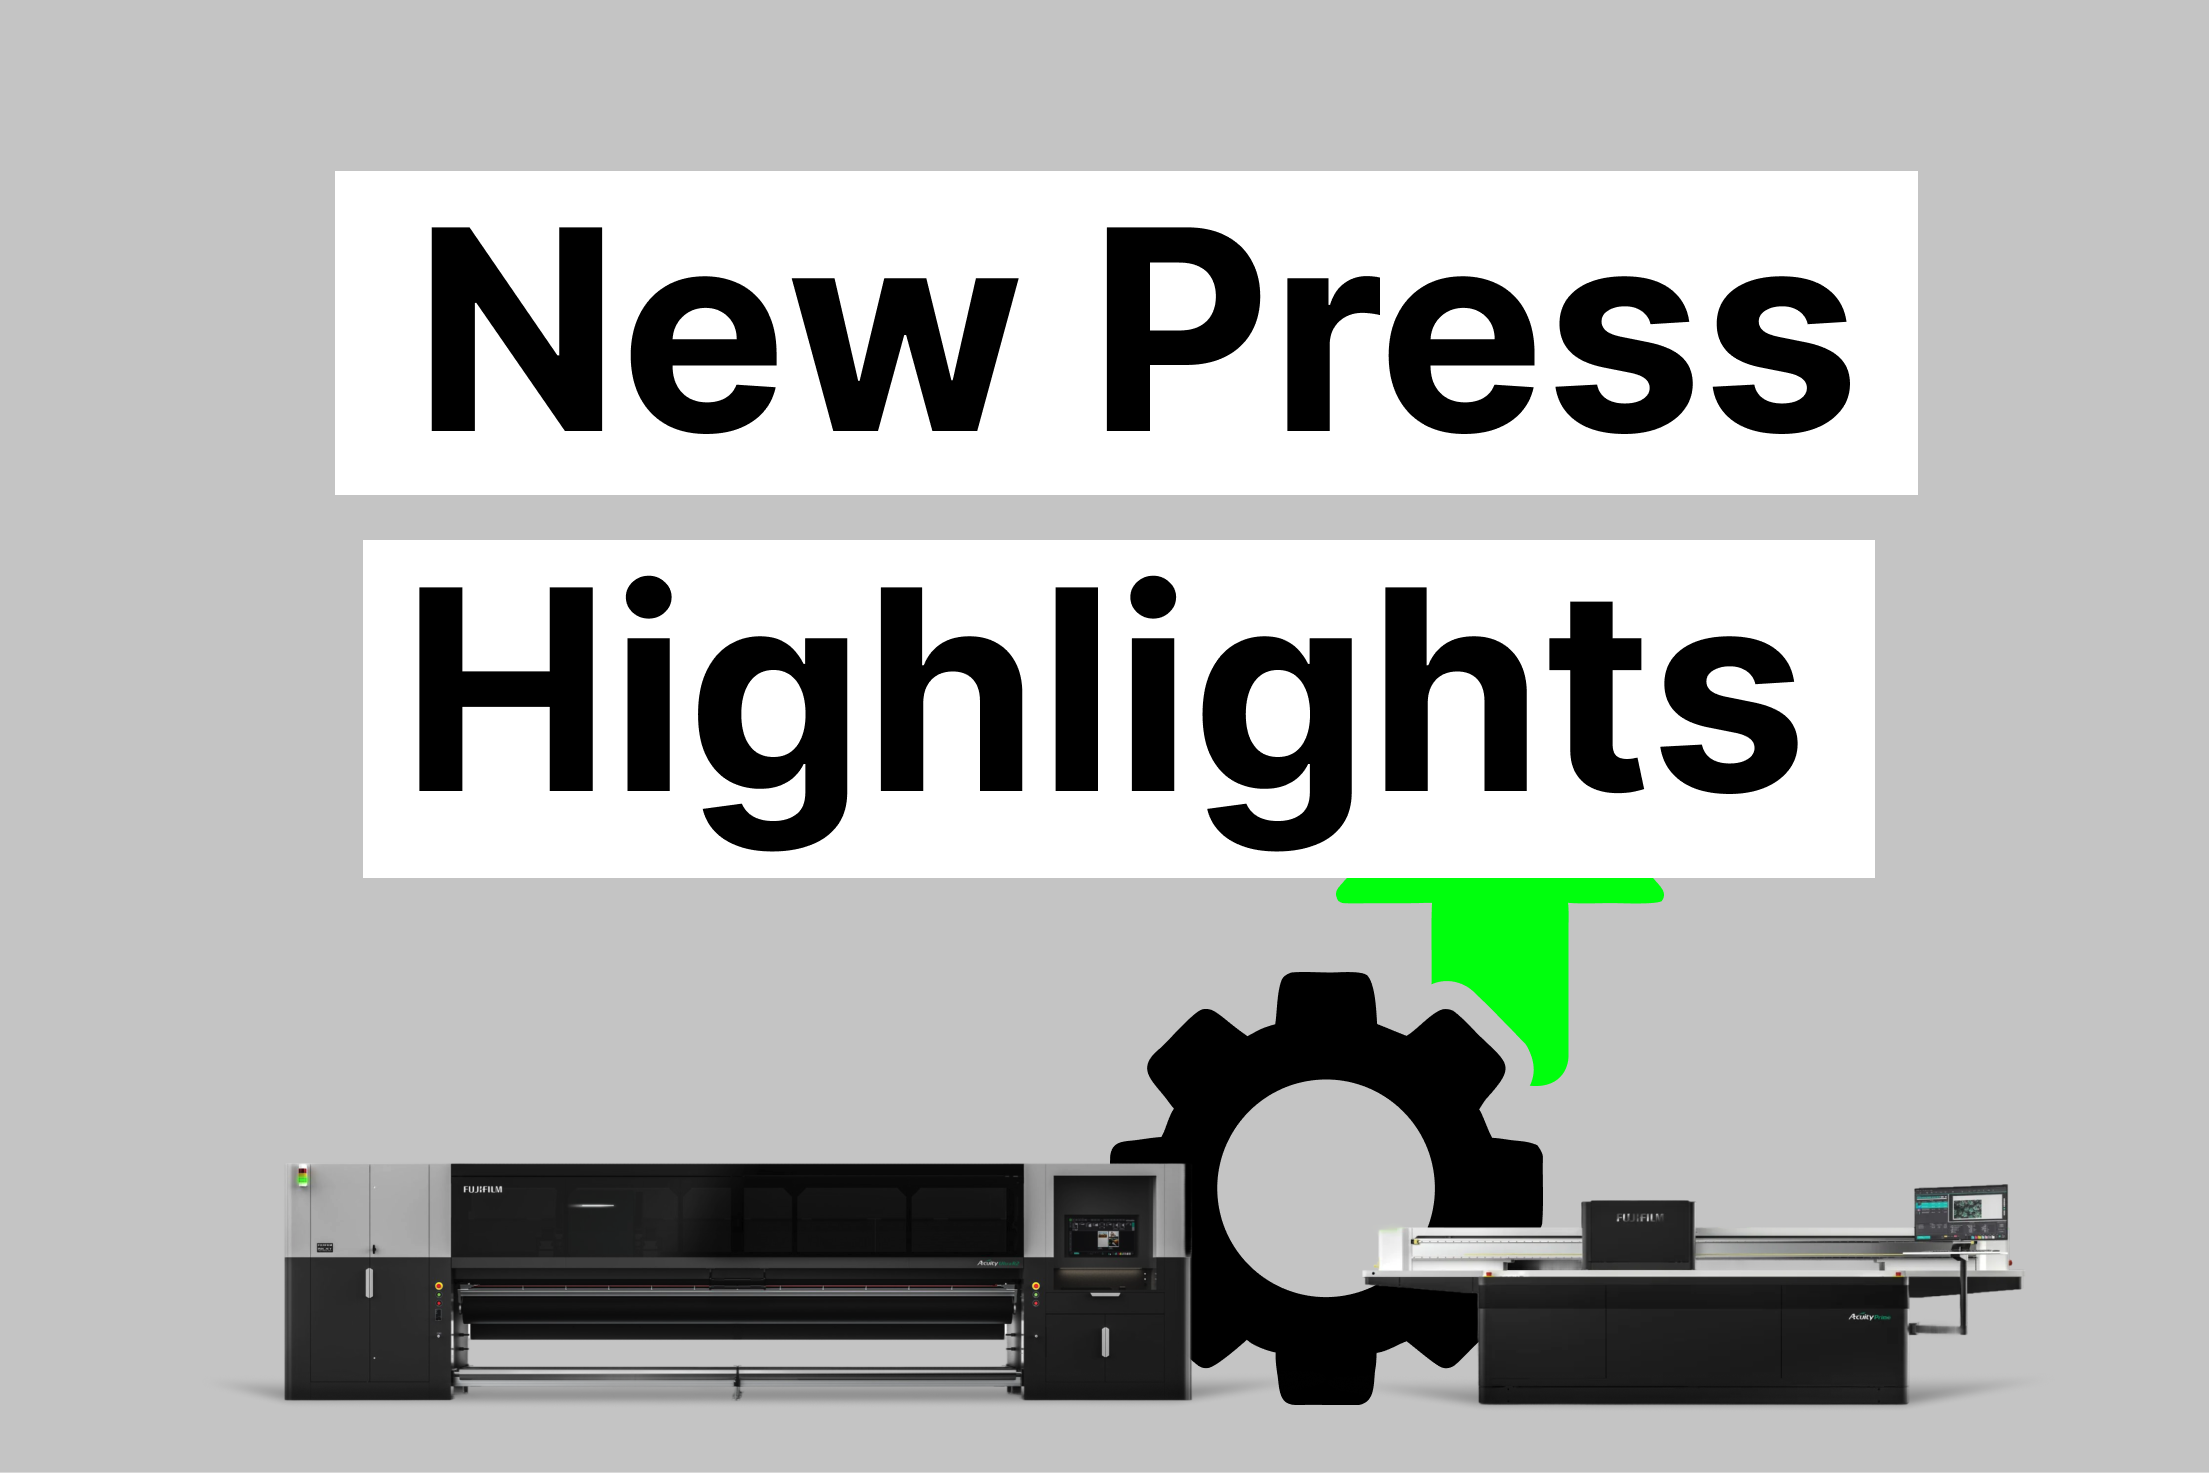
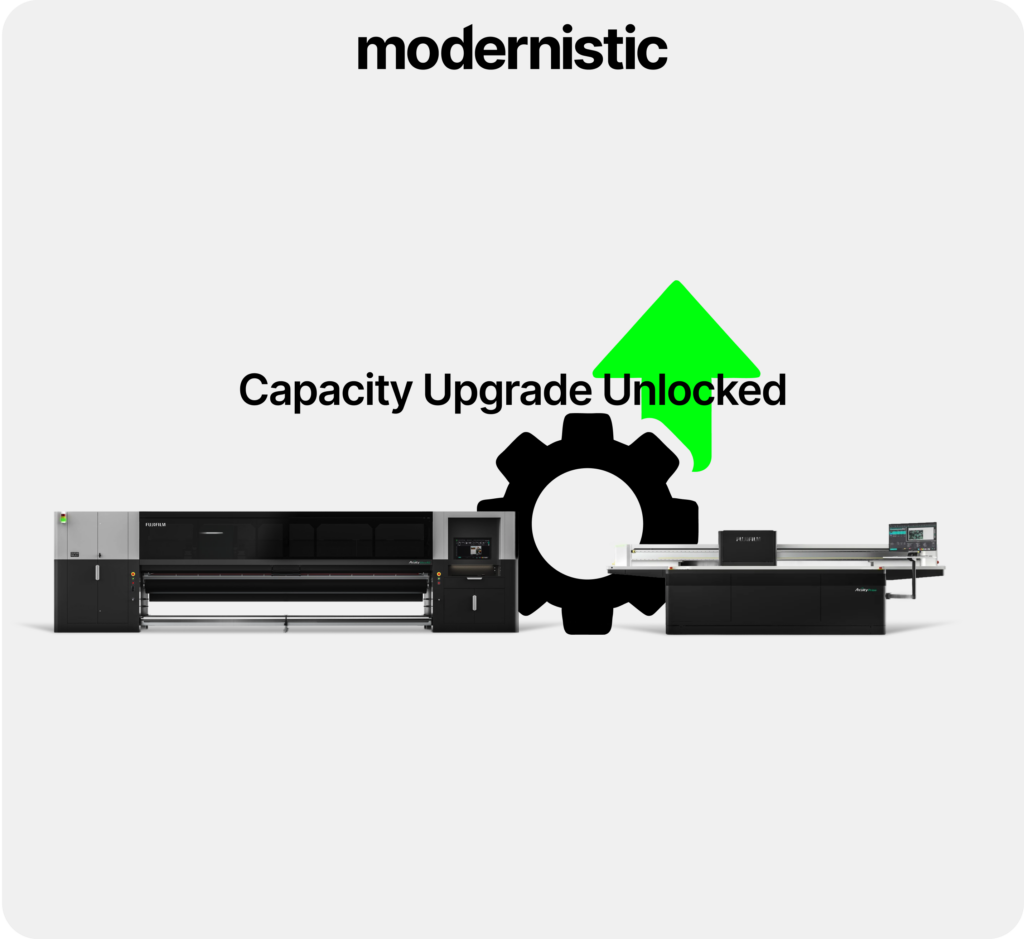
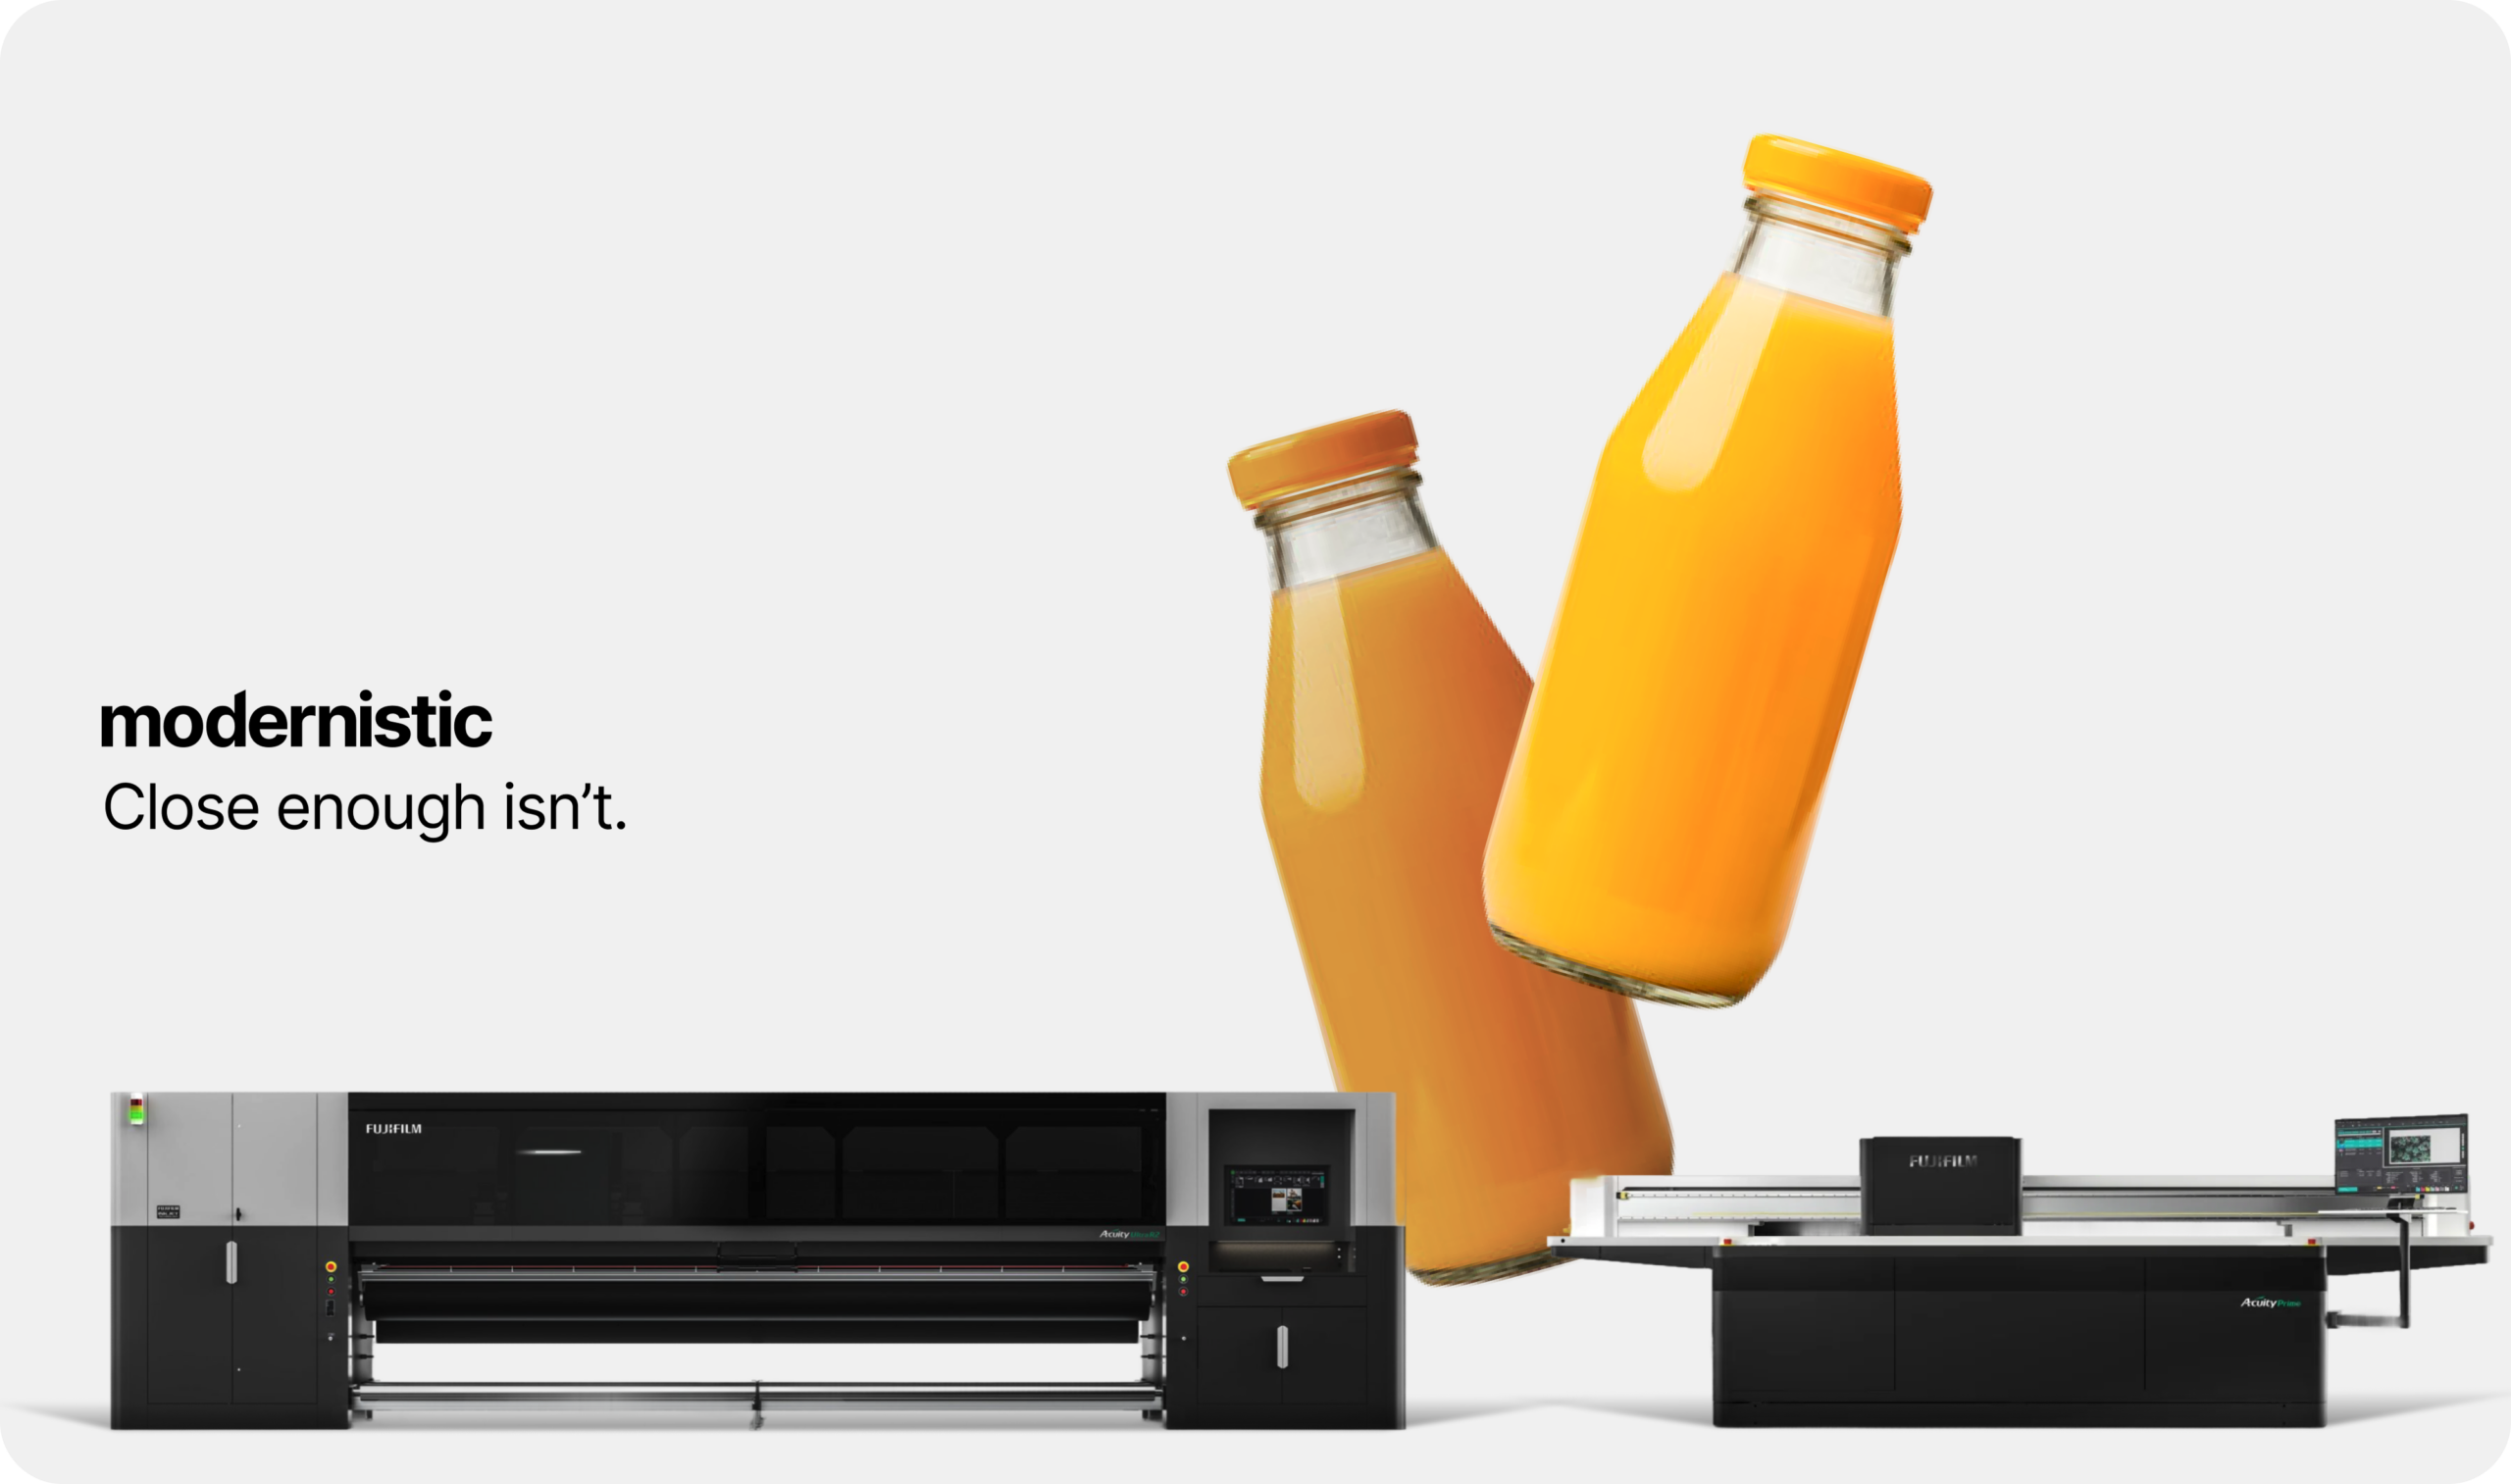
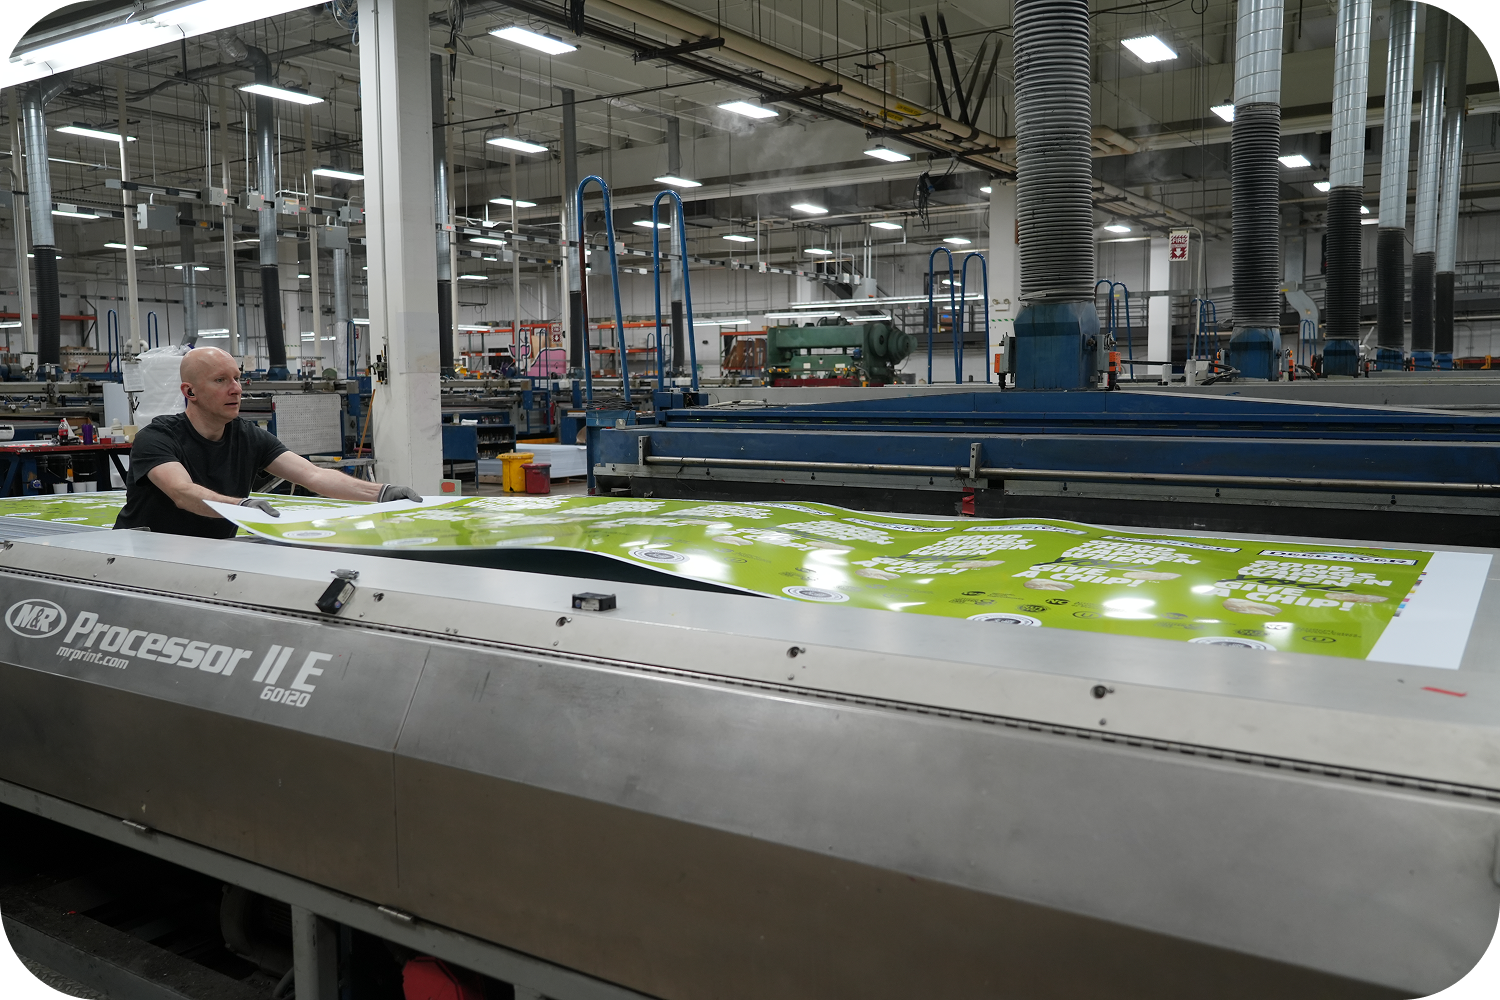
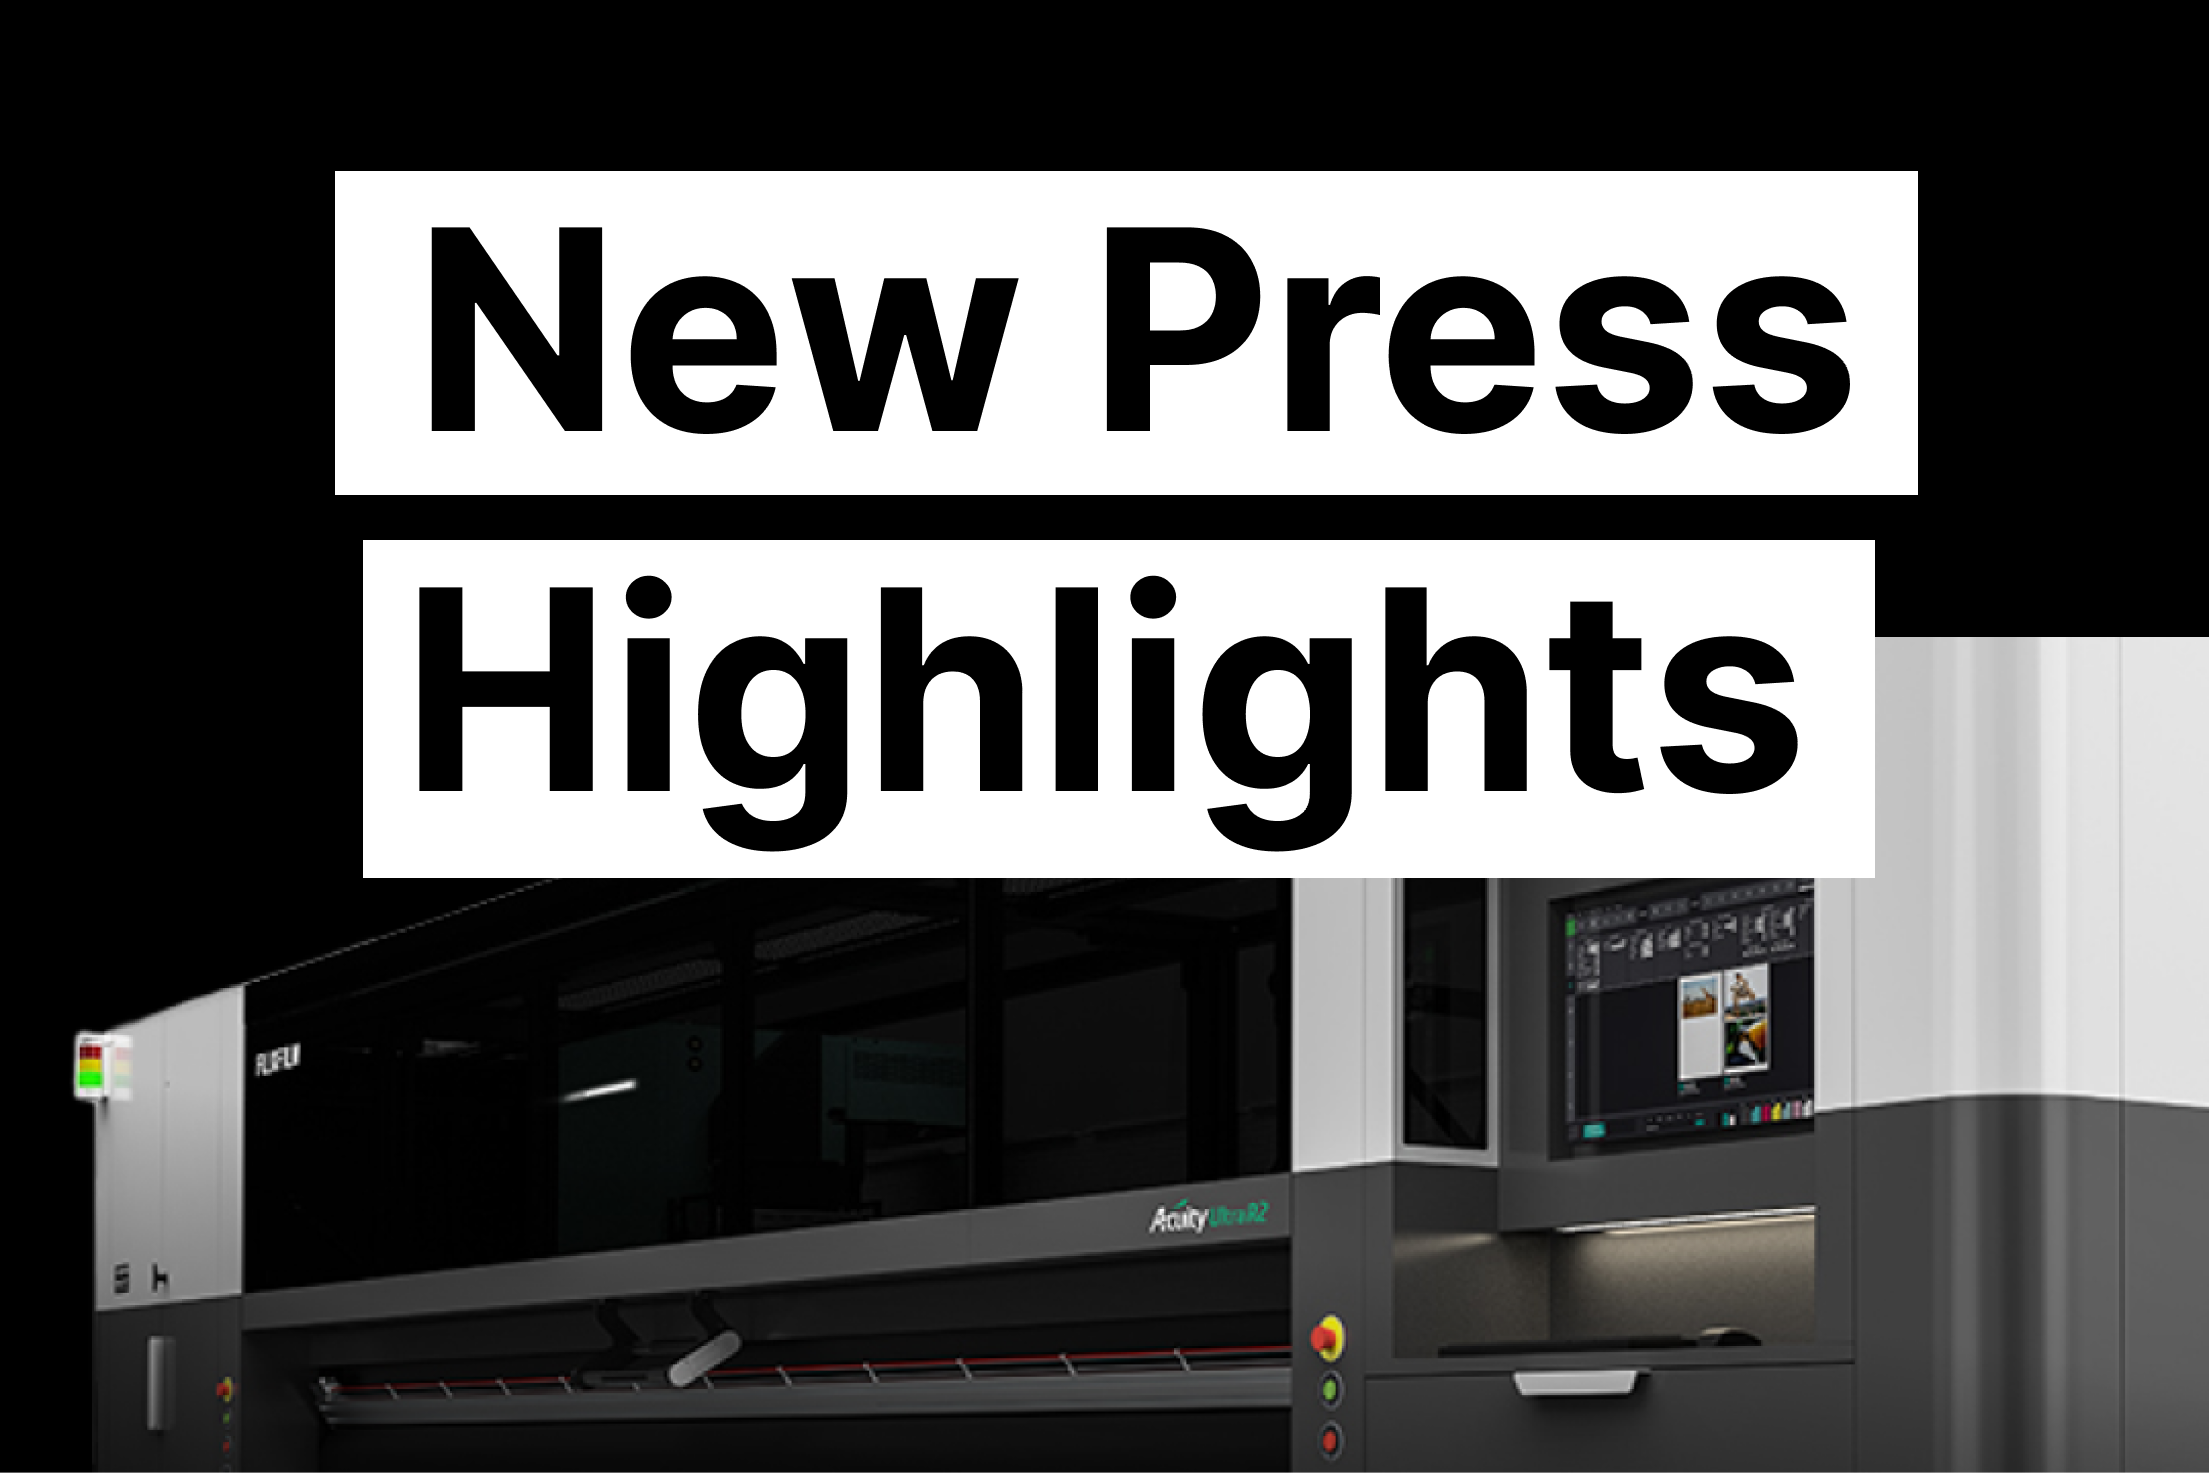
We’ve added 2 brand new presses to our digital department—and it’s not just about adding capacity. It’s about delivering better results, faster turnaround times, and more flexibility for every project that comes through our doors.
Here are are the key highlights that are already making a difference for you…
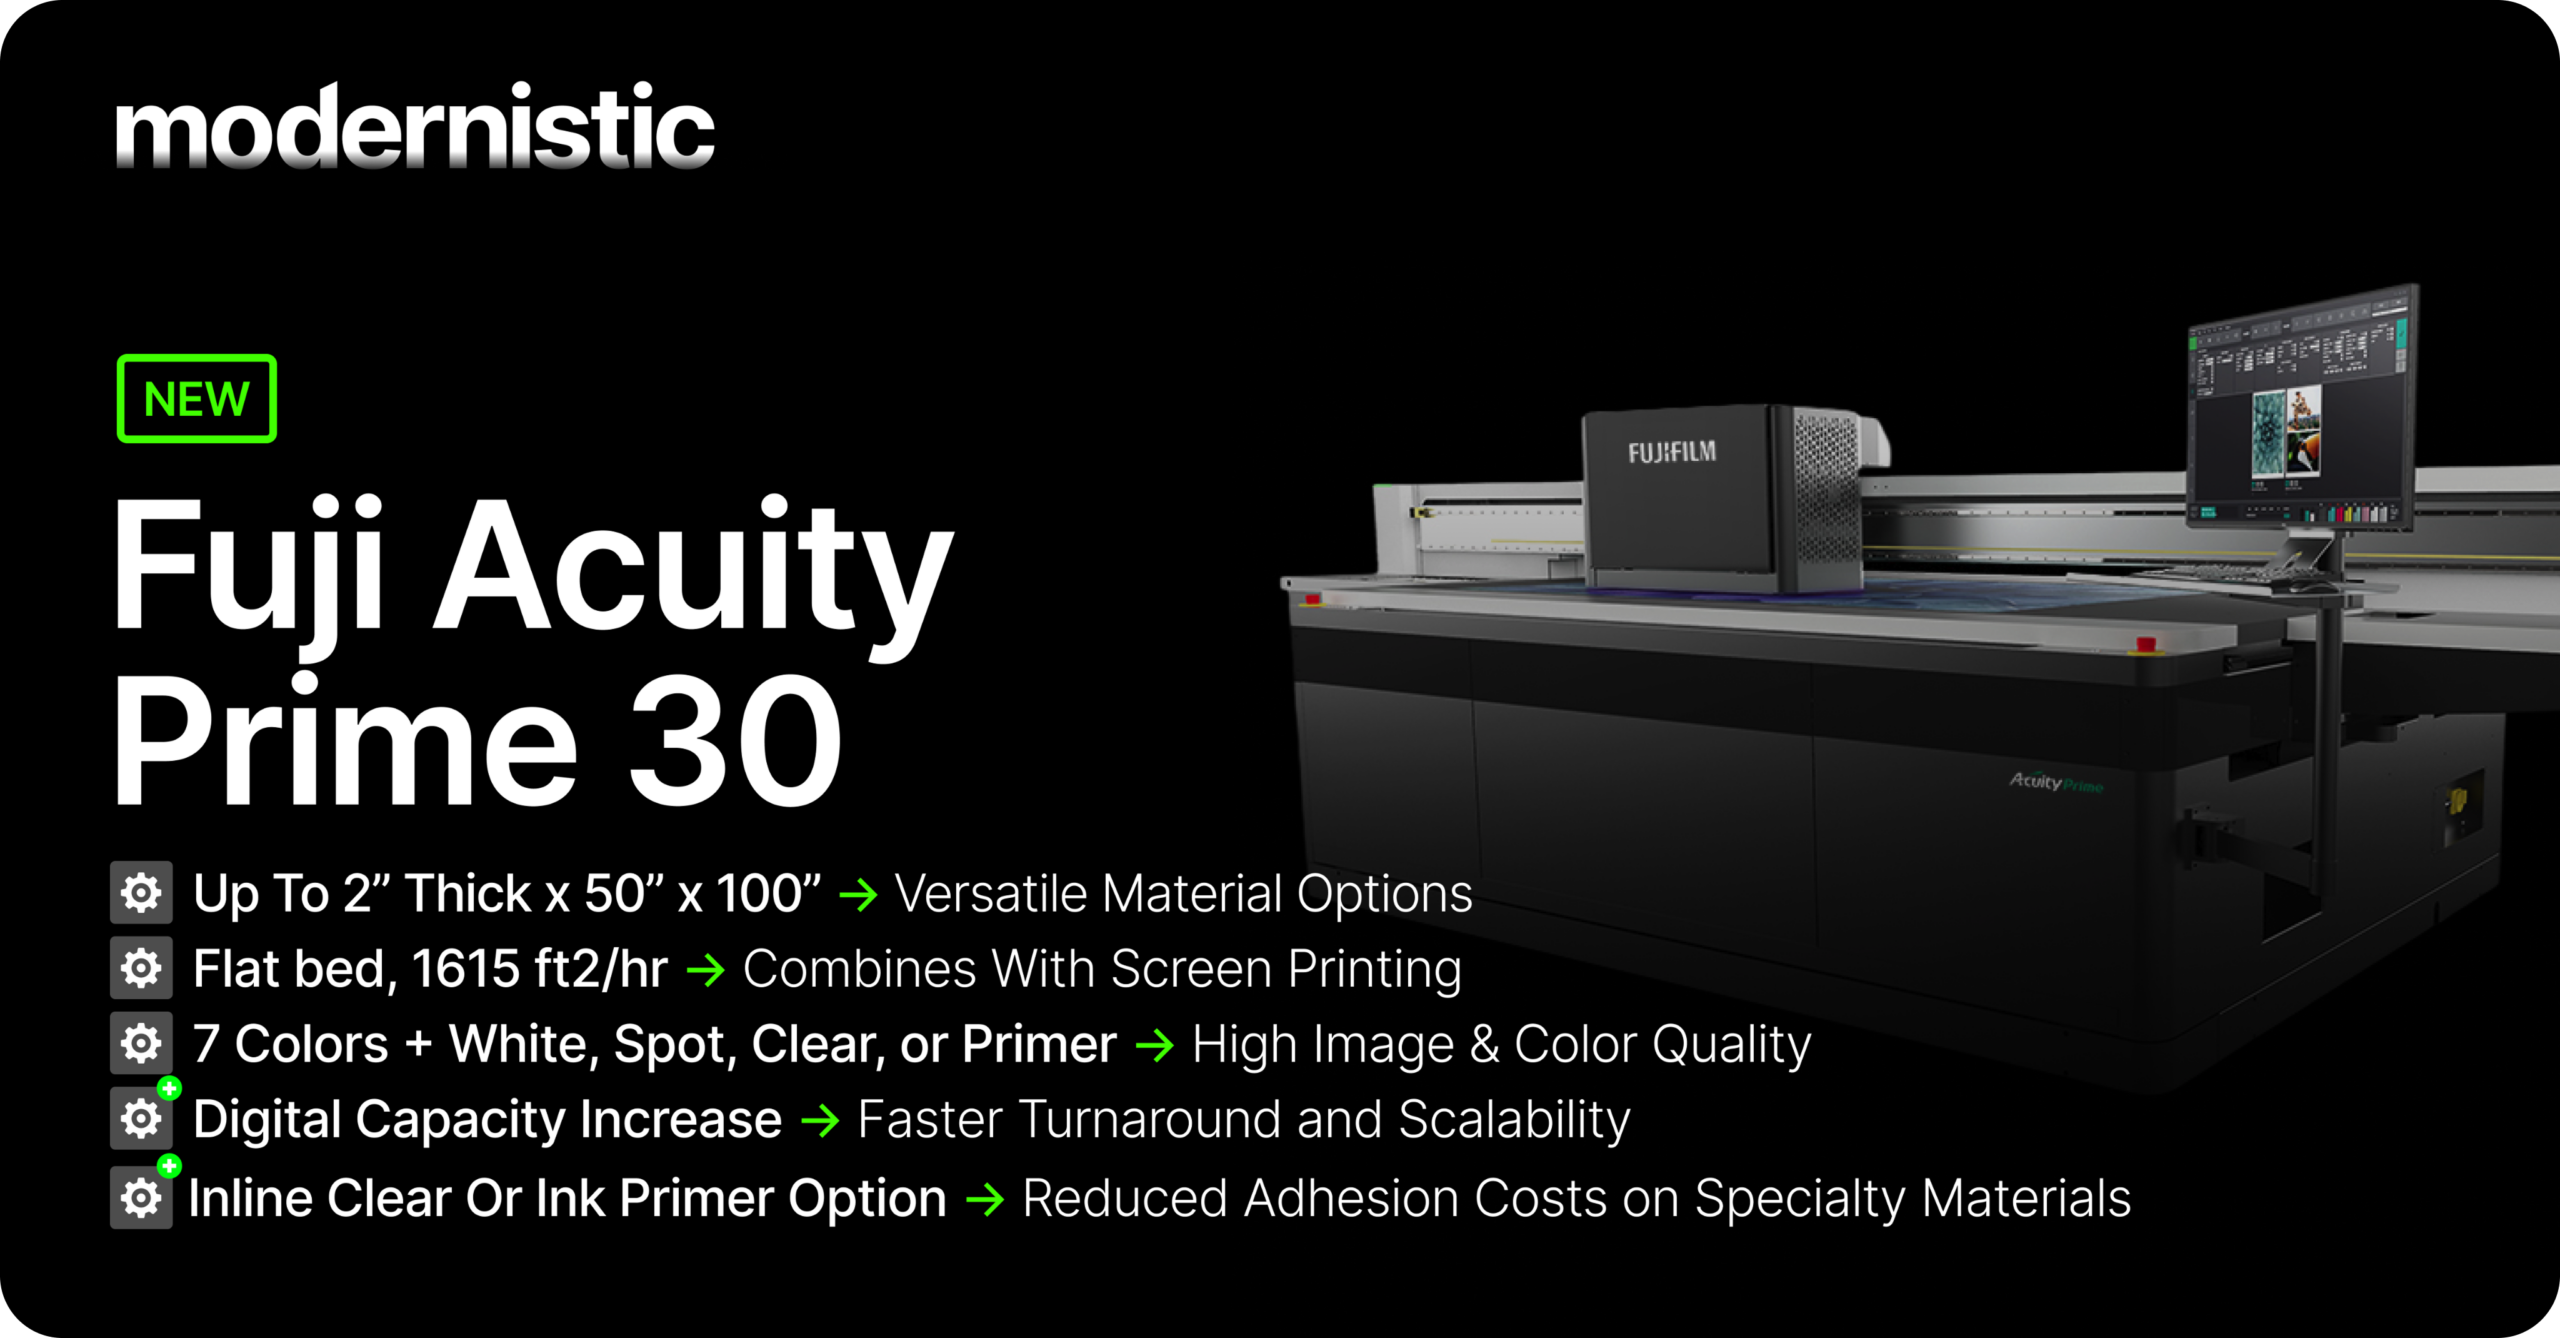
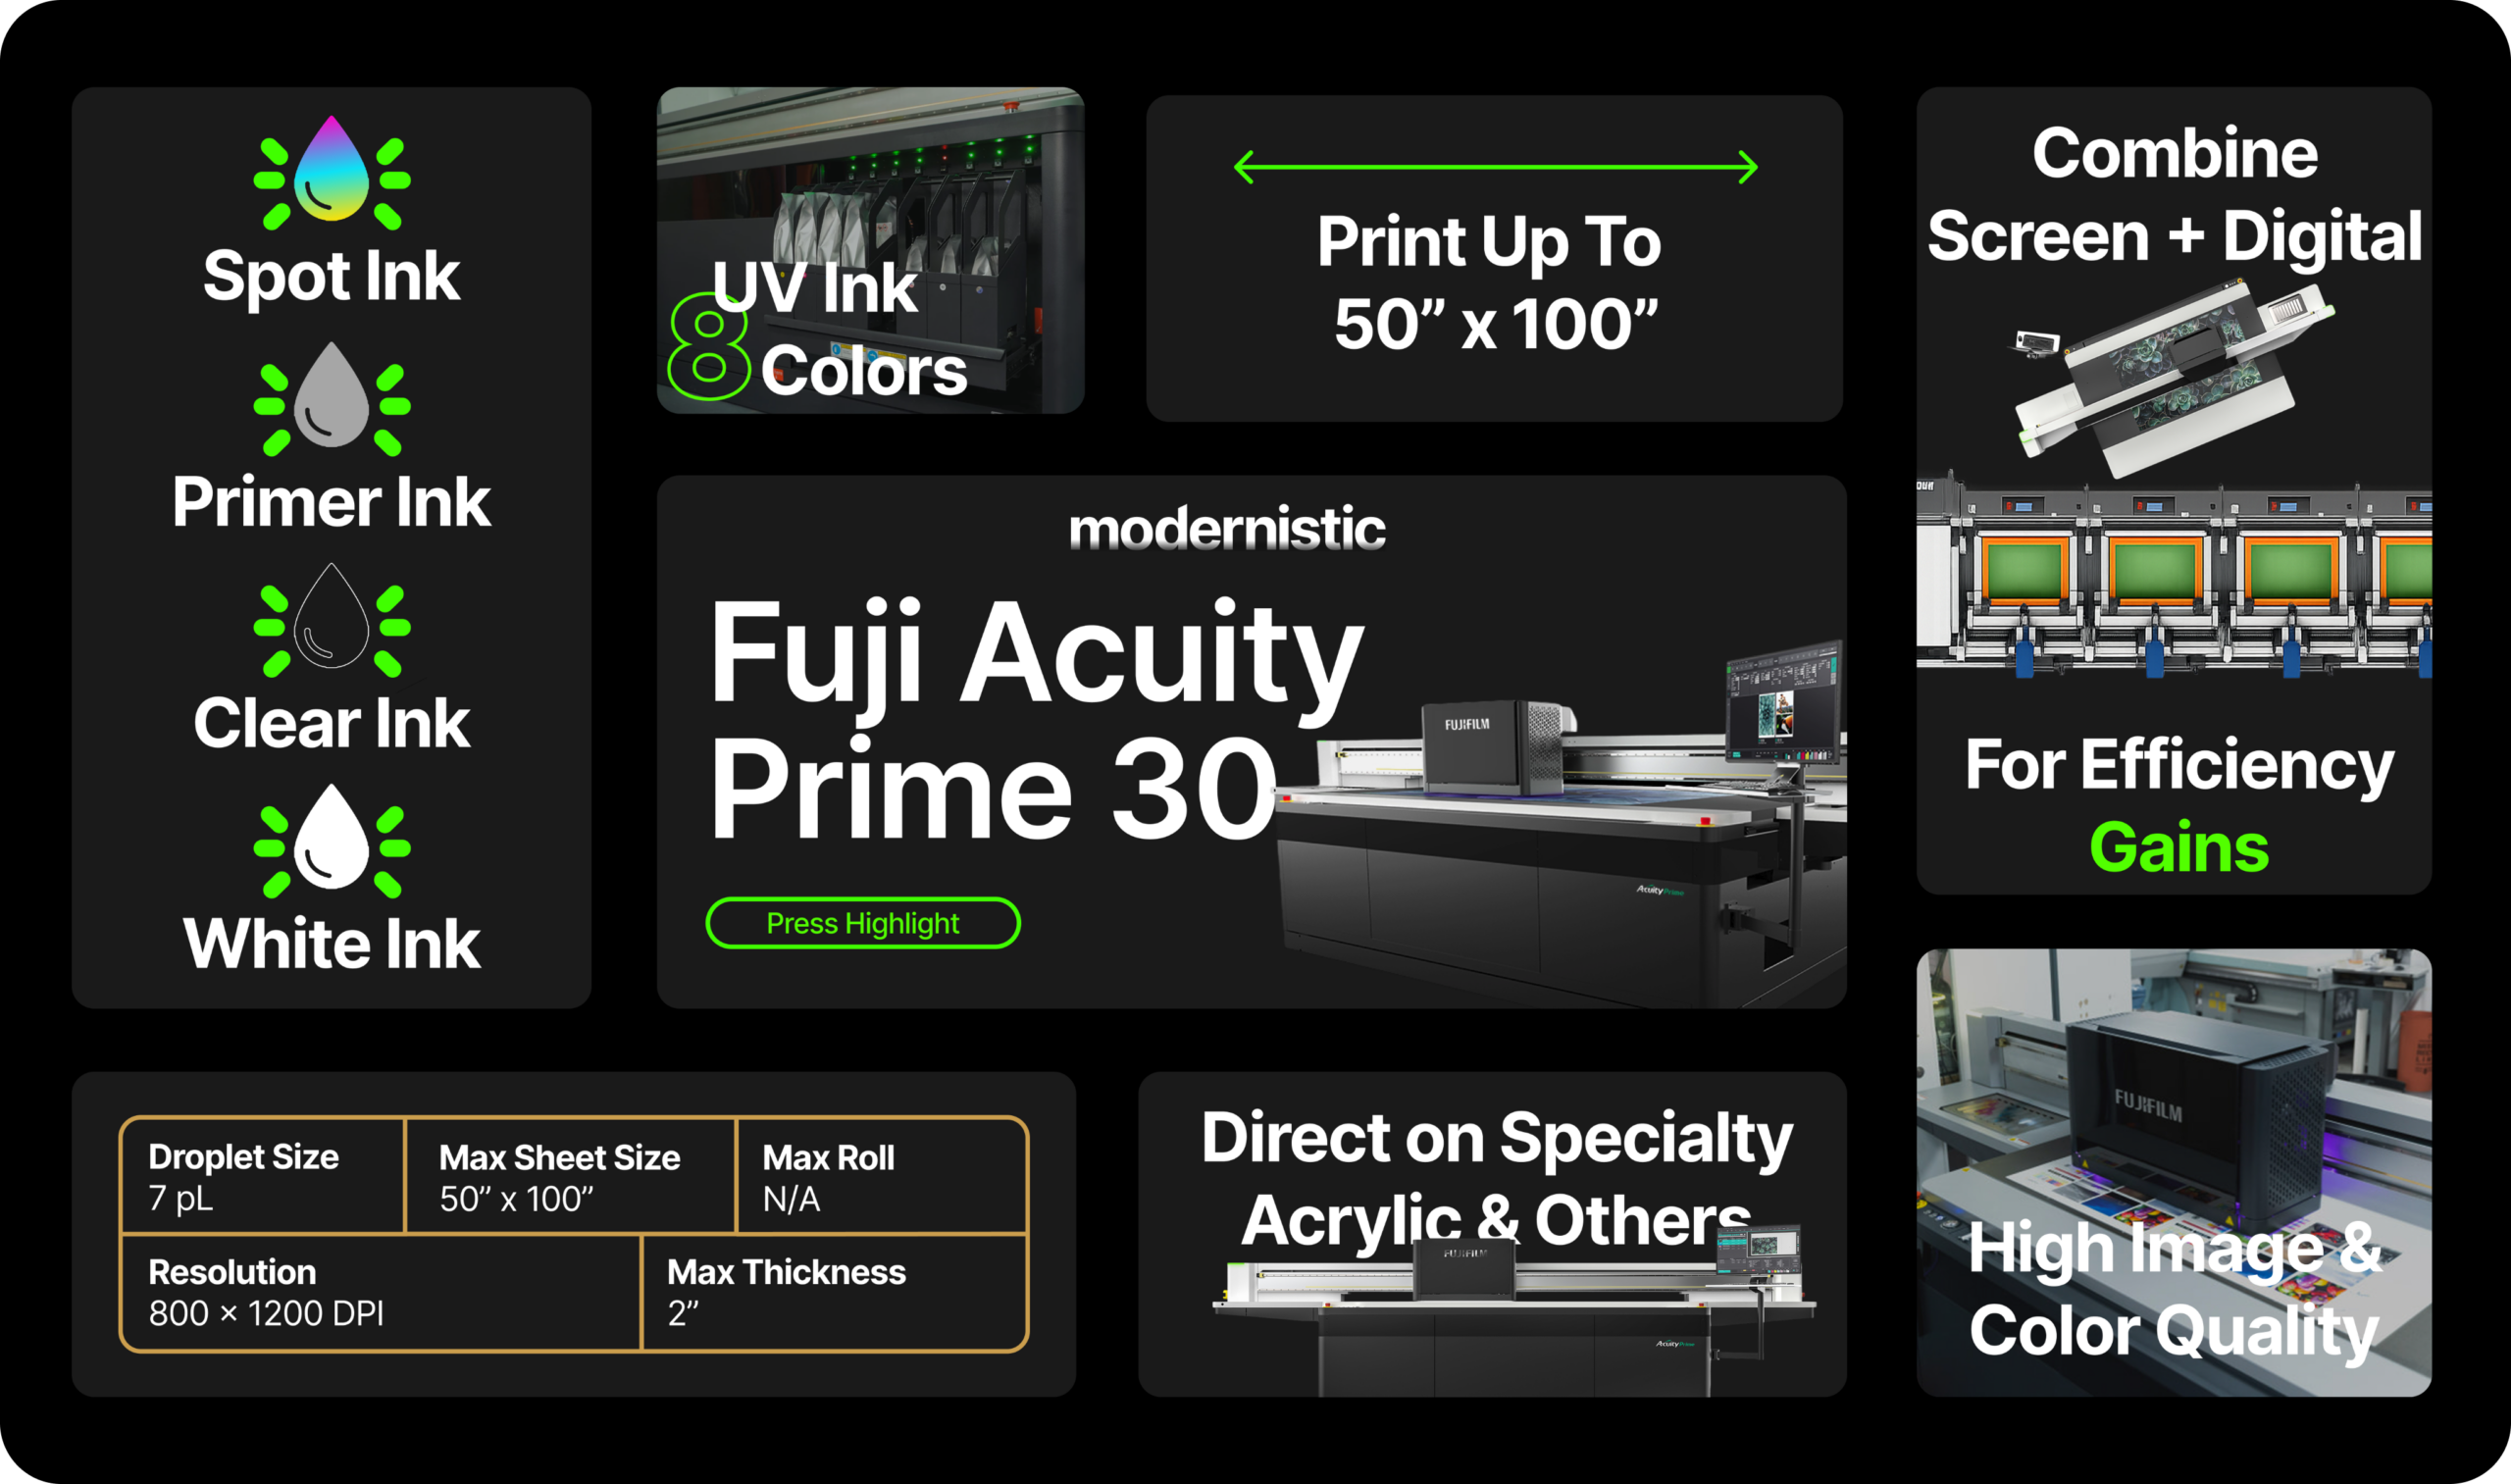
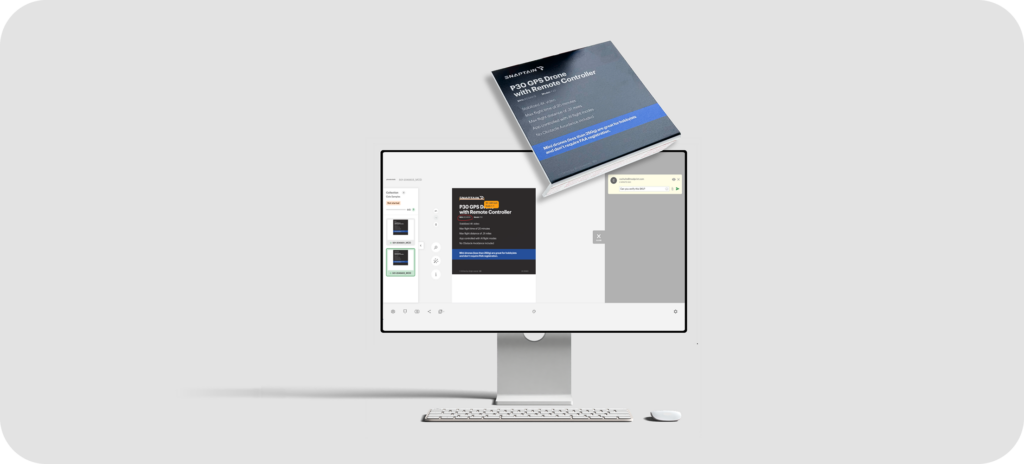
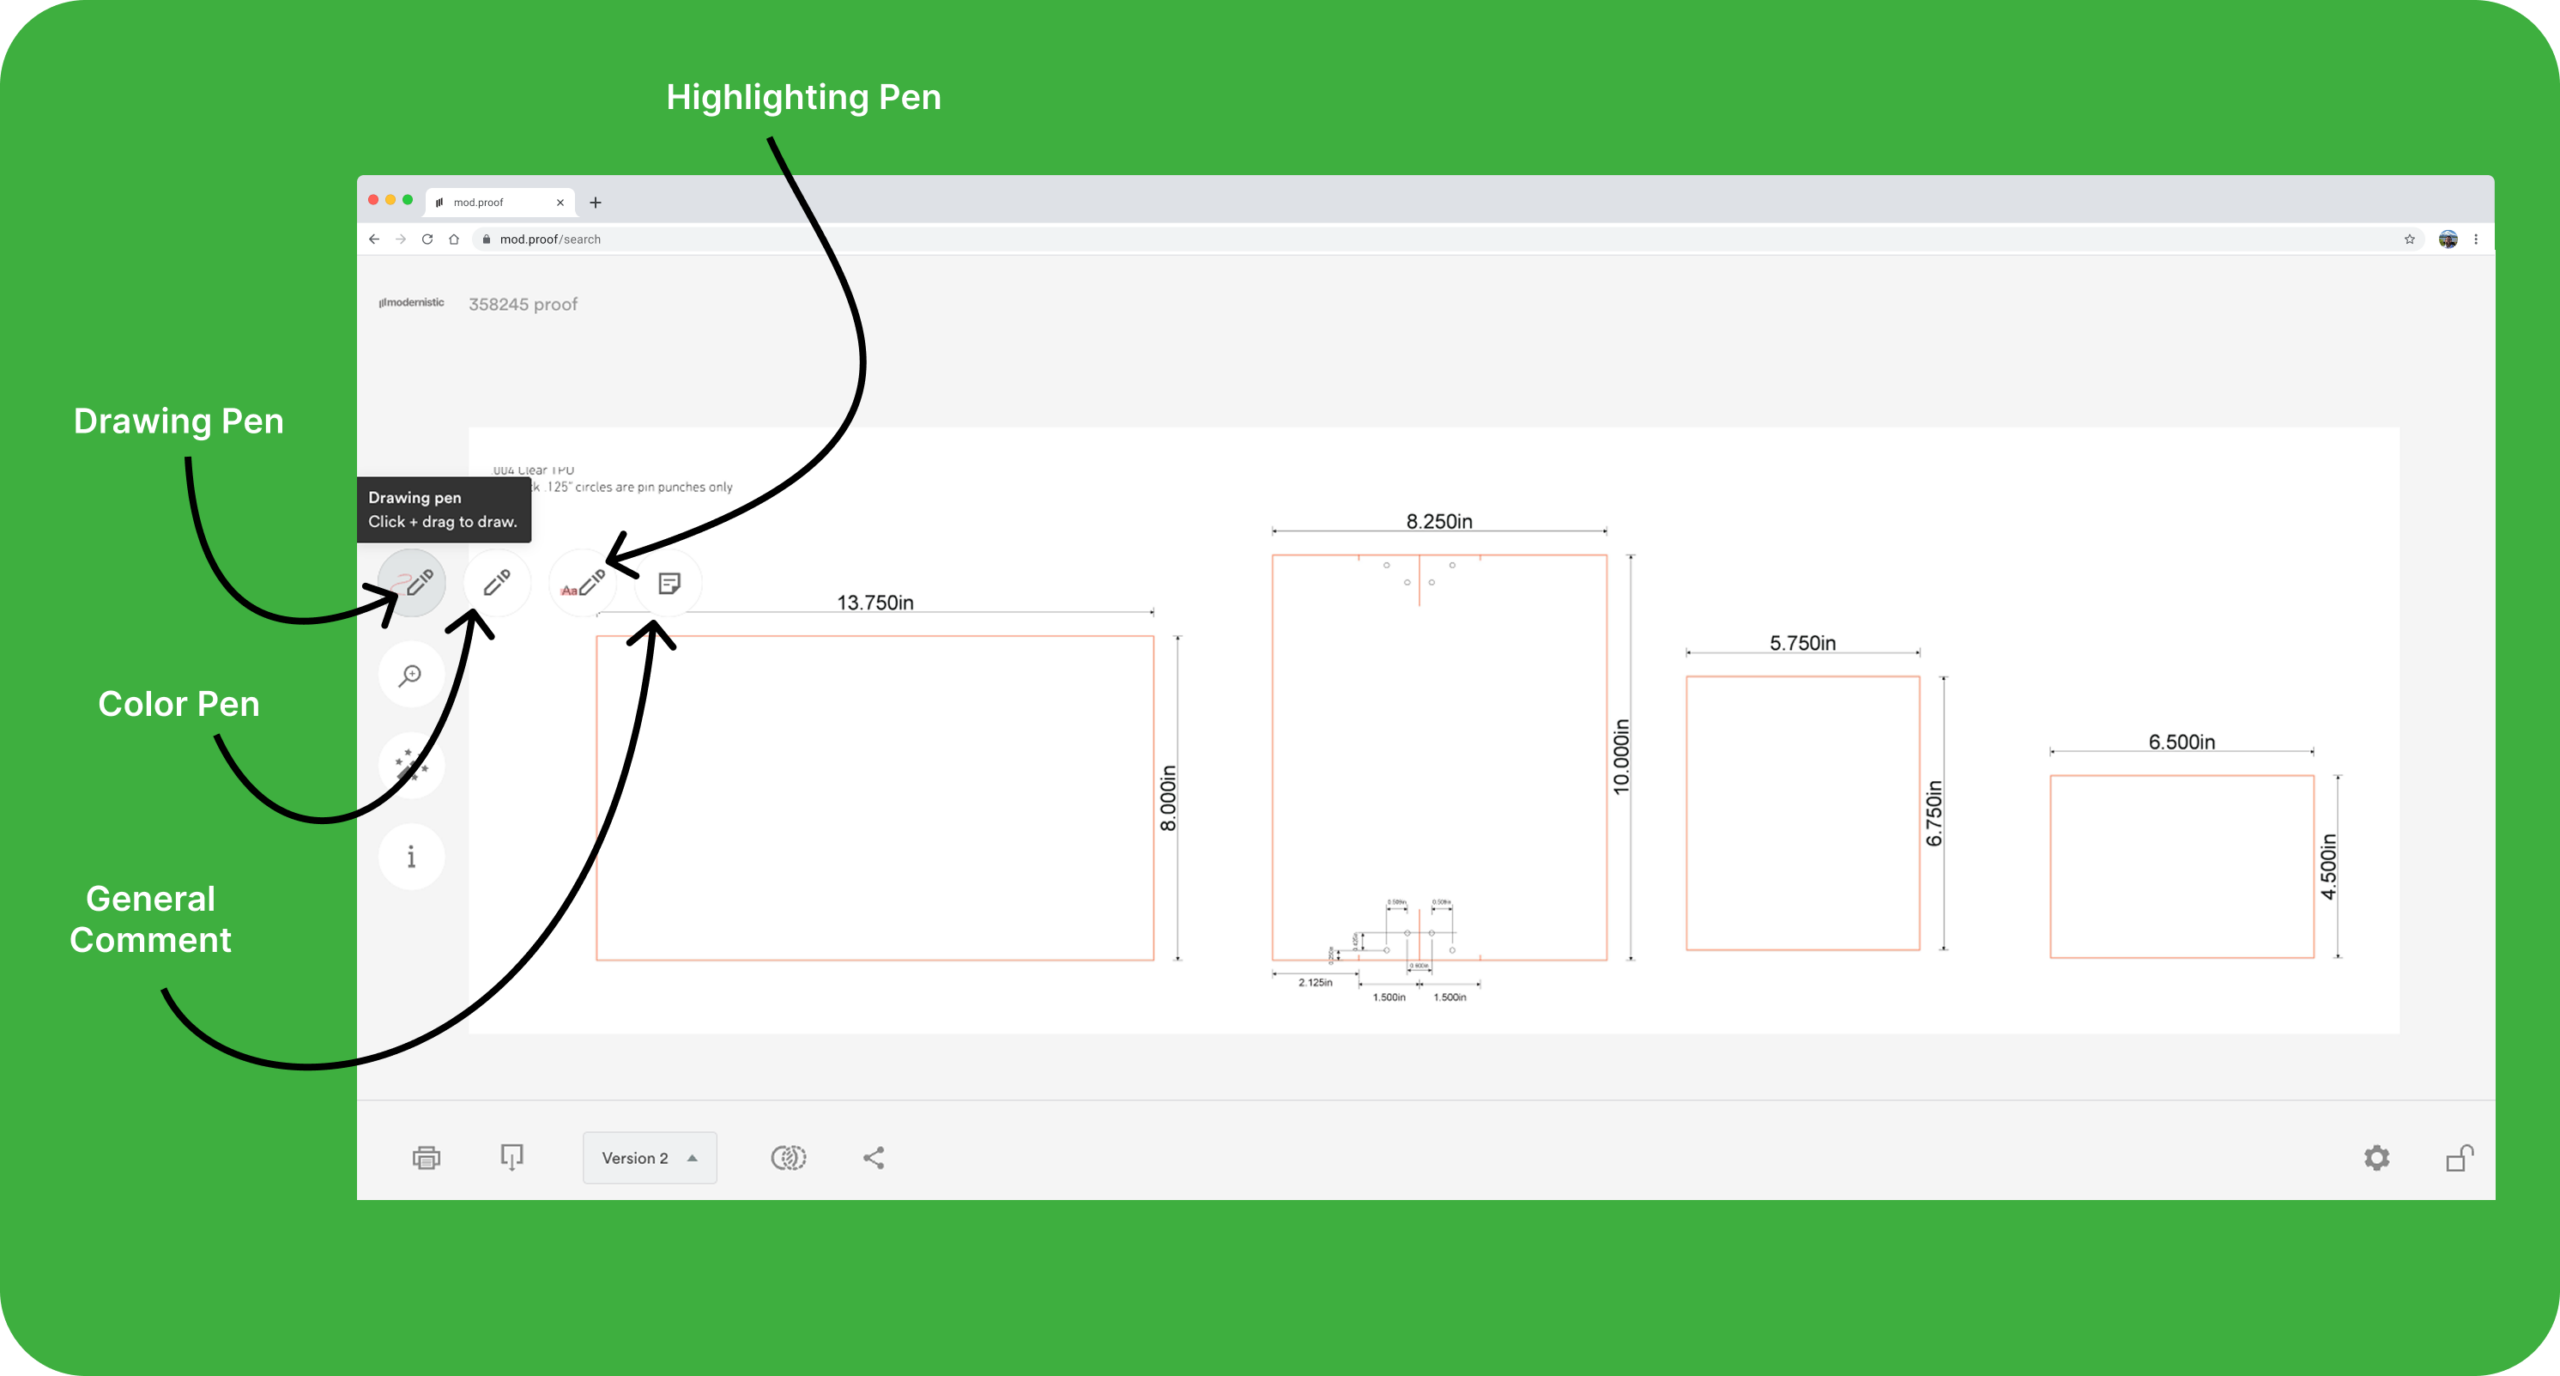
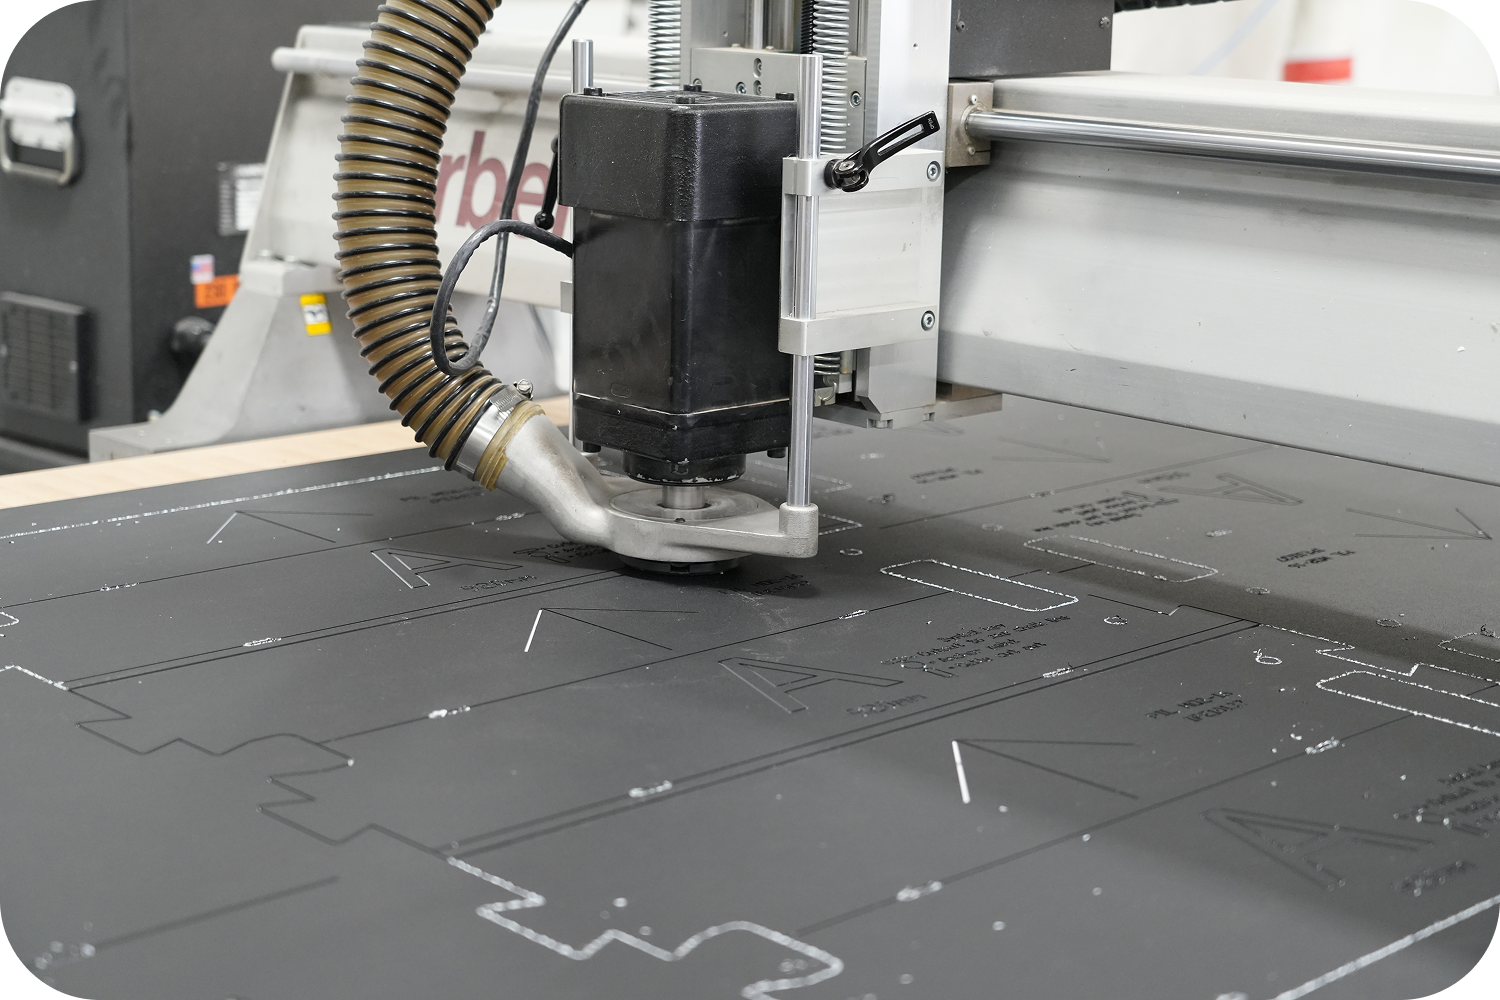
Key Highlights: Fuji Acuity Prime 30
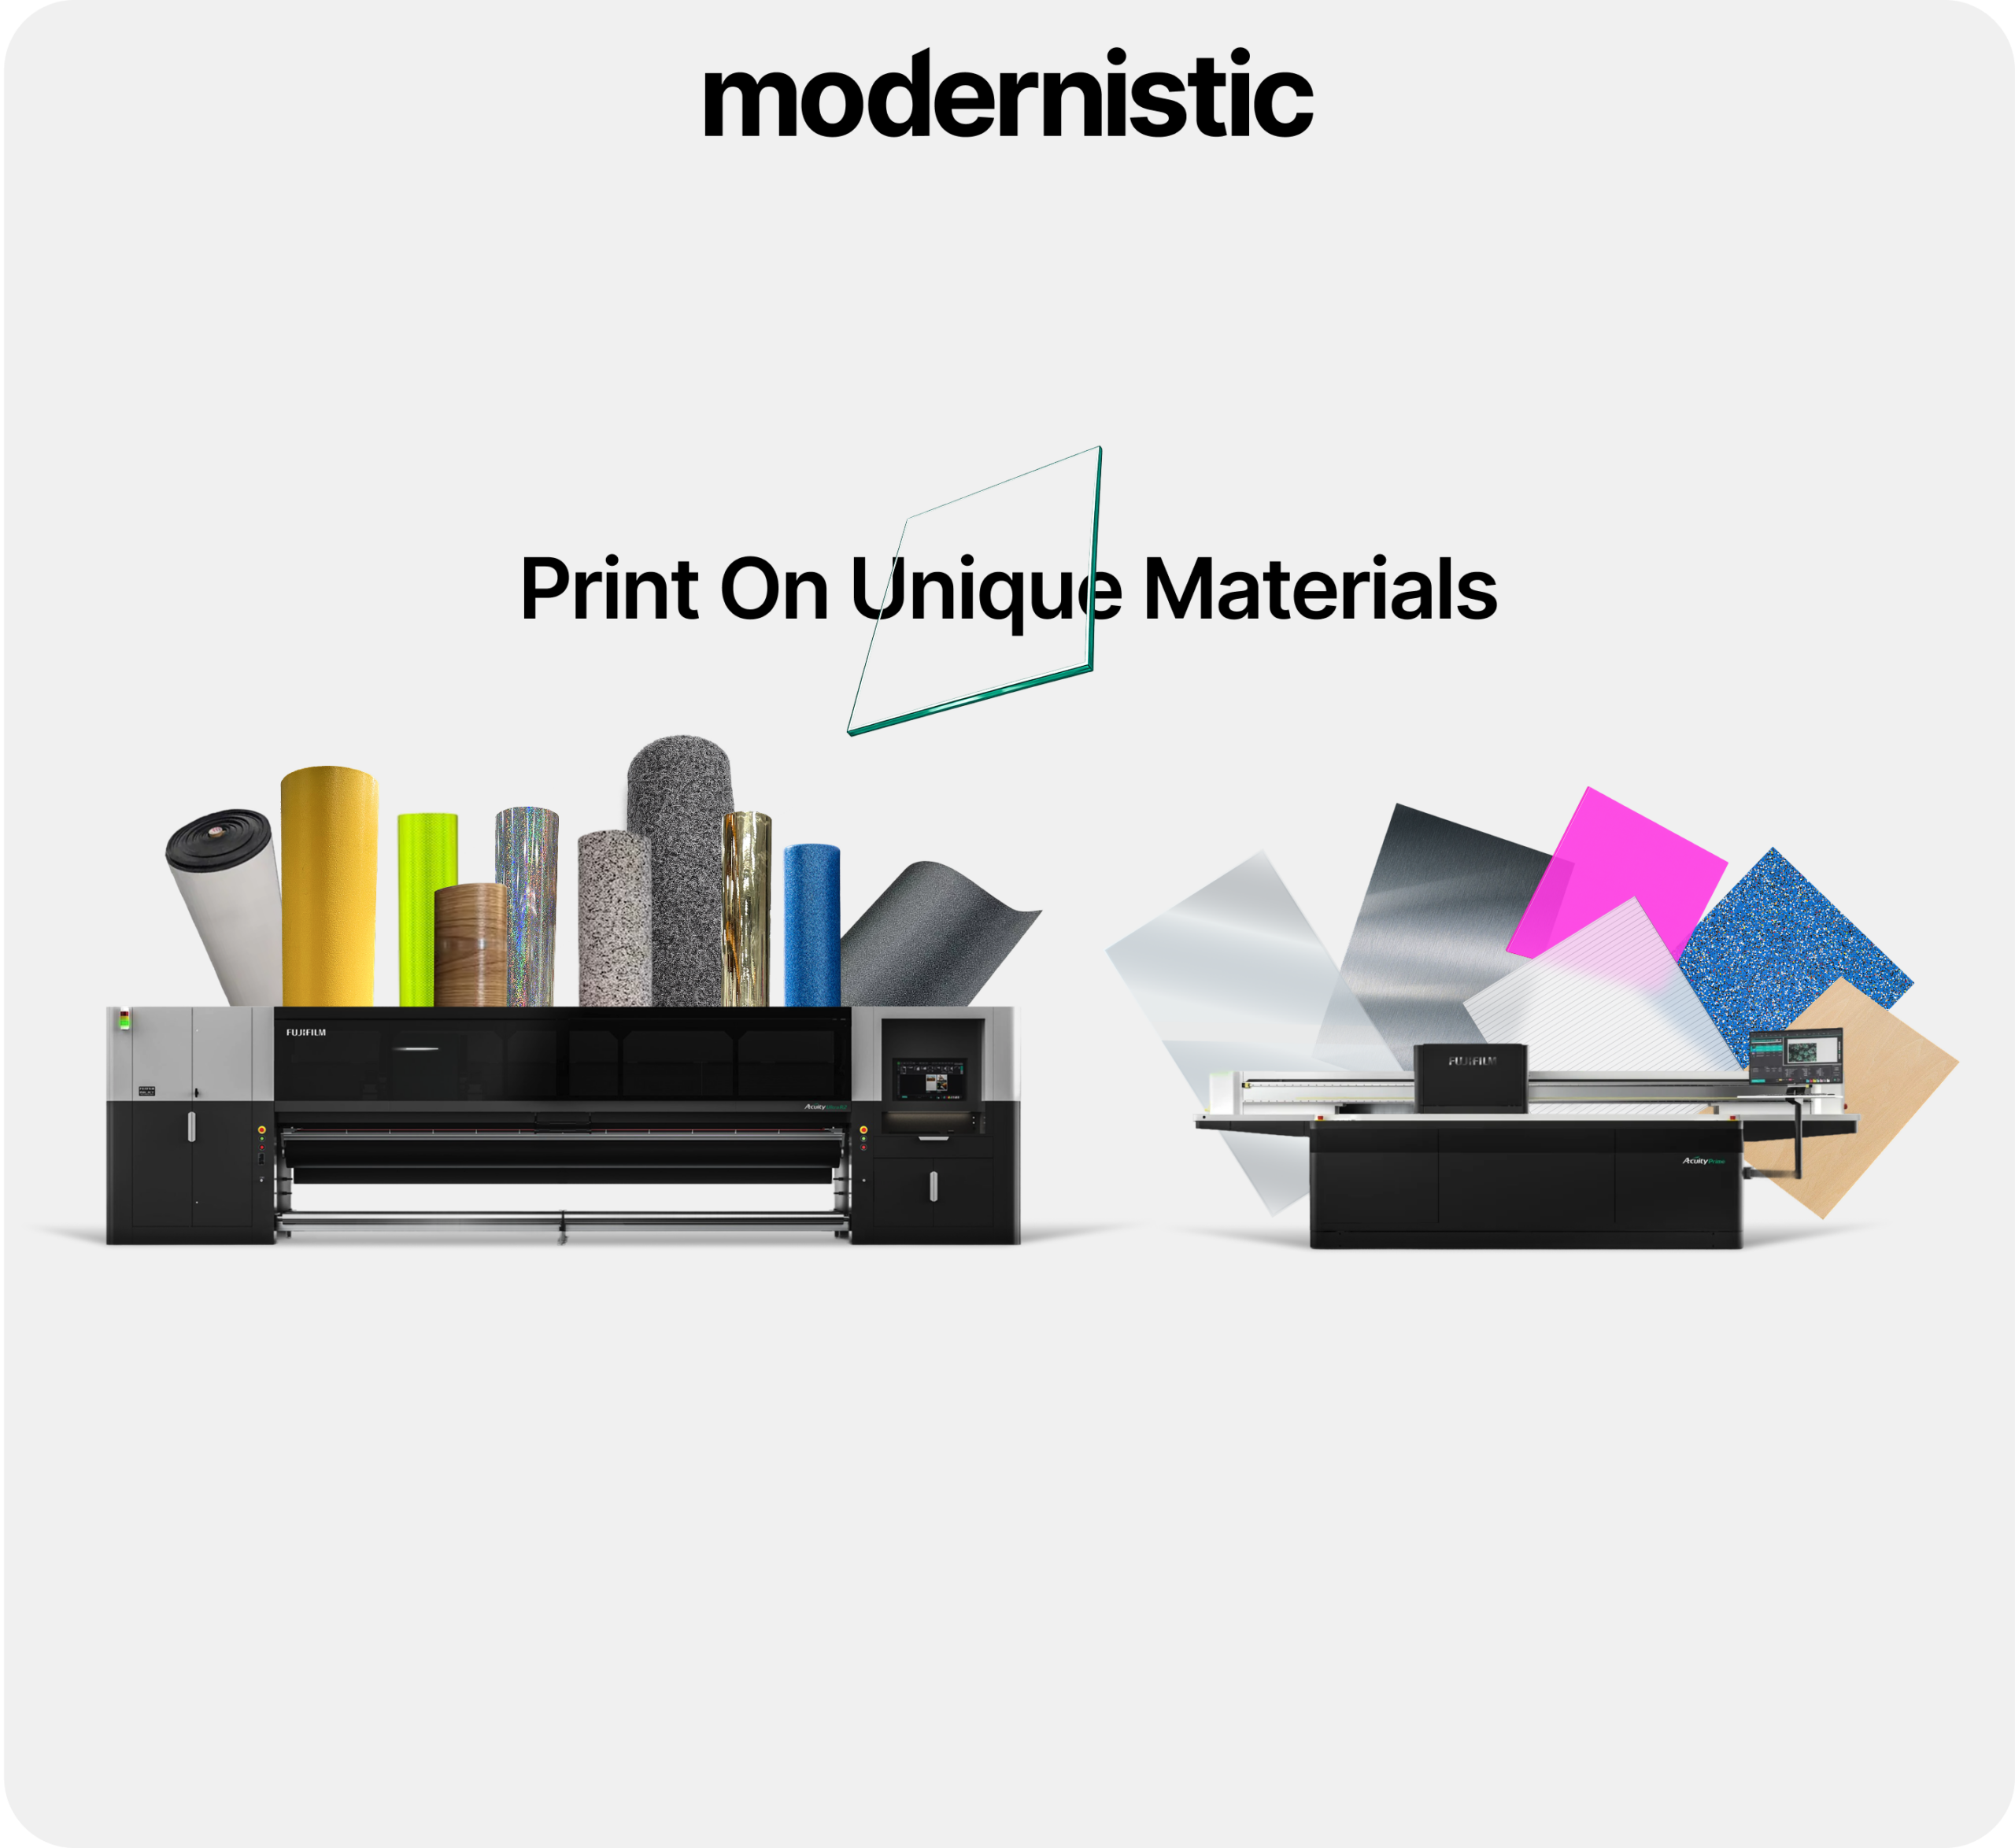
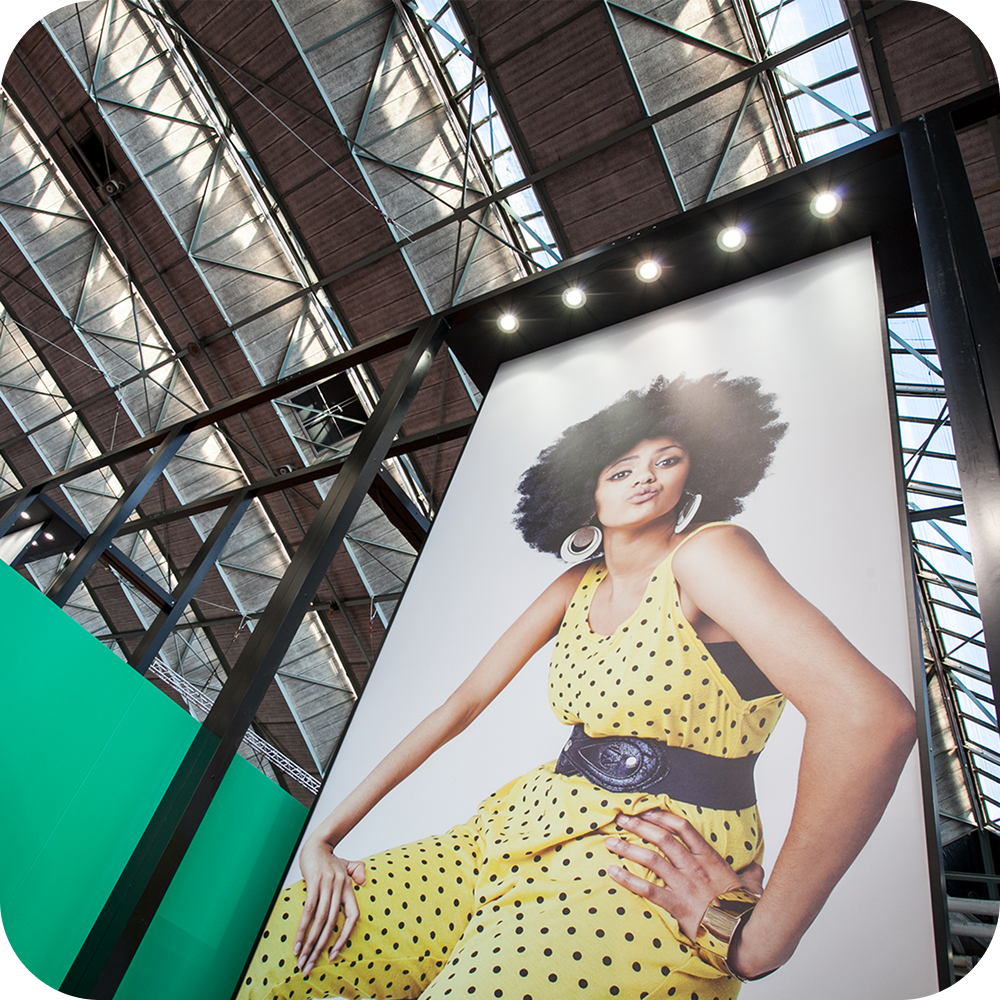
The Acuity Prime 30 is a precision flatbed built for rigid materials, delivering exceptional detail, smooth gradients, and consistent quality across every sheet—ideal for retail and display work.
Specs: Fuji Acuity Prime 30
A 50″ x 100″ UV flatbed delivering up to ~3,000+ sq ft/hr, with high-resolution output, white/clear/primer ink options, and precise registration—ideal for rigid substrates and low surface energy materials like non-DA acrylic and glass, while pairing seamlessly with screen printing workflows.
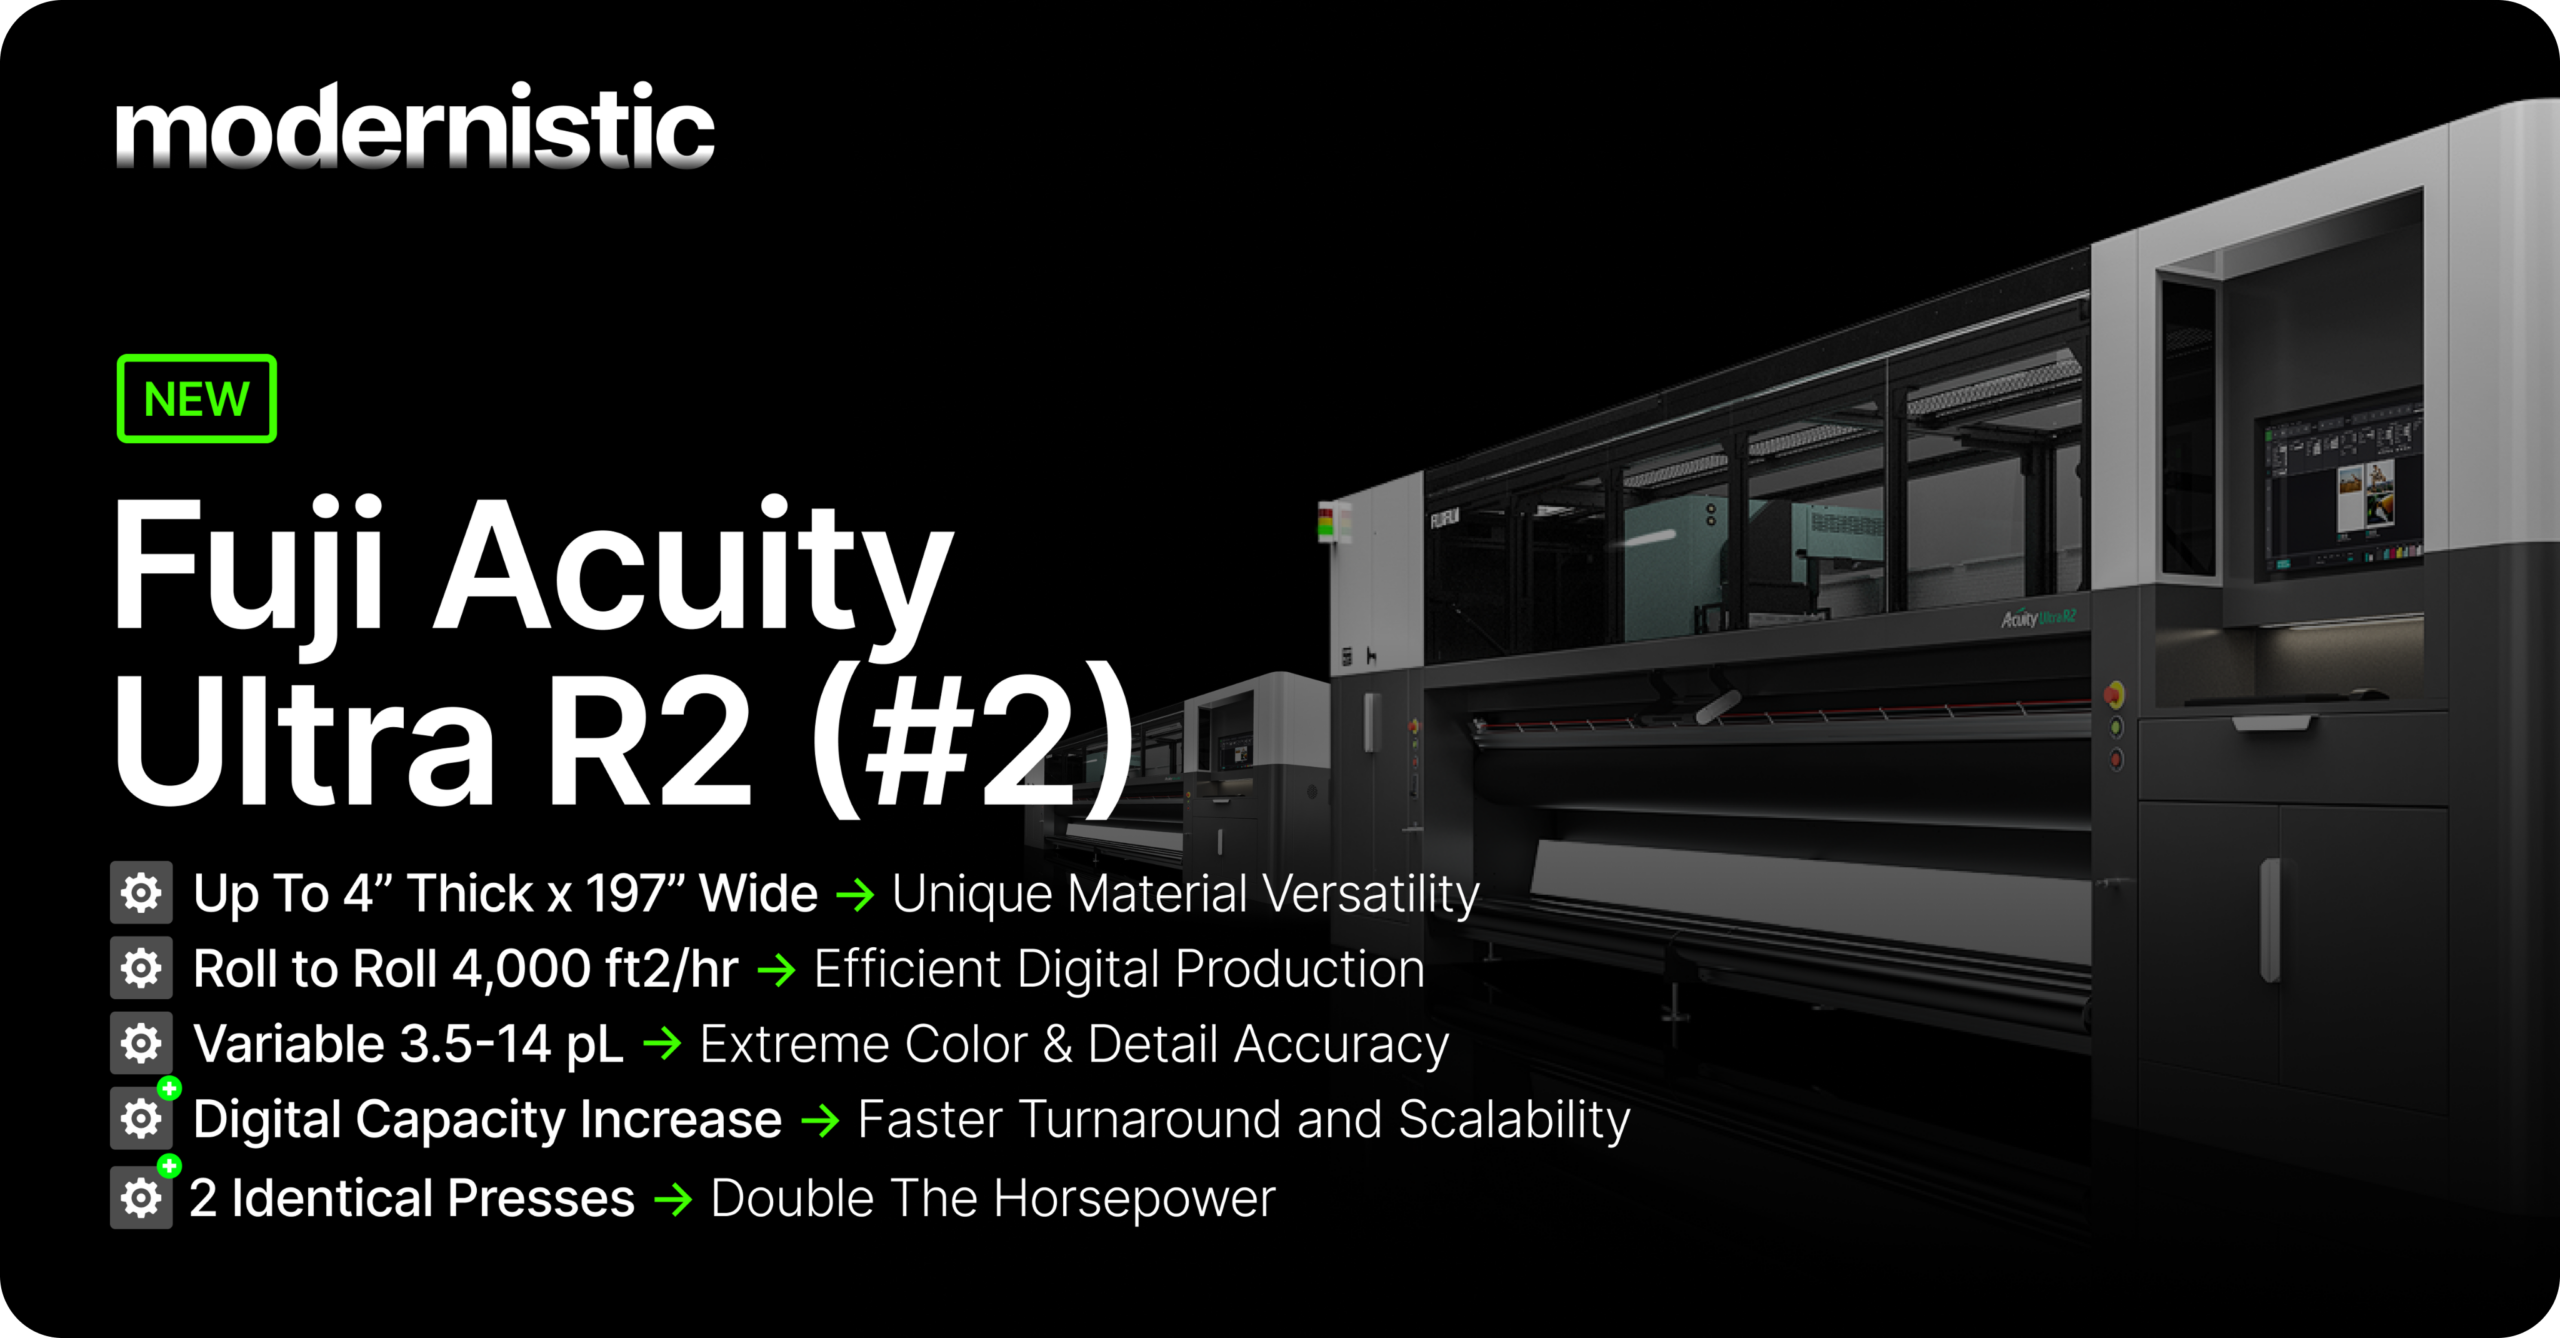
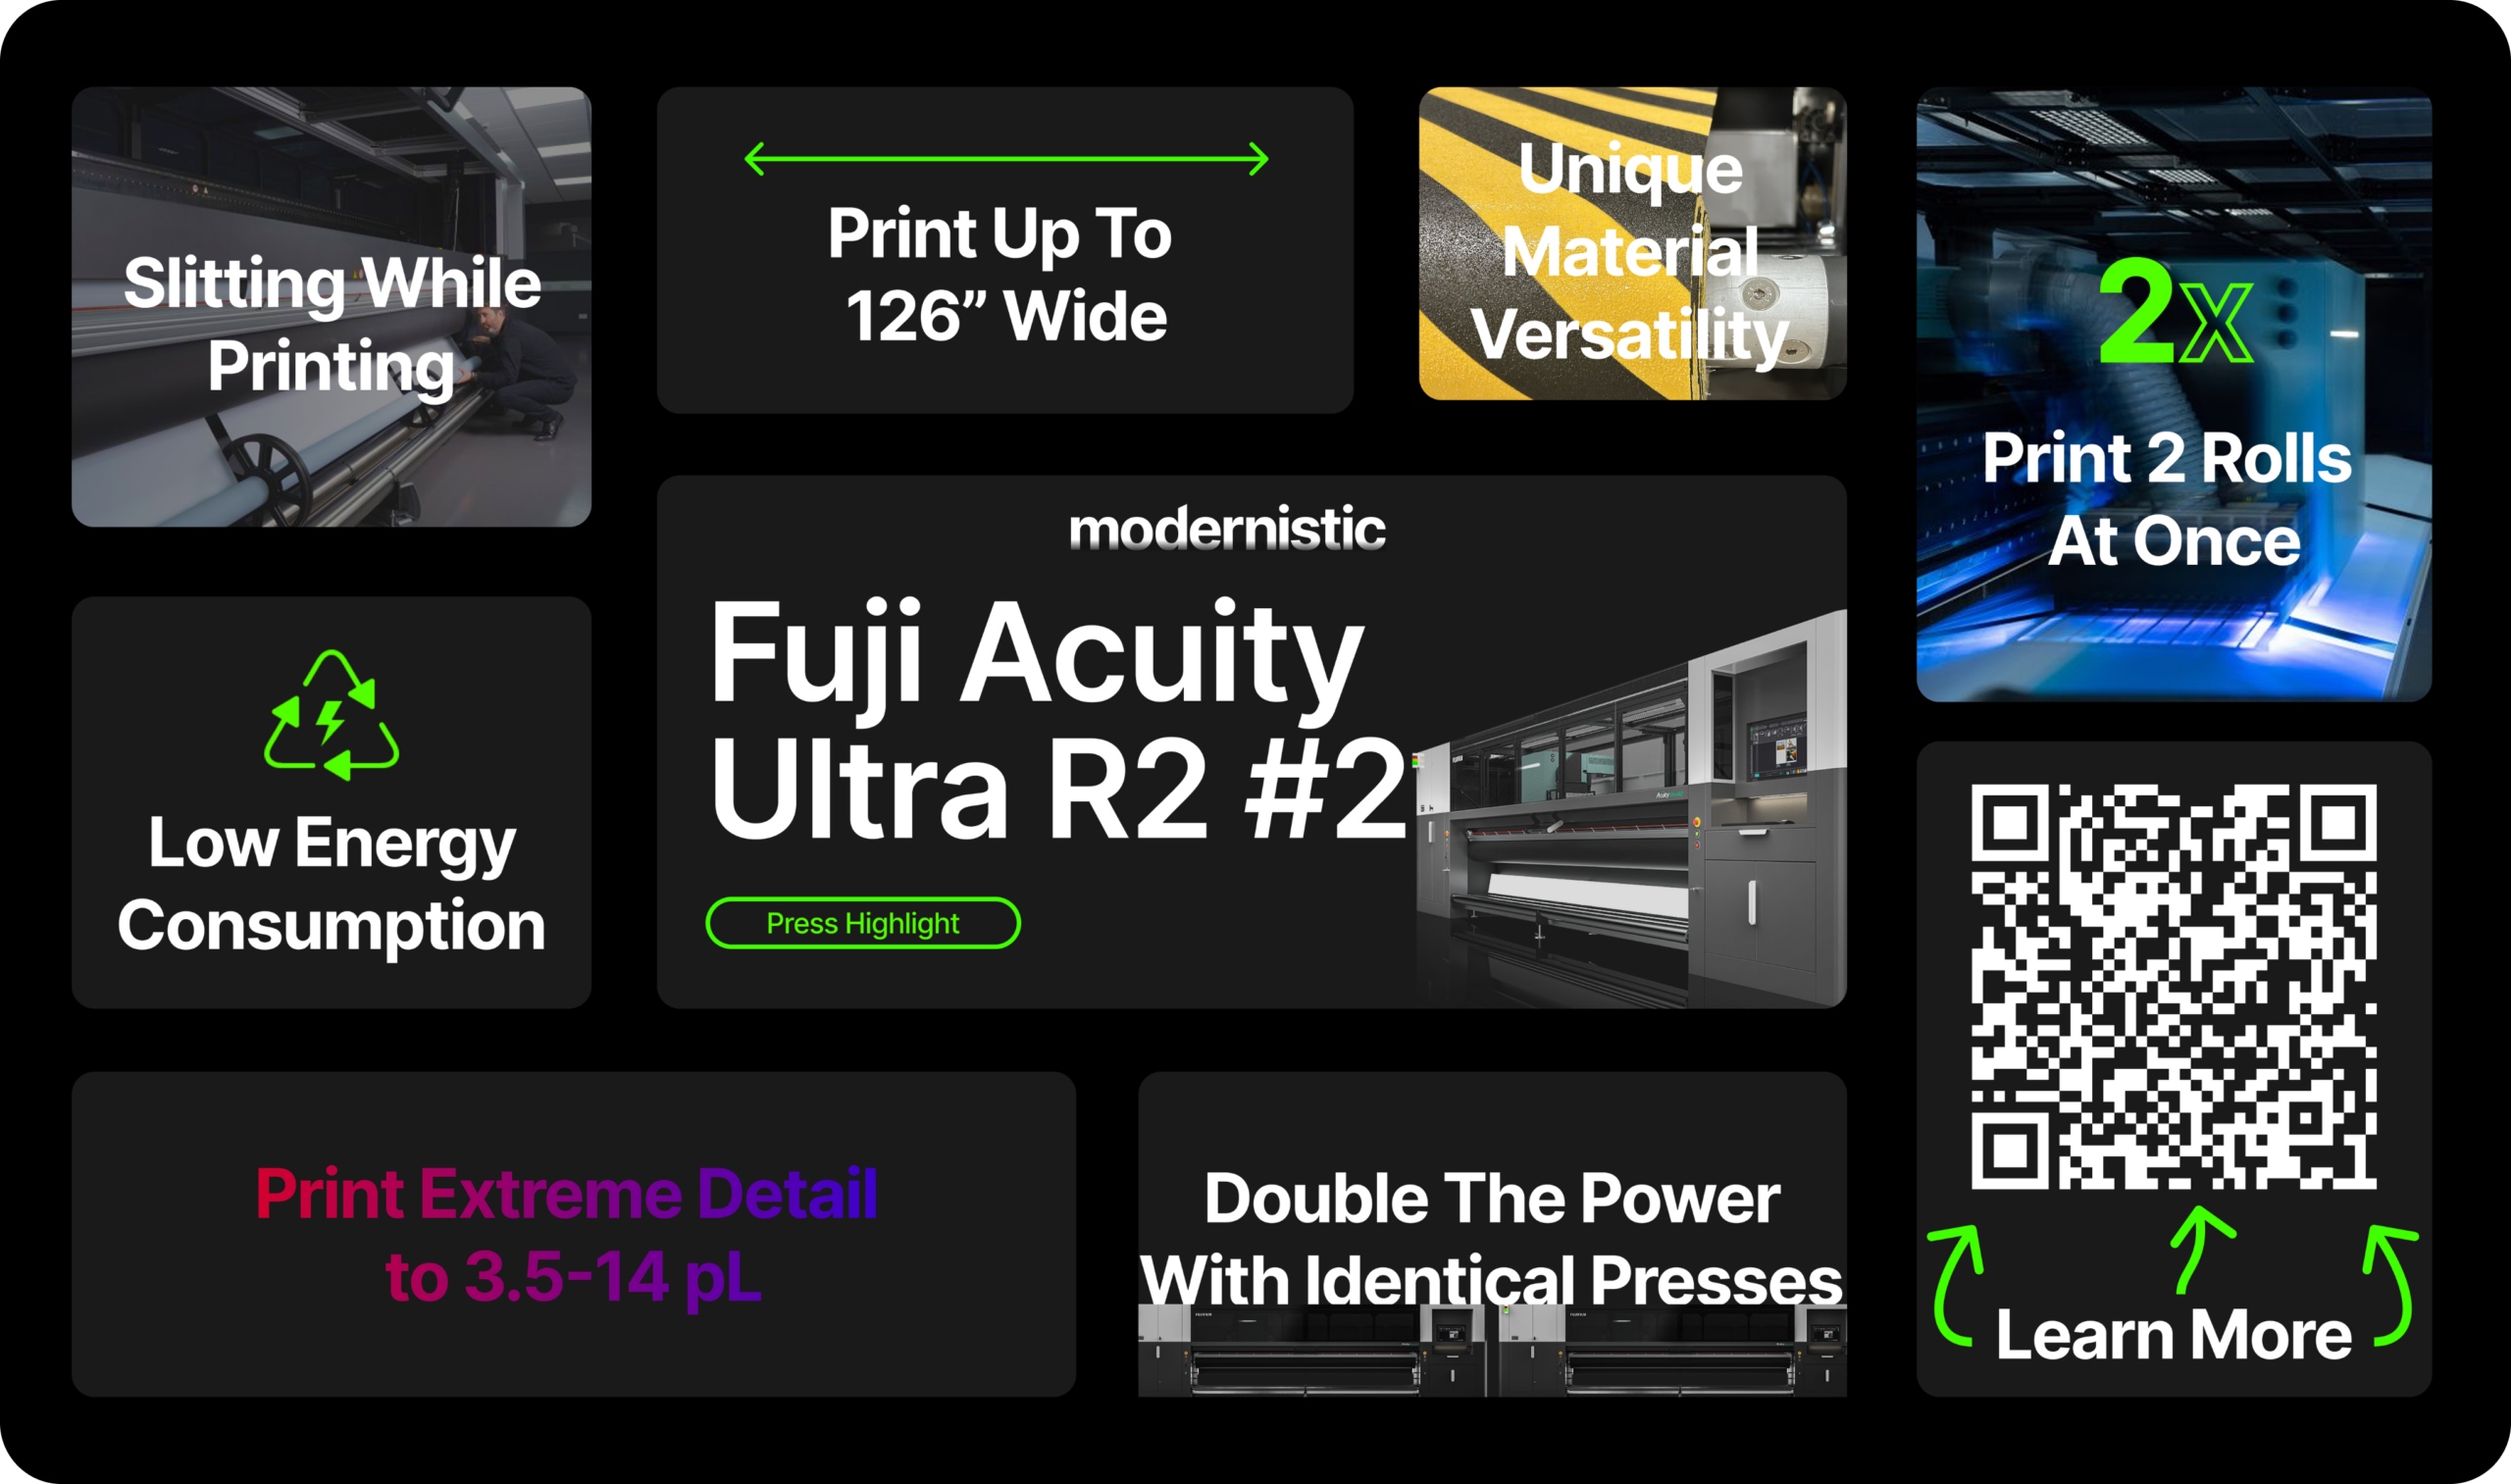
Key Highlights: Fuji Acuity Ultra R2 (#2)
Designed for true industrial throughput, the Ultra R2 delivers ultra-wide production with consistent color, unique substrate versatility, and uptime you can count on. It’s built for high-volume projects where speed and reliability are non-negotiable. Oh, and did I mention, we have 2 of them?!
Specs: Fuji Acuity Ultra R2 (#2)
A grand format roll-to-roll UV press (up to ~5 meters / 197”) capable of 4,000+ sq ft/hr, with high-resolution output (up to ~1200 dpi) and multi-channel ink configurations for scalable, high-volume production. Learn more about this press with our in-depth dive into our first one: 8 features you’ll benefit from our new Fuji Acuity
Overview: Press Redundancy
Press redundancy isn’t flashy, but it’s everything when it matters. If you’ve ever had a press go down in the middle of a complex project and there is no equivalent backup, you know how quickly timelines can slip – days, even weeks. That’s why investments like this are critical. It’s not just more capacity of state-of-the-art equipment—it’s reliability, stability, and confidence when deadlines are tight.
This is just one of many reasons it’s important to work with a partner that has backups on backups. If you’re dealing with crucial turnaround times that must be met, we have the solution.
Overview: Spot Colors
Have your graphics ever looked fuzzy or gradients turn into steps?
That’s where detail separates the best from the rest: spot colors, fine text, gradients, clean edges. We don’t guess, we match. These new presses only strengthen what our pre-press and award-winning color lab already does best.
If you caught the press specs, you probably noticed a trend: unique materials are welcome. These presses are a continuation of that offering—spec’d by our team for their versatility, so we can match the process to the project instead of forcing a one-size-fits-all approach.
From non-DA acrylic to glass, sandpaper, and even 4” thick foam … we’re built to handle the stuff most printers avoid.
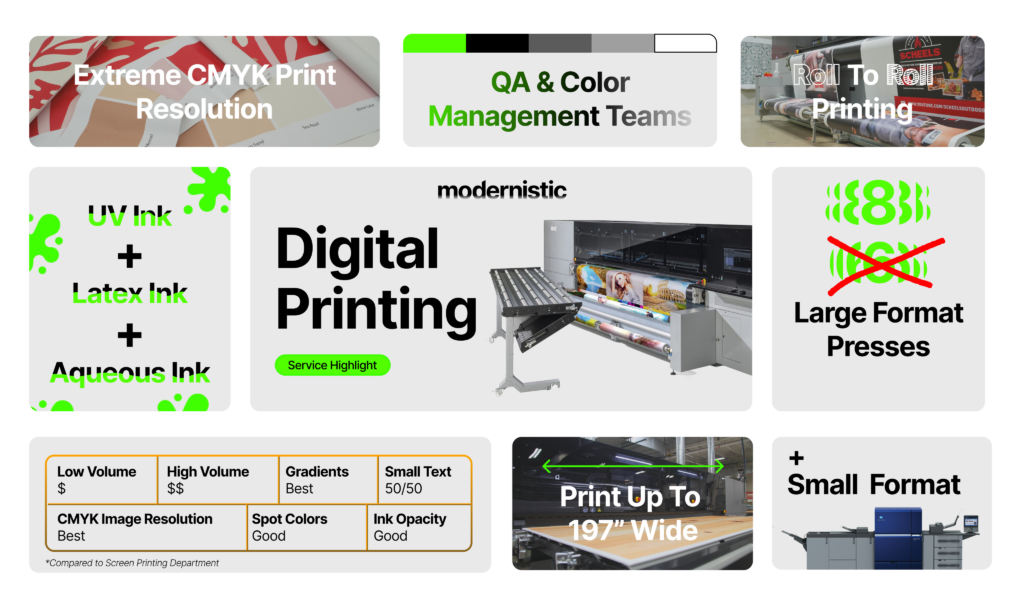
New presses are just the start. This is how it all connects. Not all digital printing is created equal; UV, latex, Aqueous, roll-fed, sheet-fed, DPI, speed. Each path has its strengths with color, durability, detail, and cost.
The advantage goes further than just offering all the options in-house … it’s knowing exactly which one to use and when. That’s how we deliver the best results without outsourcing or over-engineering the project. Got a project that needs dialing in? Send us the specs at info@modprint.com for a free quote/consultation or stay tuned for next month’s knowledge drop to learn more!
On the other hand, if you can’t wait or are ready to see these presses help you RIGHT NOW – click here, and we’ll talk today!
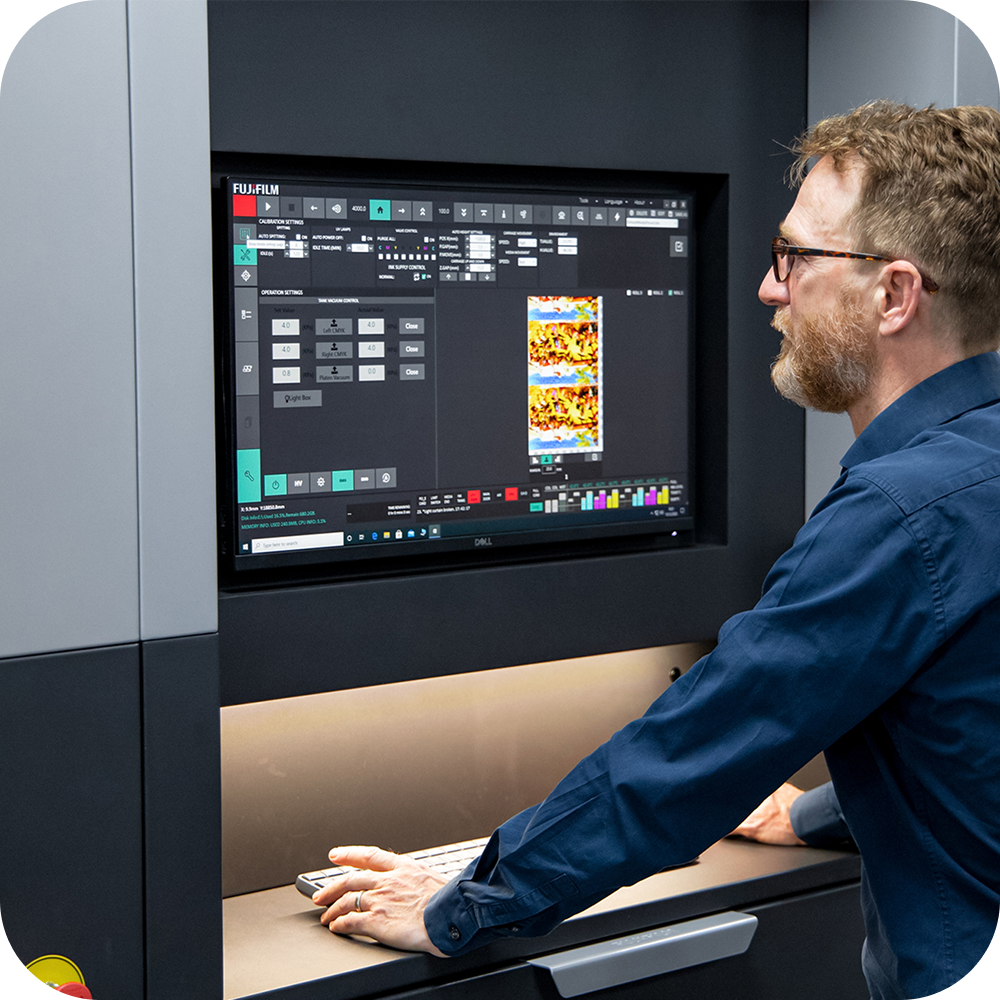
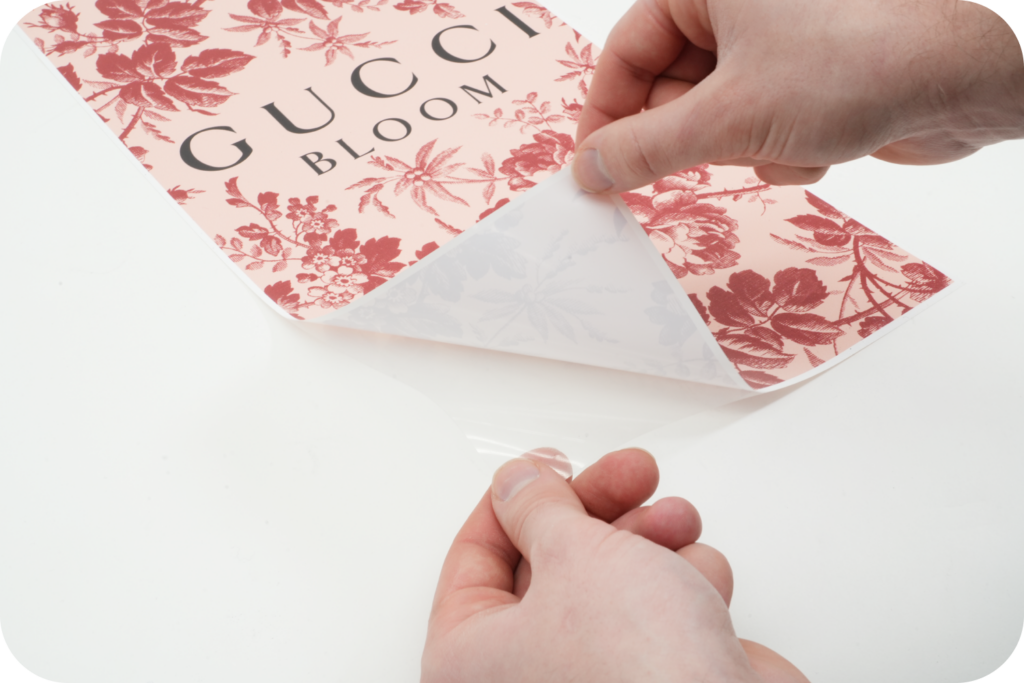
Proofing is a critical step in product development, production, and marketing—yet it’s often overlooked when sourcing a vendor. An outdated or a poor proofing process can lead to missed edits, delayed approvals, costly reprints, and frustrated teams. On the other hand, the right system transforms proofing into a smooth, reliable process that saves time, reduces errors, and improves collaboration.
We are always trying to improve user experience and that is why we continually enhance our platforms, making them faster, more intuitive, and easier for teams and clients to use—so every part of the manufacturing process feels effortless, efficient, and precise. Let’s take a look at one of our user experience platforms: Our proofing system.
Teams report up to 40% increase in workflow efficiency and 38% higher productivity with PageProof compared to traditional proofing methods. – Source: Pageproof Review times can be cut by over 60%, helping projects move faster from draft to approval. – Source: Pageproof 74% of teams report improved accountability and collaboration thanks to centralized proofing platforms. – Source: Adobe Business Studies show proofing tools can reduce project turnaround time significantly by eliminating email chains and enabling faster approvals. – Source: Vocal
Here’s how that translates into real benefits for you…
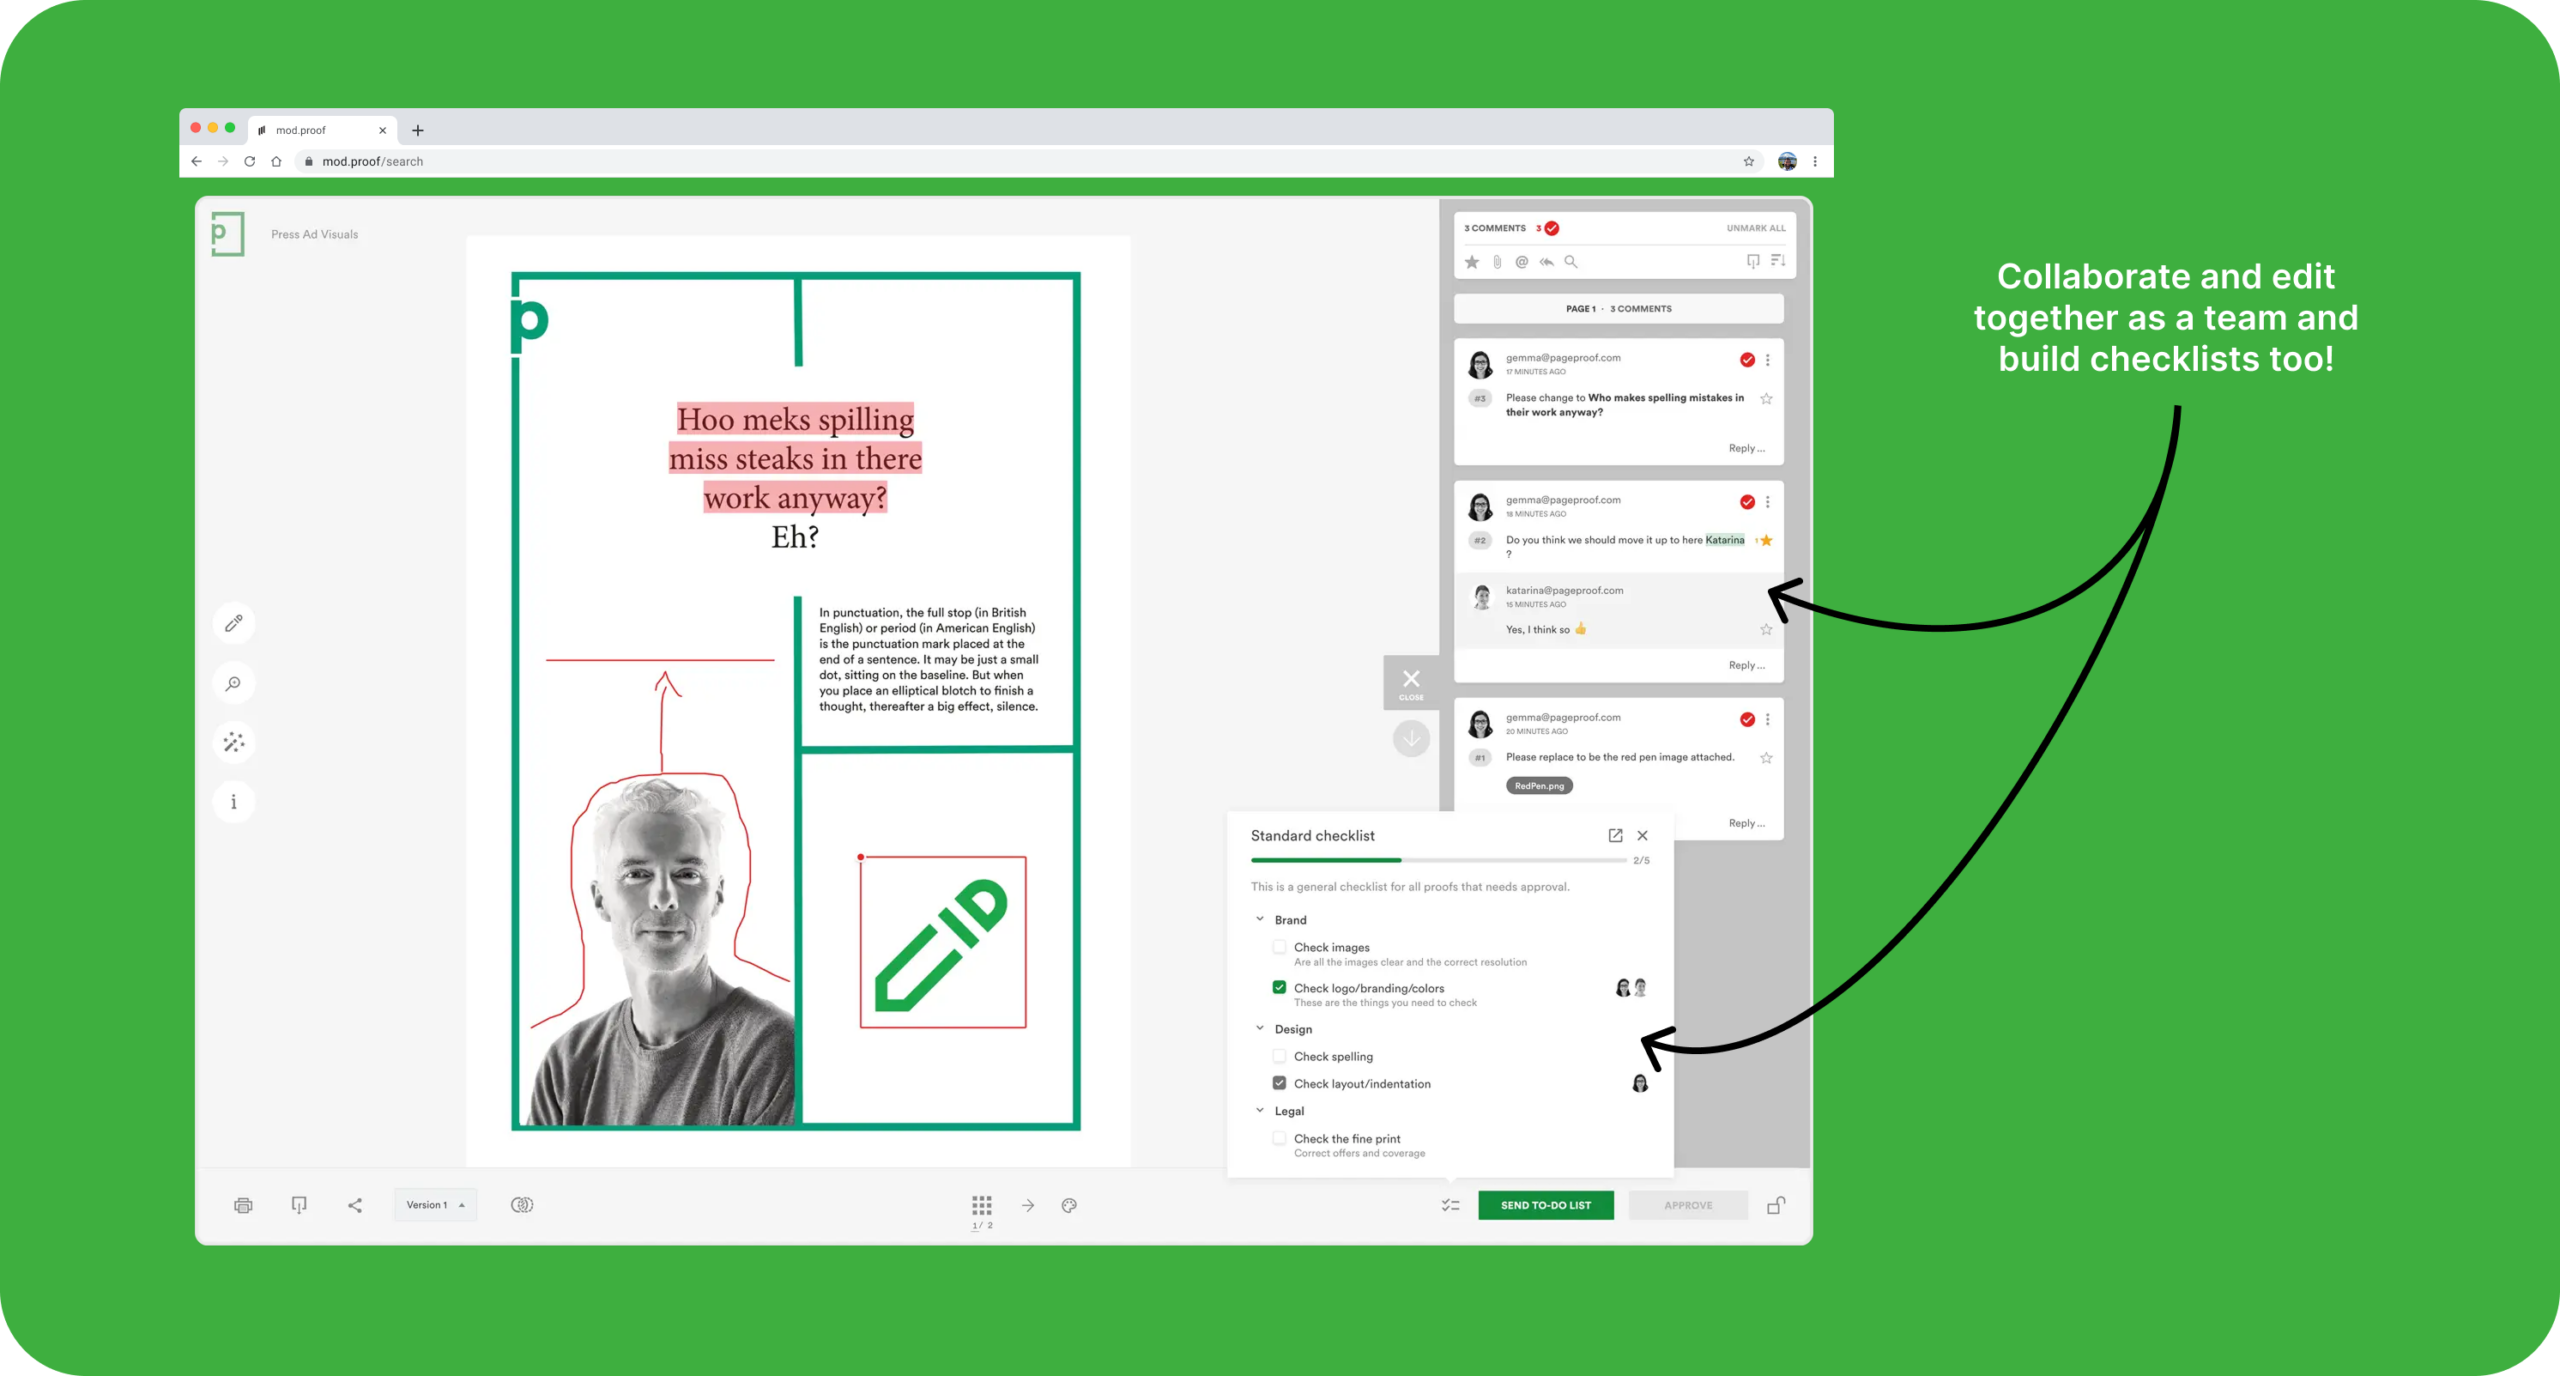
1. Real-Time Collaboration
Multiple reviewers can comment on a proof simultaneously, removing endless email chains and back-and-forth file exchanges. Everyone sees updates instantly, which eliminates miscommunication and speeds up approvals. Real-time collaboration keeps teams aligned and reduces frustration for clients and stakeholders.
2. Centralized Feedback
All comments, annotations, and approvals are stored in one organized location. No more hunting through emails or scattered notes for important feedback. Centralized feedback ensures teams stay on the same page, promotes accountability, and makes it easy to track every change in the project lifecycle.
“Studies show proofing tools can reduce project turnaround time significantly by eliminating email chains and enabling faster approvals.” Source: Vocal
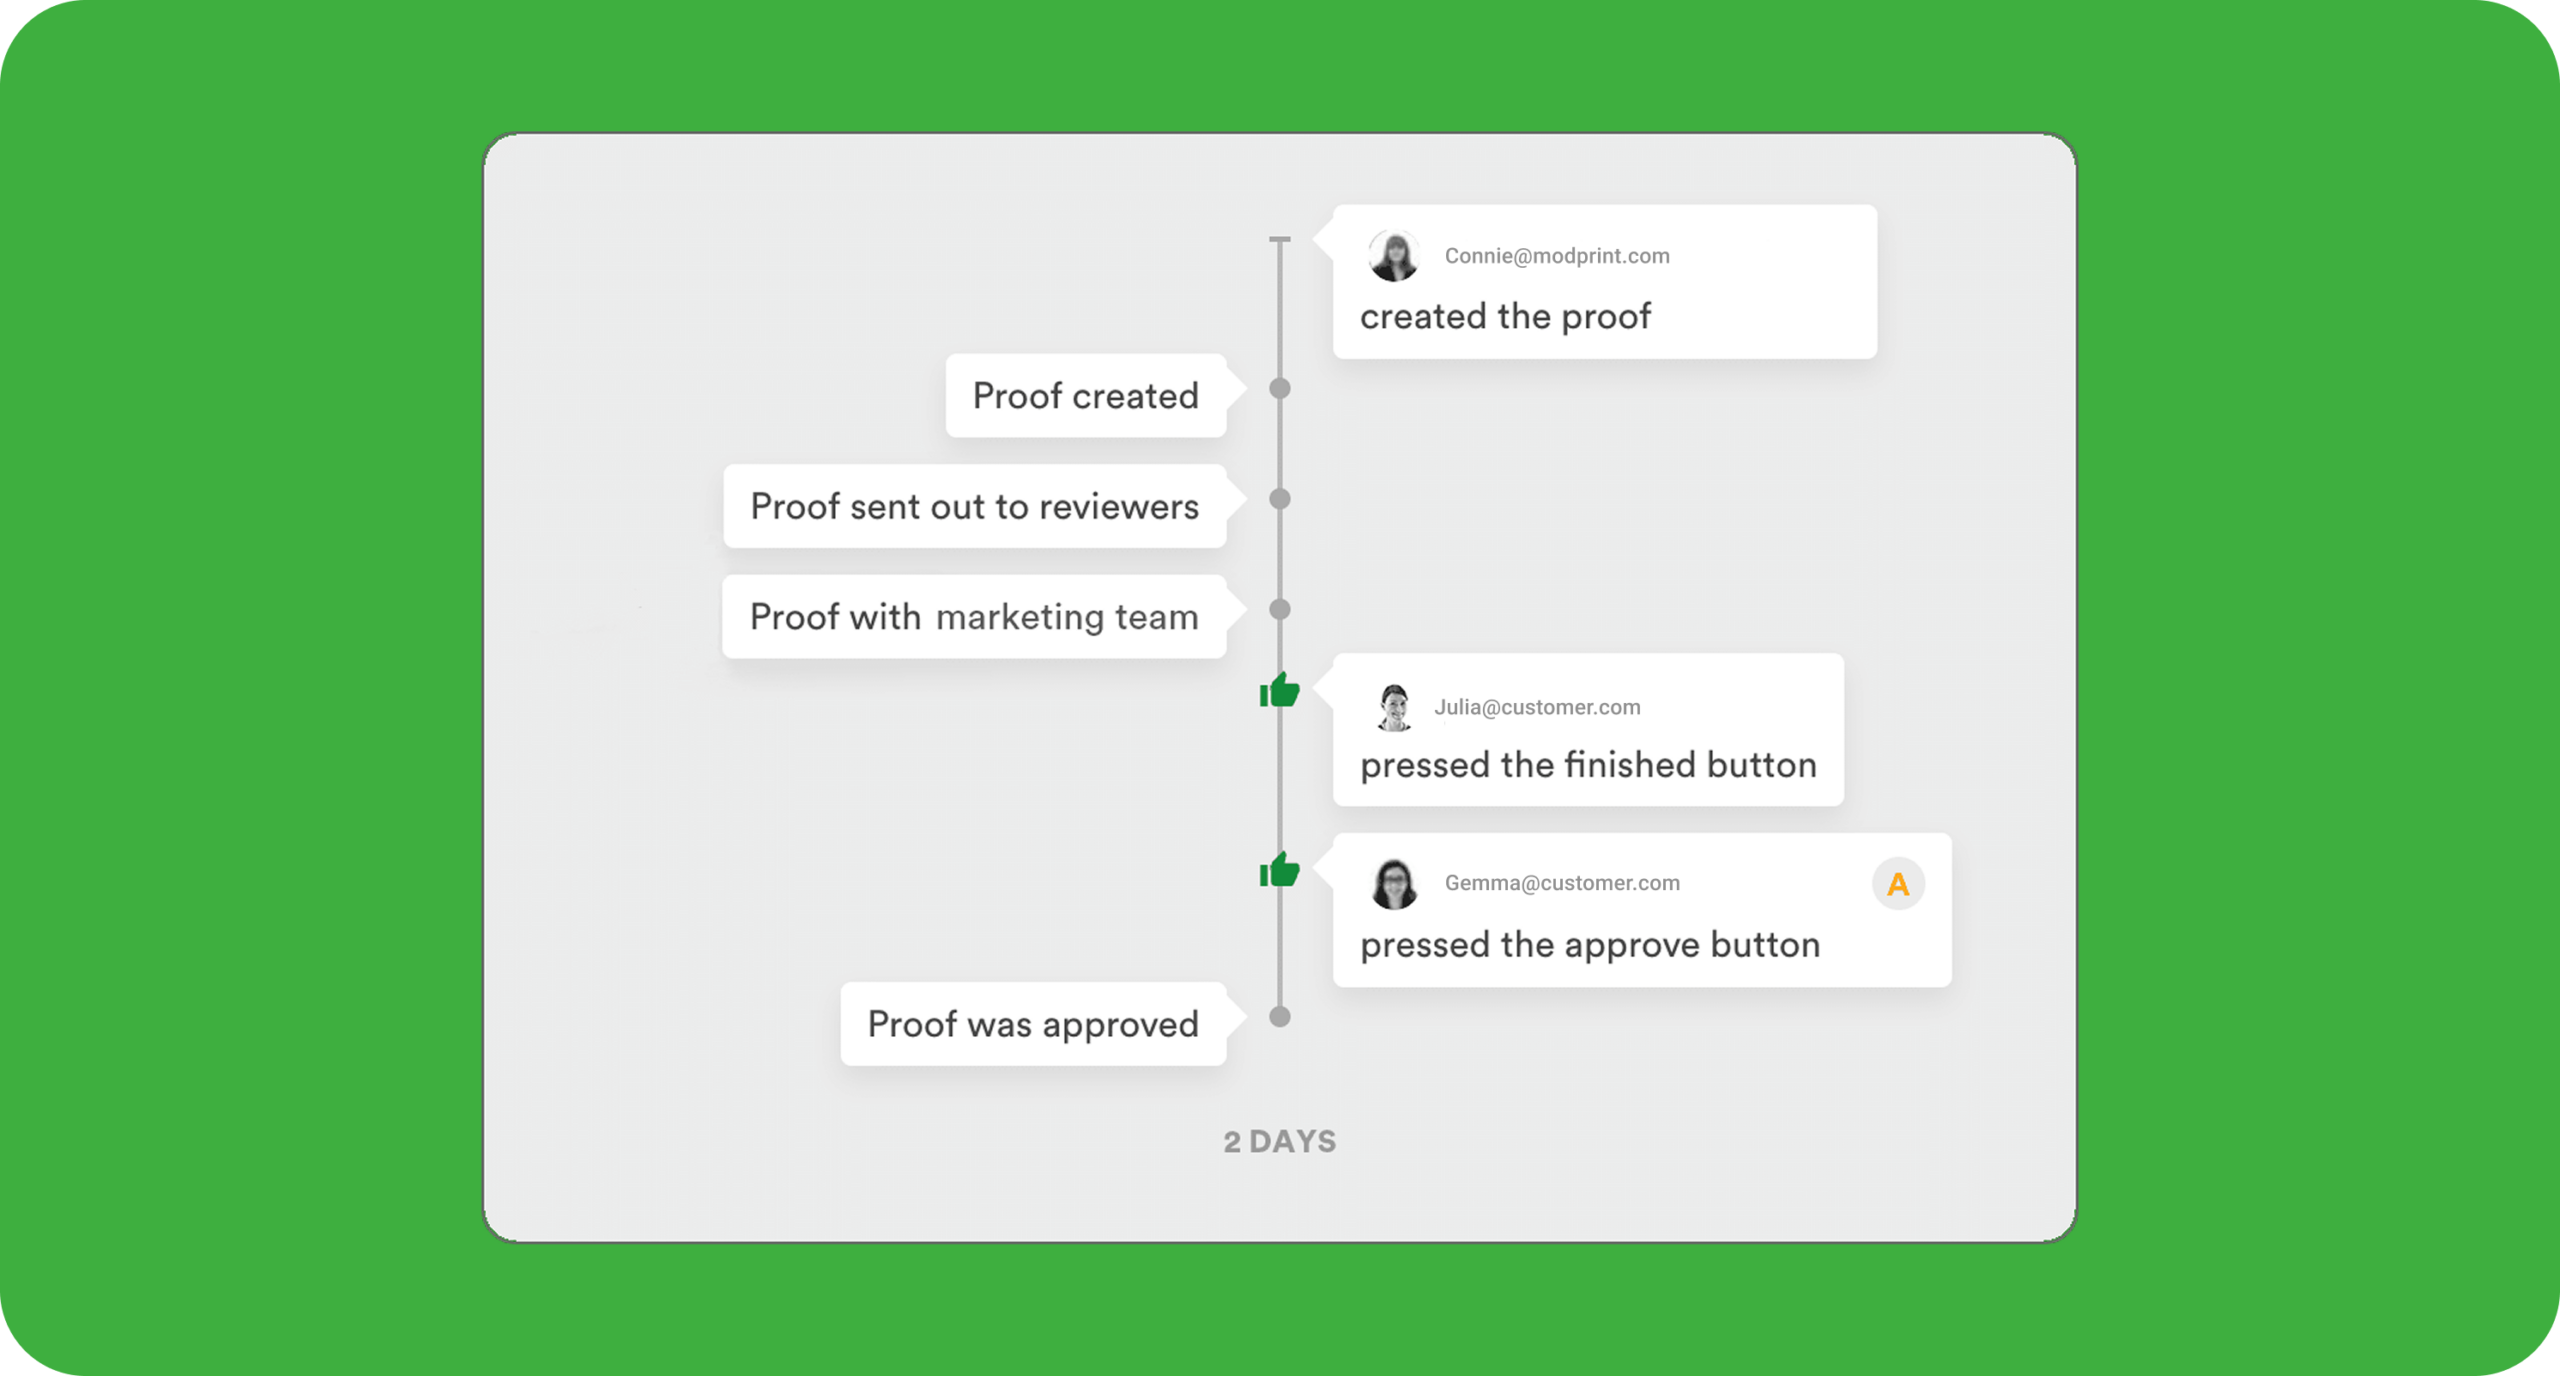
3. Approval Tracking
Track exactly who approved or rejected a proof and when, with a full audit trail. This creates accountability and ensures deadlines are met. Approval tracking also provides clear documentation for compliance or future reference.
“74% of teams report improved accountability and collaboration thanks to centralized proofing platforms.“ Source: Adobe Business
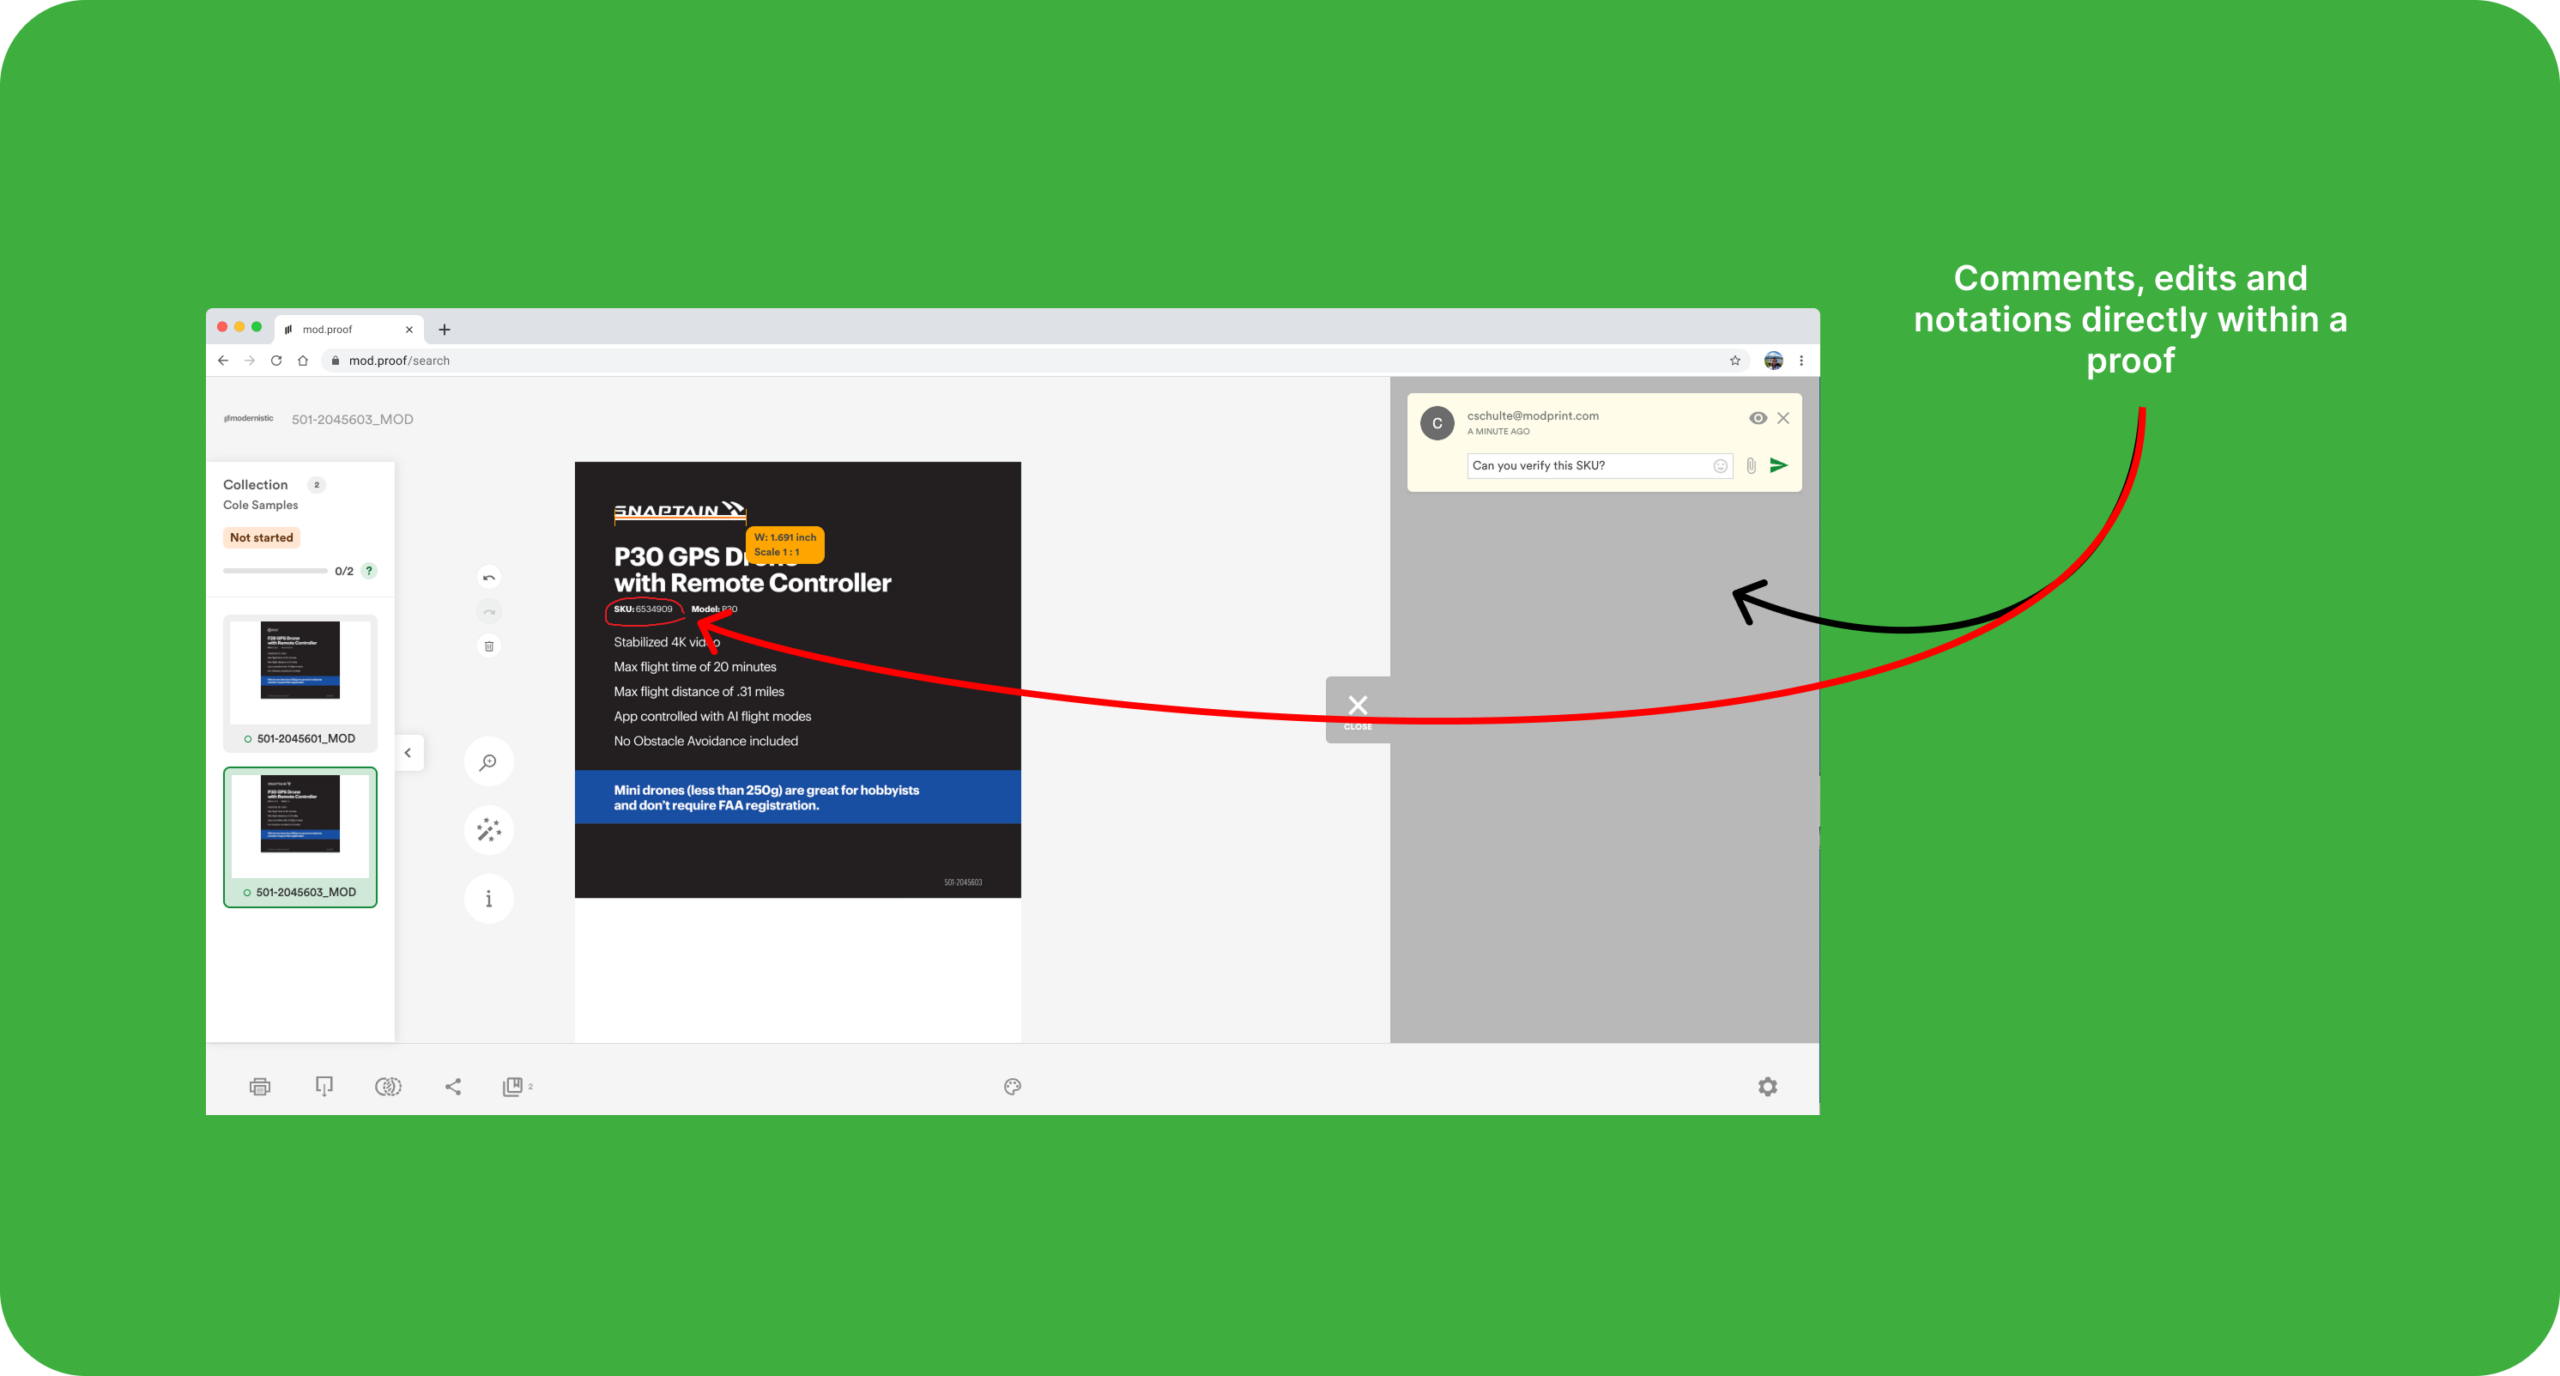
4. Markup & Annotation Tools
Highlight, draw, and comment directly on proofs for precise communication. Designers and editors know exactly what adjustments are needed, eliminating guesswork. Markup tools save time and improve clarity, reducing misinterpretation and repeated edits.
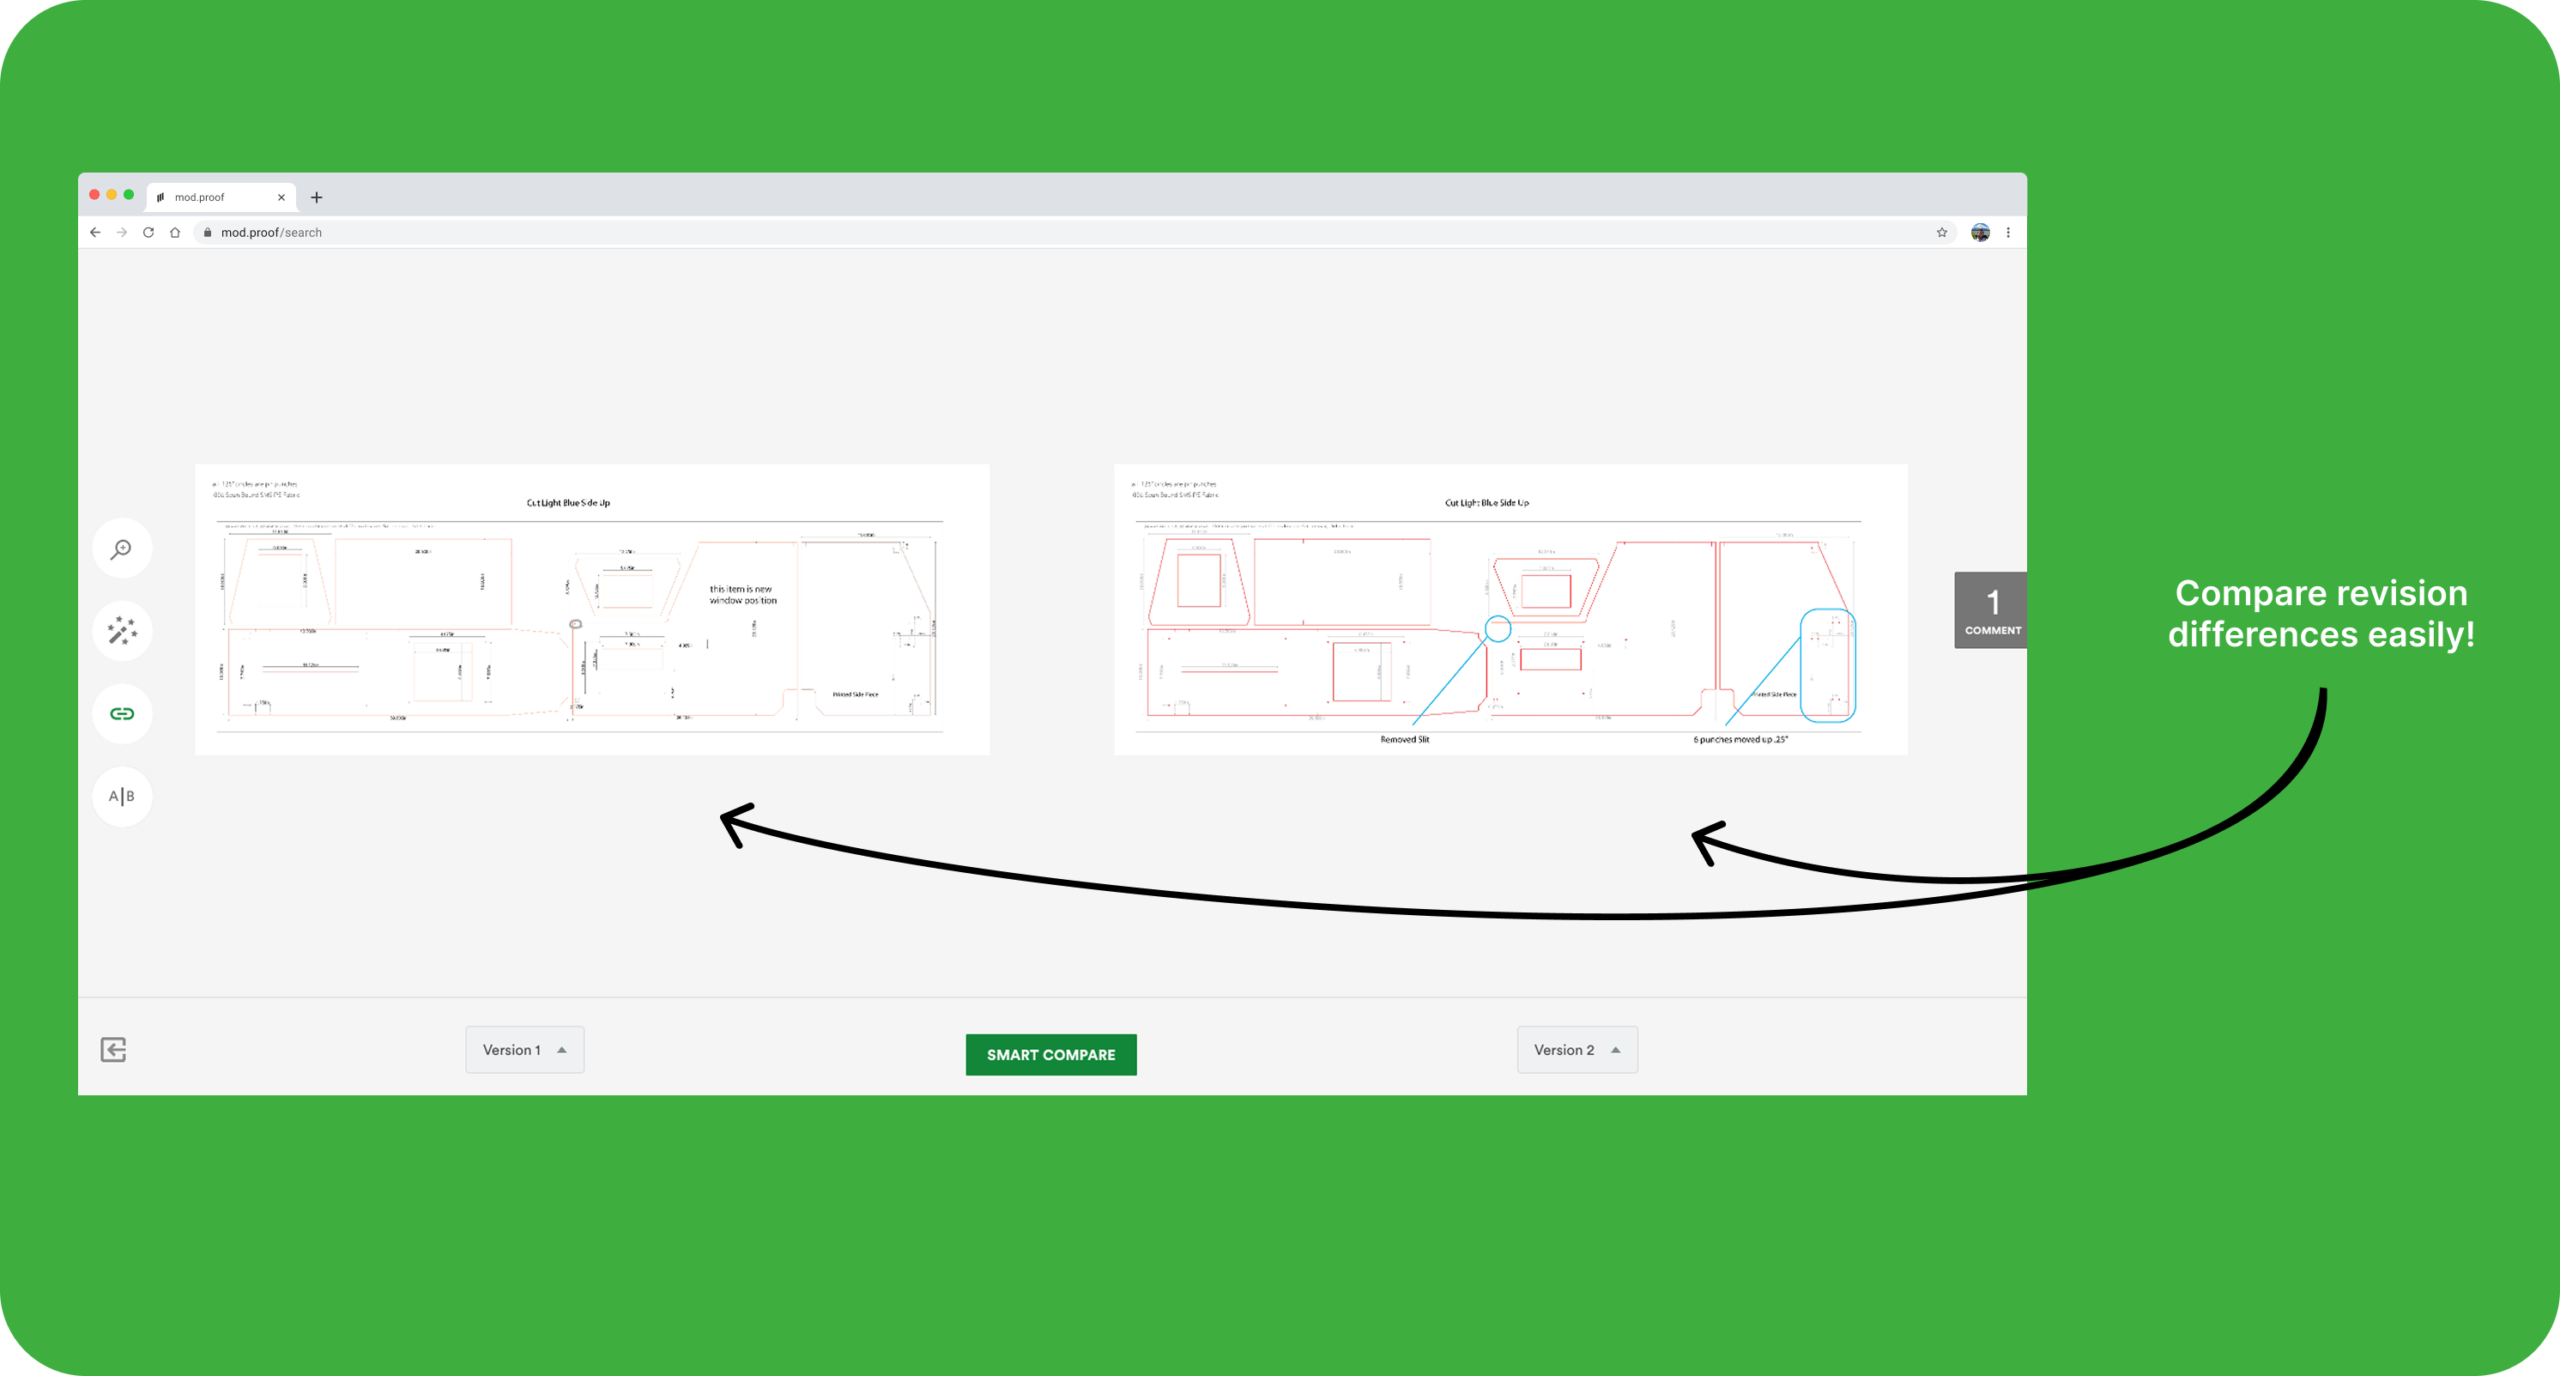
5. Side-by-Side Comparison
Quickly see changes between proof versions to ensure edits were applied correctly. This avoids manually checking differences, which can be time-consuming and error-prone. Side-by-side comparison increases accuracy and speeds up final approvals.
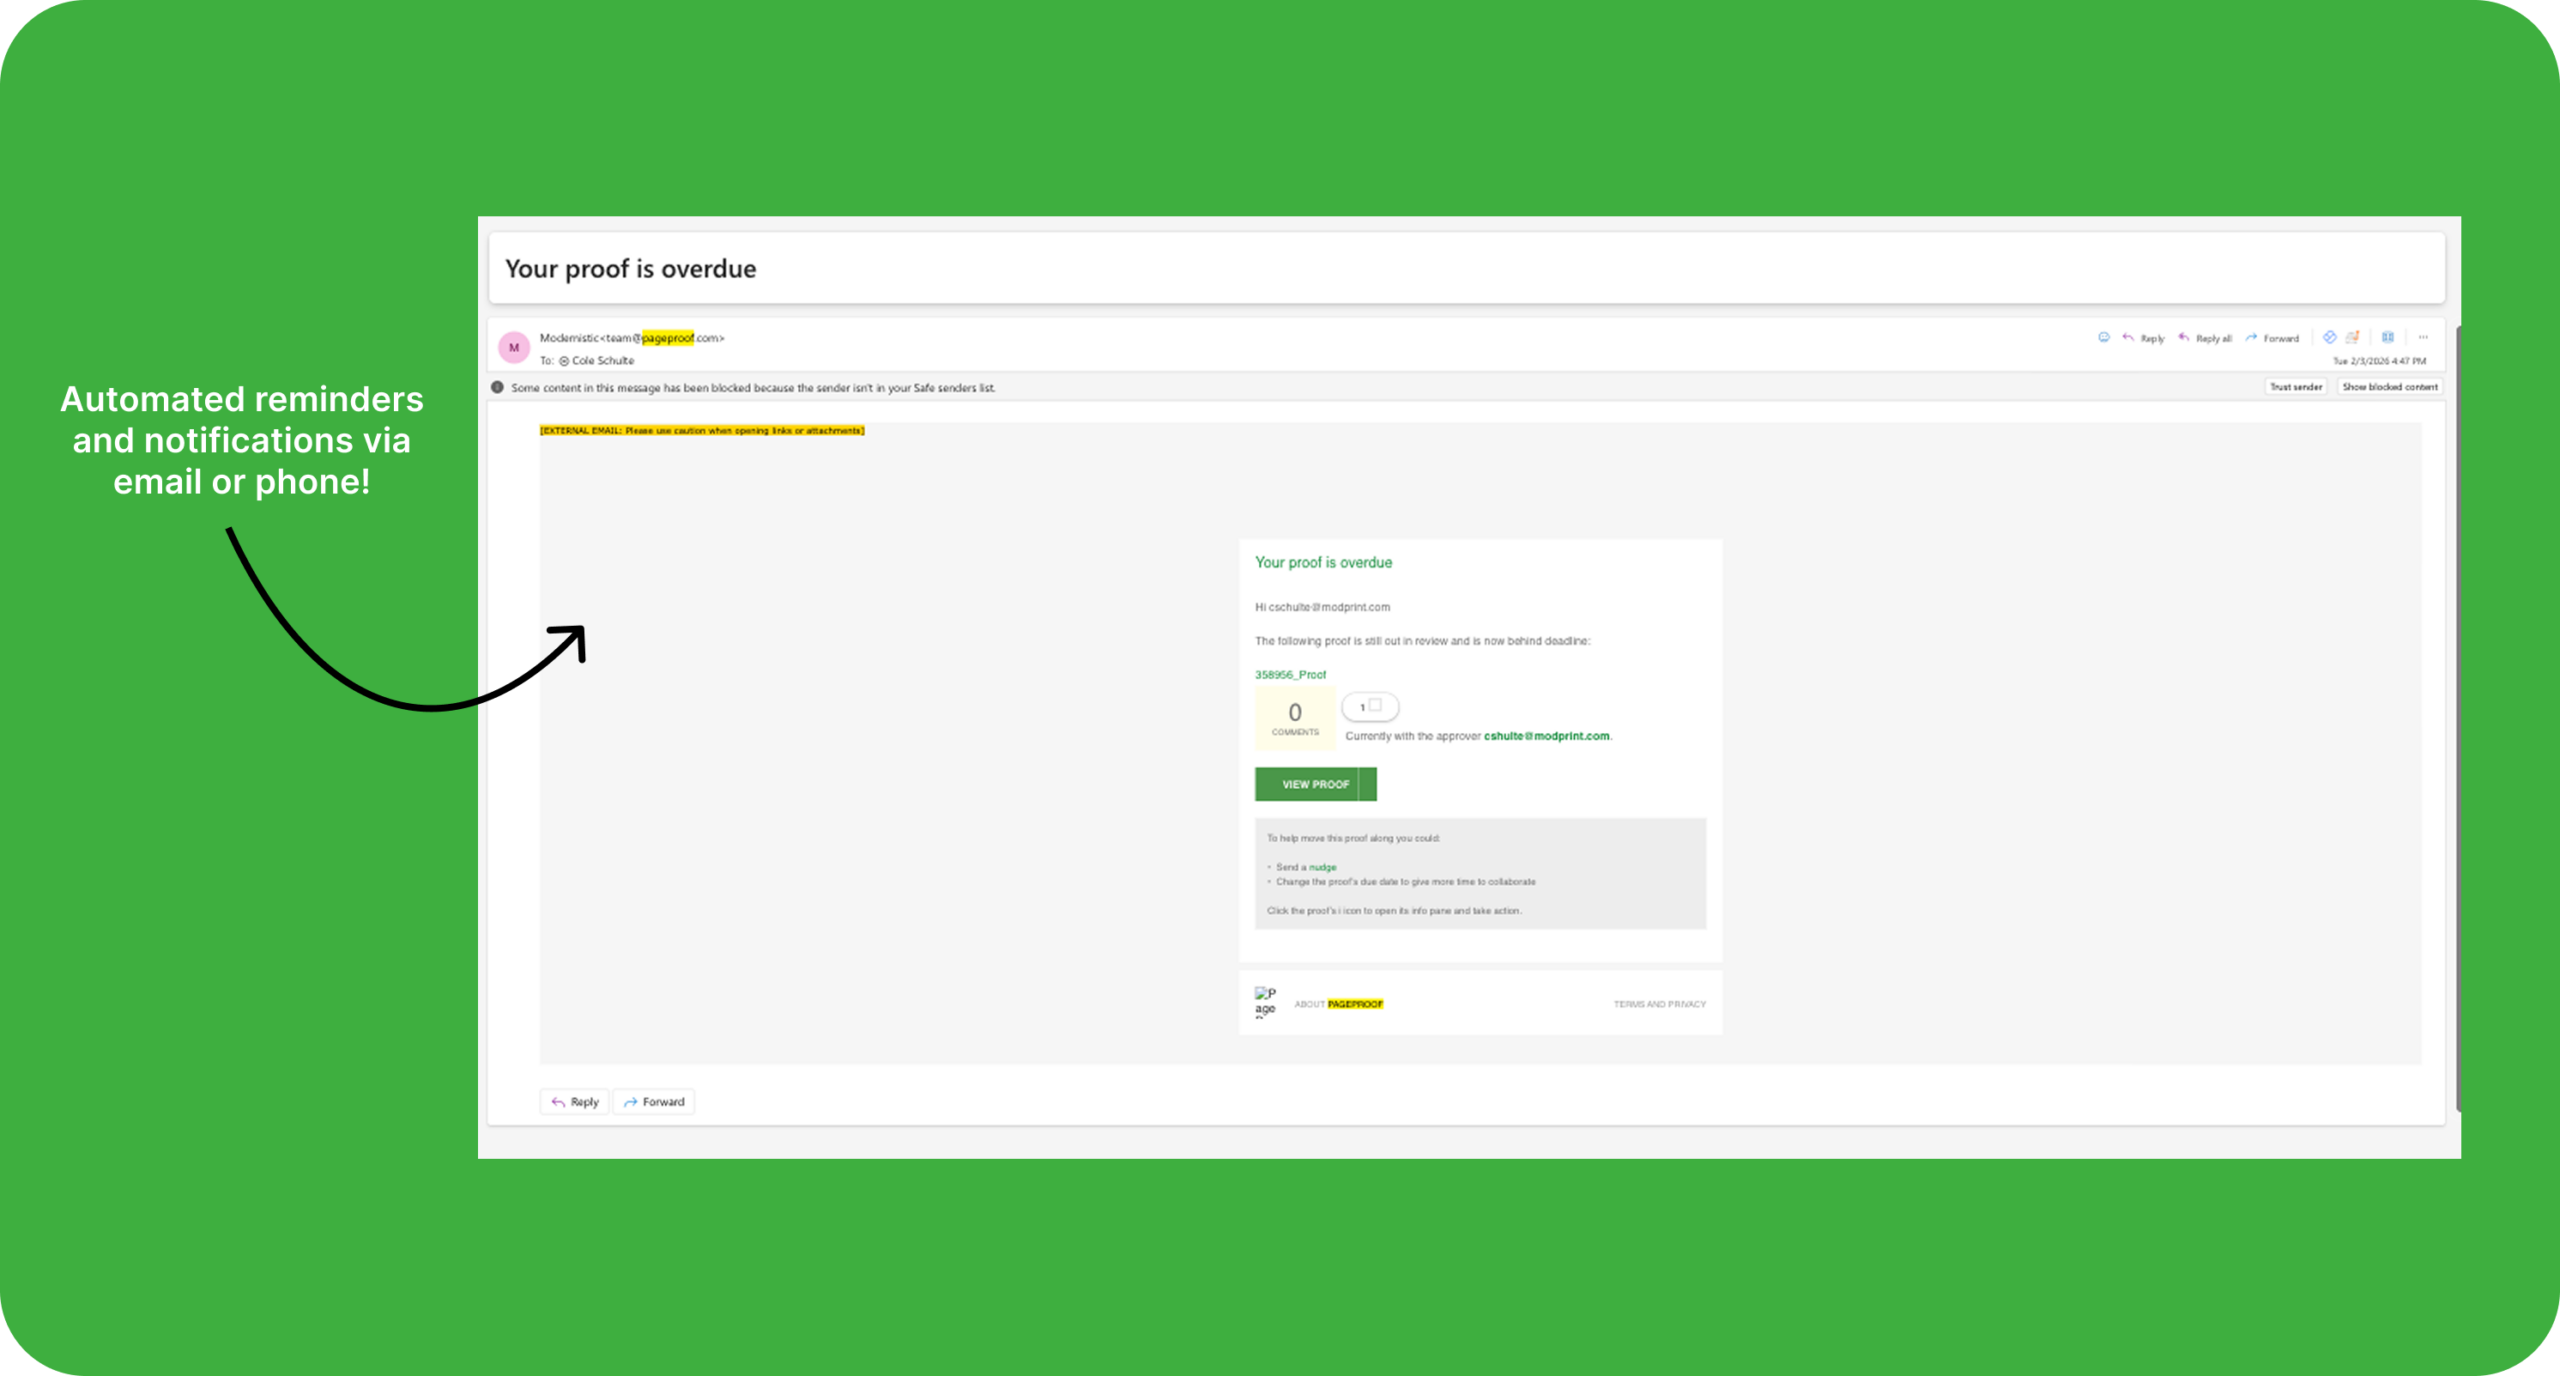
6. Automated Reminders
Set notifications for pending proofs or upcoming deadlines. Automated reminders keep projects on track without micromanagement. This feature reduces delays and ensures a consistent, predictable workflow.
“Review times can be cut by over 60%, helping projects move faster from draft to approval.” Source: Pageproof
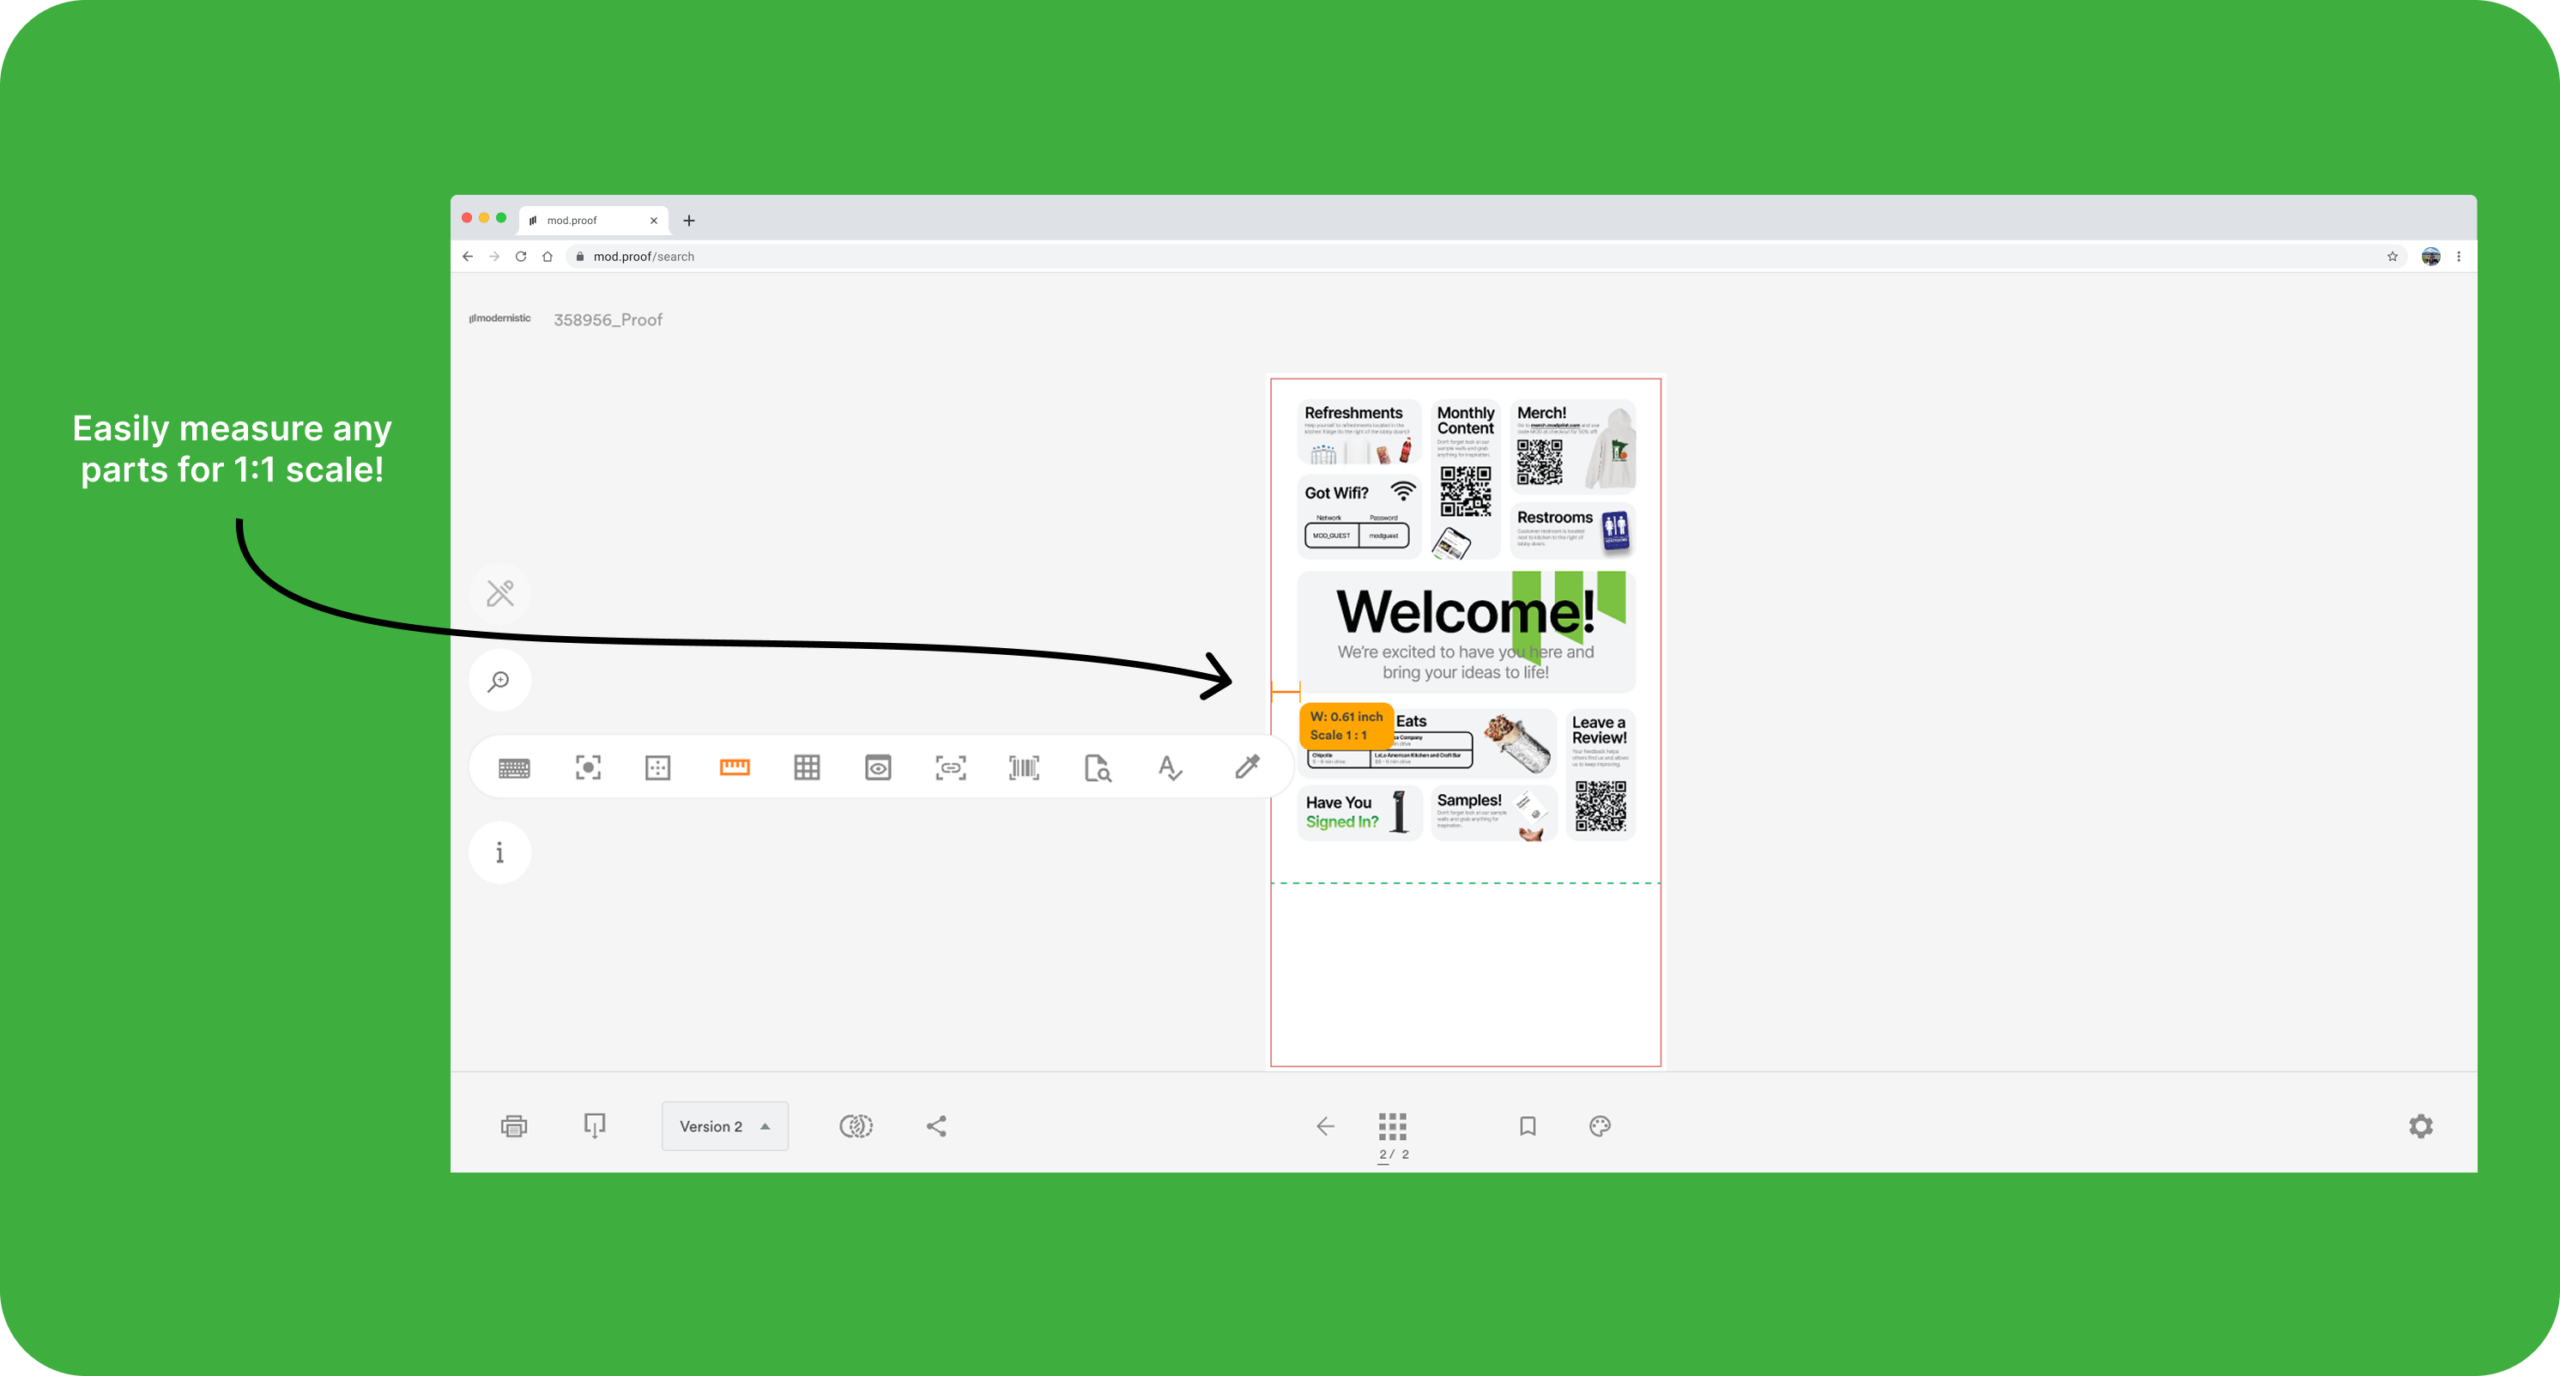
7. Measuring Tools
Check dimensions, spacing, margins, and alignment directly on the proof. This helps catch layout or interior size issues early, reducing errors and costly rework.
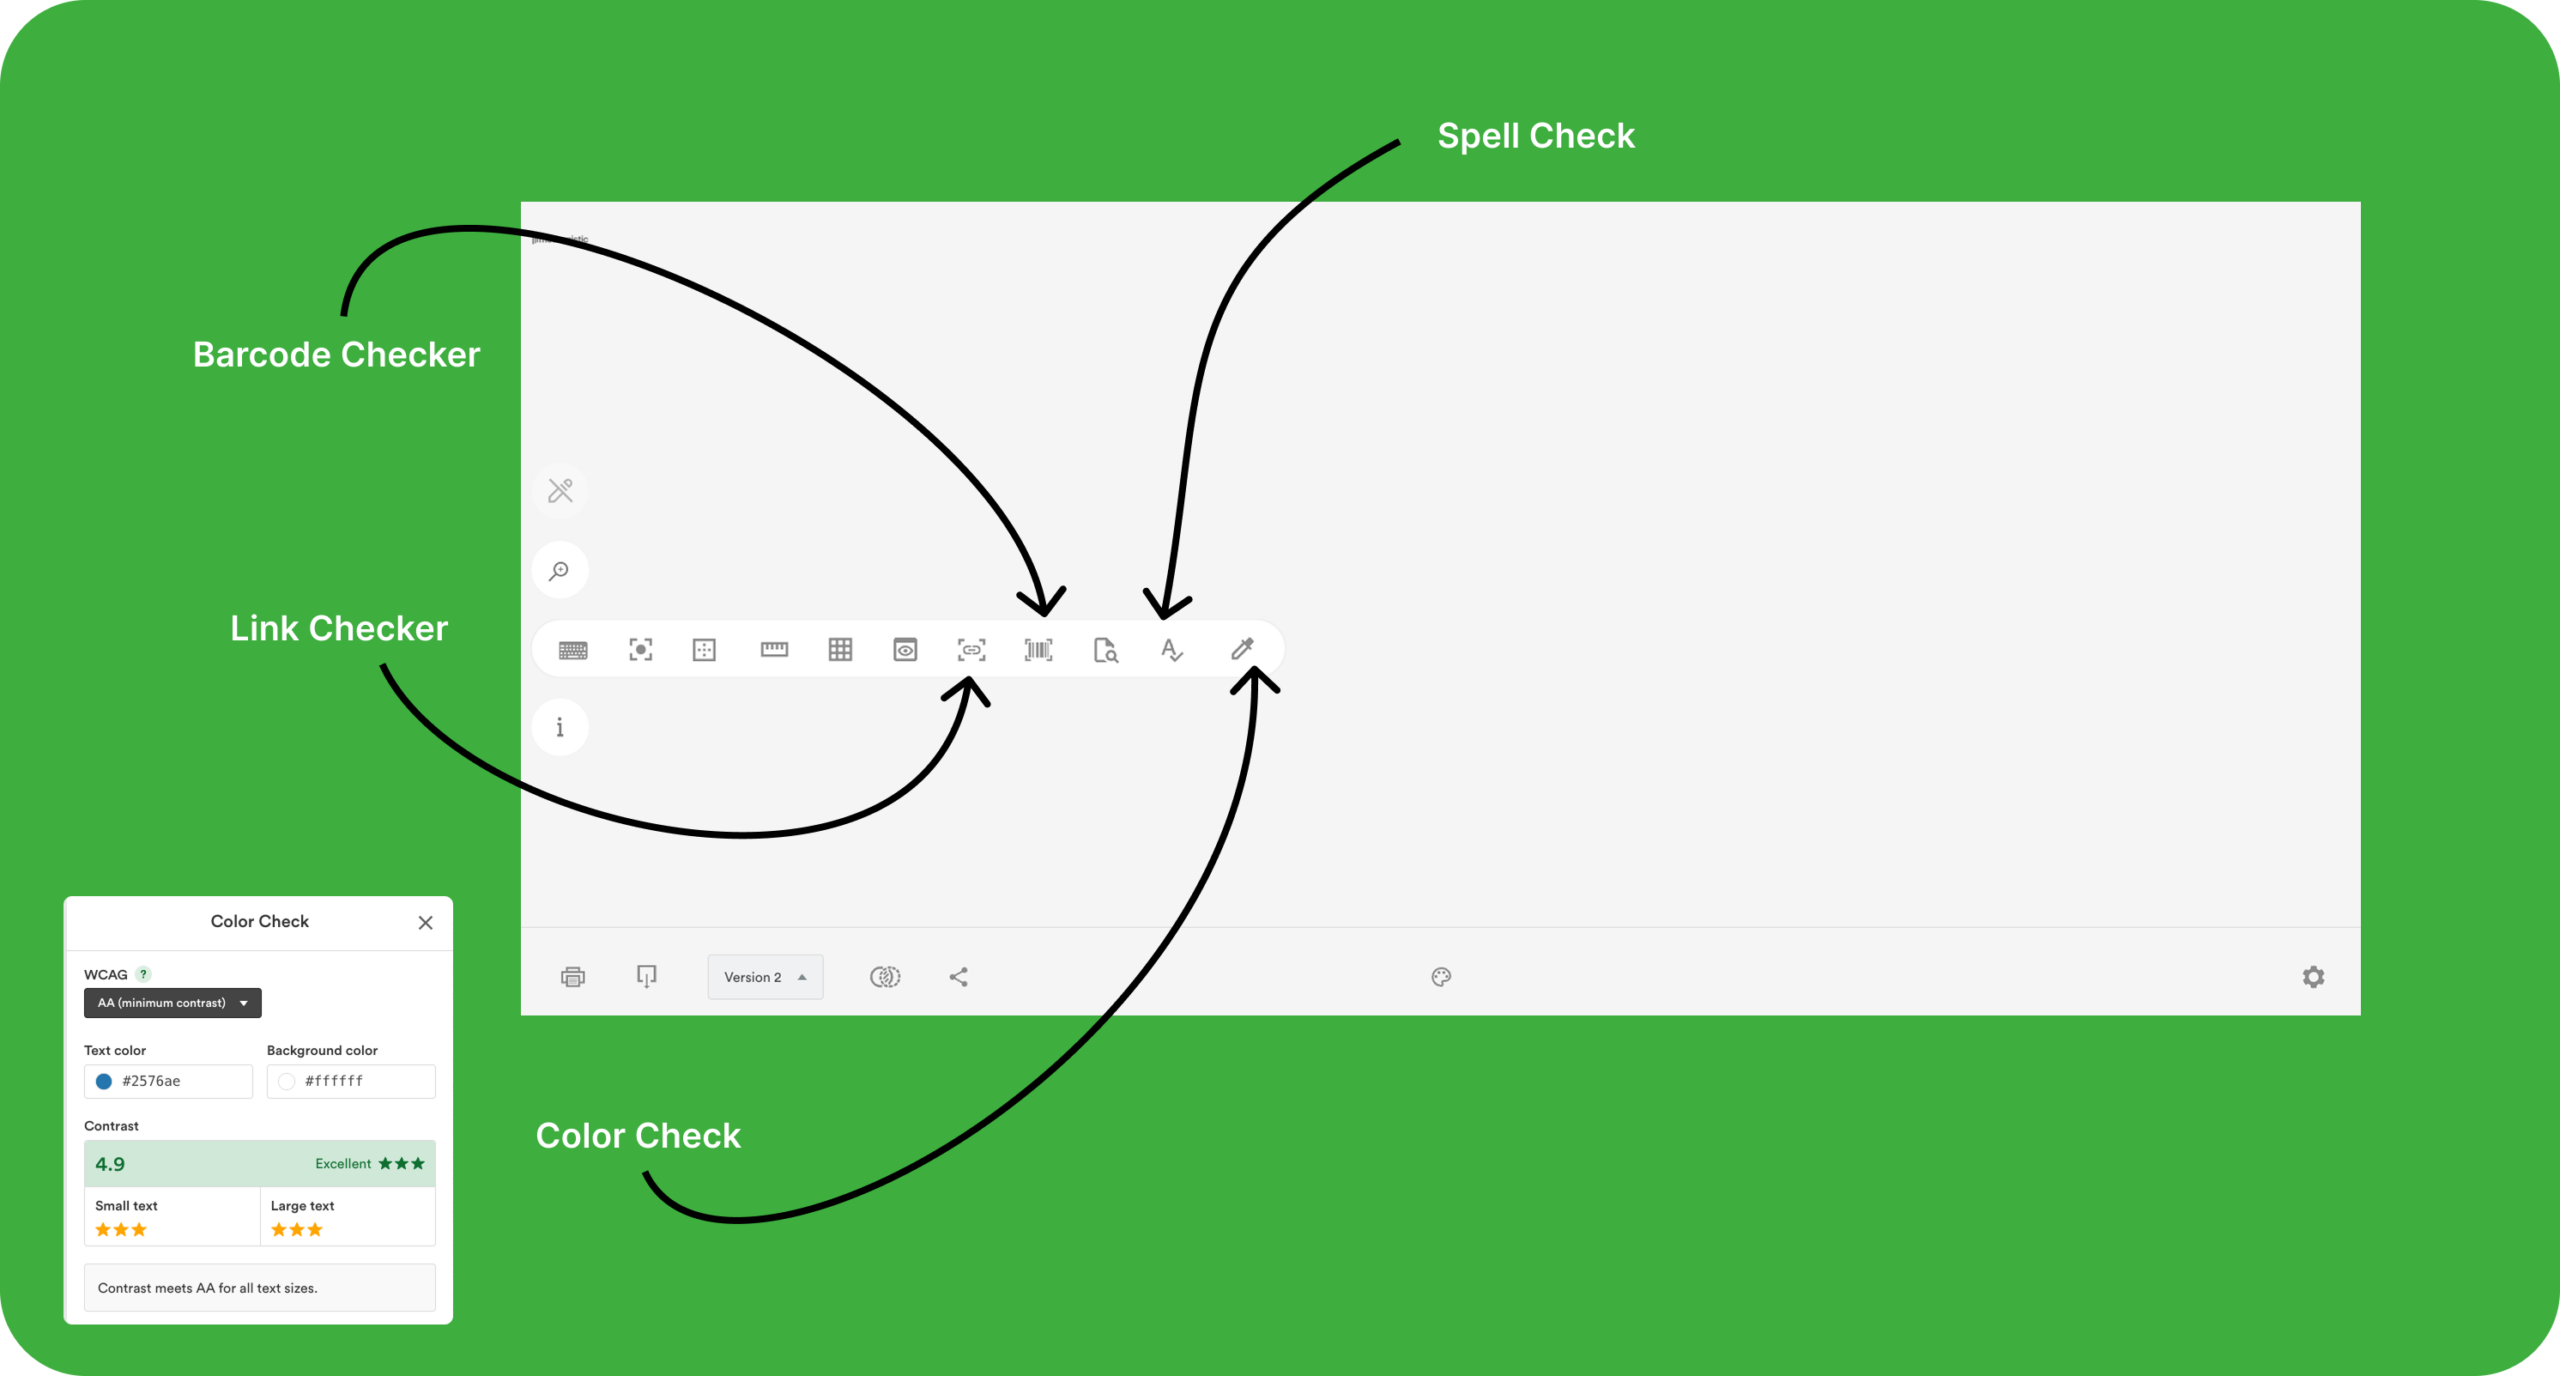
7. Verification Tools
In addition to thorough checks by our pre‑press and production teams, our proofing software offers robust verification tools — including color checks, link validation, spell check, barcode scanning, and more — to ensure your content is technically accurate before it reaches production. These tools automatically detect potential issues, whether it’s a misconfigured color profile, a broken link, or a typo, saving you time and preventing costly oversights. By identifying errors early in the proofing stage, you minimize last‑minute corrections, reduce rework, and avoid approval delays. This extra layer of verification boosts confidence in the final output and helps deliver higher-quality results every time.
Proofing may sometimes be overlooked, but its impact on efficiency, accuracy, and team satisfaction is immense. Our proofing software turns what can be a tedious, error-prone step into a streamlined, enjoyable experience for everyone involved. With continuous improvements to all aspects of the user experience, intuitive tools, and measurable results, our proofing software ensures your projects get approved faster, with fewer mistakes, and less stress.
Our proofing software isn’t about checking a box — it’s about elevating how we serve you. From consistent results to better communication and measurable improvement, it’s a framework that keeps us (and your projects) performing at their best. Stay tuned for next month’s knowledge drop to learn more!
On the other hand, if you can’t wait or are ready to see proofing in action RIGHT NOW – click here, and we’ll talk today!
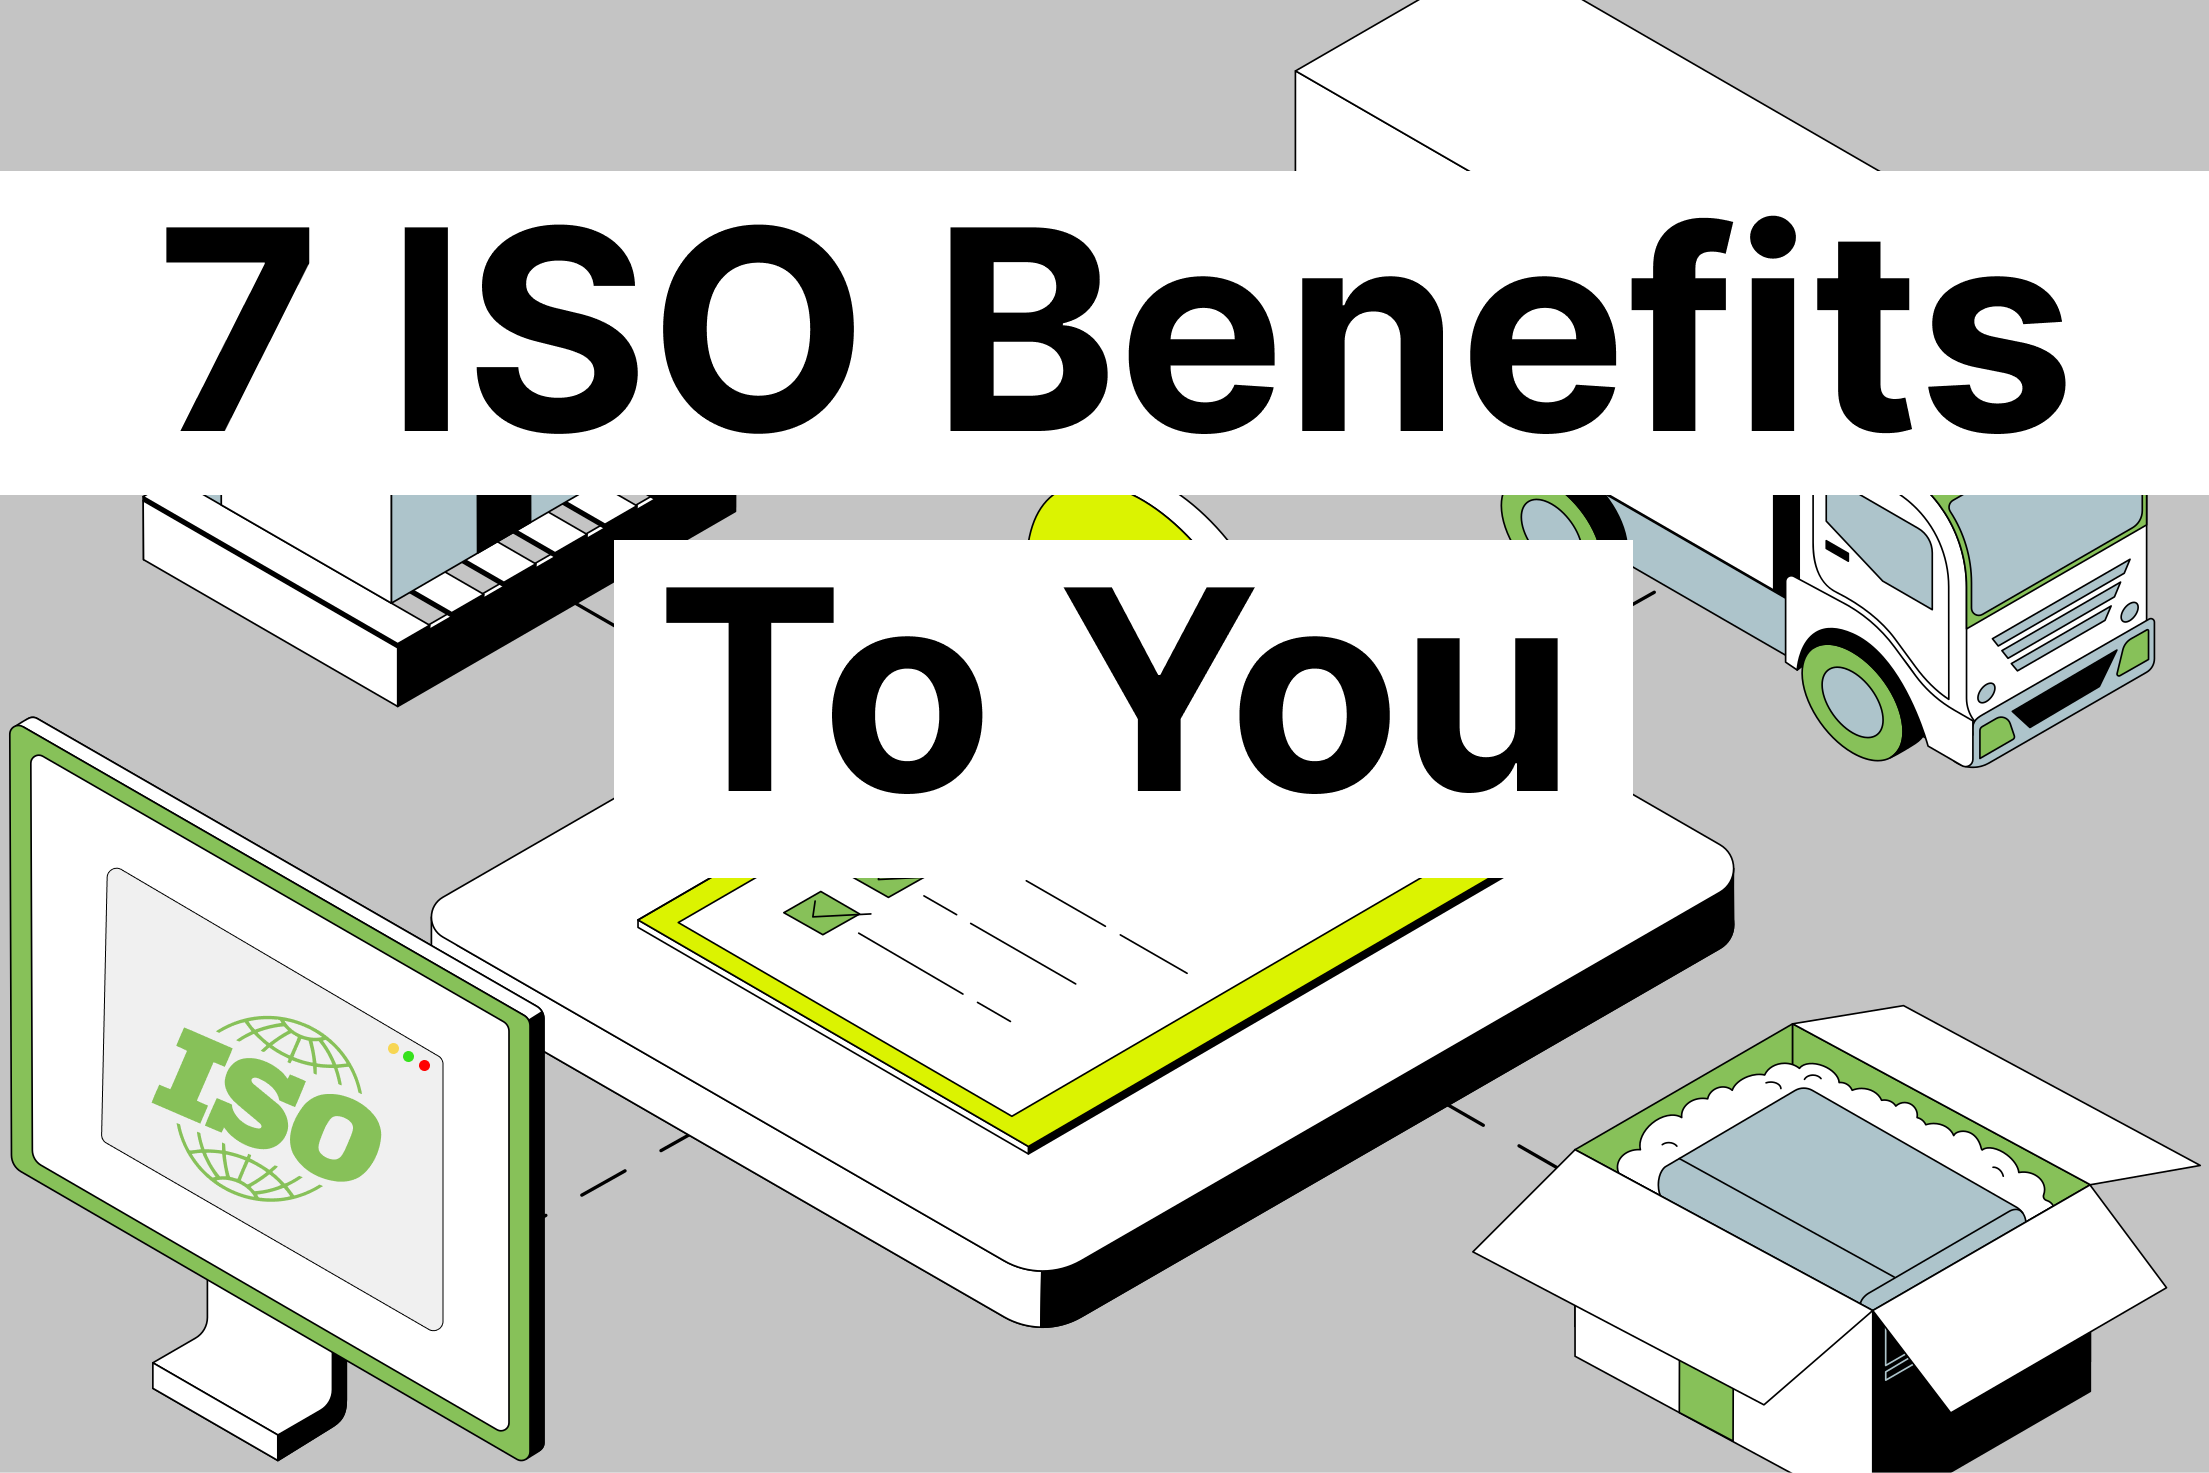
When you’re choosing a manufacturing partner, you’re not just buying a product — you’re investing in consistency, reliability, and trust. That’s why earning our ISO 9001 certification isn’t just a company milestone — it’s a direct win for our customers.
ISO 9001 is the international standard for quality management systems (QMS). It ensures that every part of our process — from quoting and production to delivery and support — meets the highest standards of quality, efficiency, and accountability. ISO 101
Studies show that organizations implementing ISO 9001 see up to a 40% reduction in customer complaints and faster overall production cycles. – Source: ISO Research from the Quality Innovation Prosperity Journal found that 87% of companies report improved customer satisfaction after earning ISO 9001 certification.” – Source: Quality Innovation Prosperity
Here’s how that translates into real benefits for you…
1. Consistent Quality You Can Count On
With ISO-certified processes, you get the same level of high quality — every single time.
That means no surprises, no variability — just precision and dependability on every order.
2. Fewer Errors, Better Turnarounds
ISO standards require clear documentation and control at every stage of production. This reduces errors, rework, and downtime. Studies show that organizations implementing ISO 9001 see up to a 40% reduction in customer complaints and faster overall production cycles. Source: ISO
You benefit from shorter lead times and fewer production headaches.
3. Improved Communication and Transparency
ISO certification emphasizes traceability and accountability. Every job, file, and process is documented, reviewed, and monitored.
That means clearer communication, faster answers, and total visibility into your project’s progress — from start to finish. We’re deeply committed to your experience, and we’re always finding new ways to make ordering with us even smoother. Check out our online order tracking portal here.
4. Continuous Improvement — Built In
We don’t just meet standards once and move on. ISO 9001 requires regular audits, reviews, and ongoing improvements to keep certification active.
So while we’re proud of where we are, we’re even more focused on getting better every day — improving processes, training, and technology that directly benefit your outcomes.
5. Customer Feedback That Drives Action
ISO systems are built around customer satisfaction metrics. That means your feedback doesn’t just get heard — it gets measured, tracked, and used to make tangible improvements.
“Research from the Quality Innovation Prosperity Journal found that 87% of companies report improved customer satisfaction after earning ISO 9001 certification.” Source: Quality Innovation Prosperity
You’re part of a continuous feedback loop that keeps quality moving forward.
6. Accountability at Every Level
From leadership to production teams, ISO certification demands clear responsibility and process ownership. This means every team member knows exactly how their work contributes to product quality — and to your success.
7. Global Standard of Excellence
ISO 9001 isn’t a regional badge — it’s a globally recognized certification held by top manufacturers in over 170 countries. When you work with an ISO-certified partner, you’re aligning with internationally verified quality and reliability standards.
At the end of the day, we hope our certification gives you one thing above all: confidence. Confidence that your order will be handled with precision. Confidence that issues will be addressed, not ignored. And confidence that you’re working with a team built on accountability, improvement, and trust.
Our ISO 9001 certification isn’t about checking a box — it’s about elevating how we serve you. From consistent results to better communication and measurable improvement, it’s a framework that keeps us (and your projects) performing at their best. Stay tuned for next month’s knowledge drop to learn more!
On the other hand, if you can’t wait or are ready to see ISO-certified quality in action RIGHT NOW – click here, and we’ll talk today!
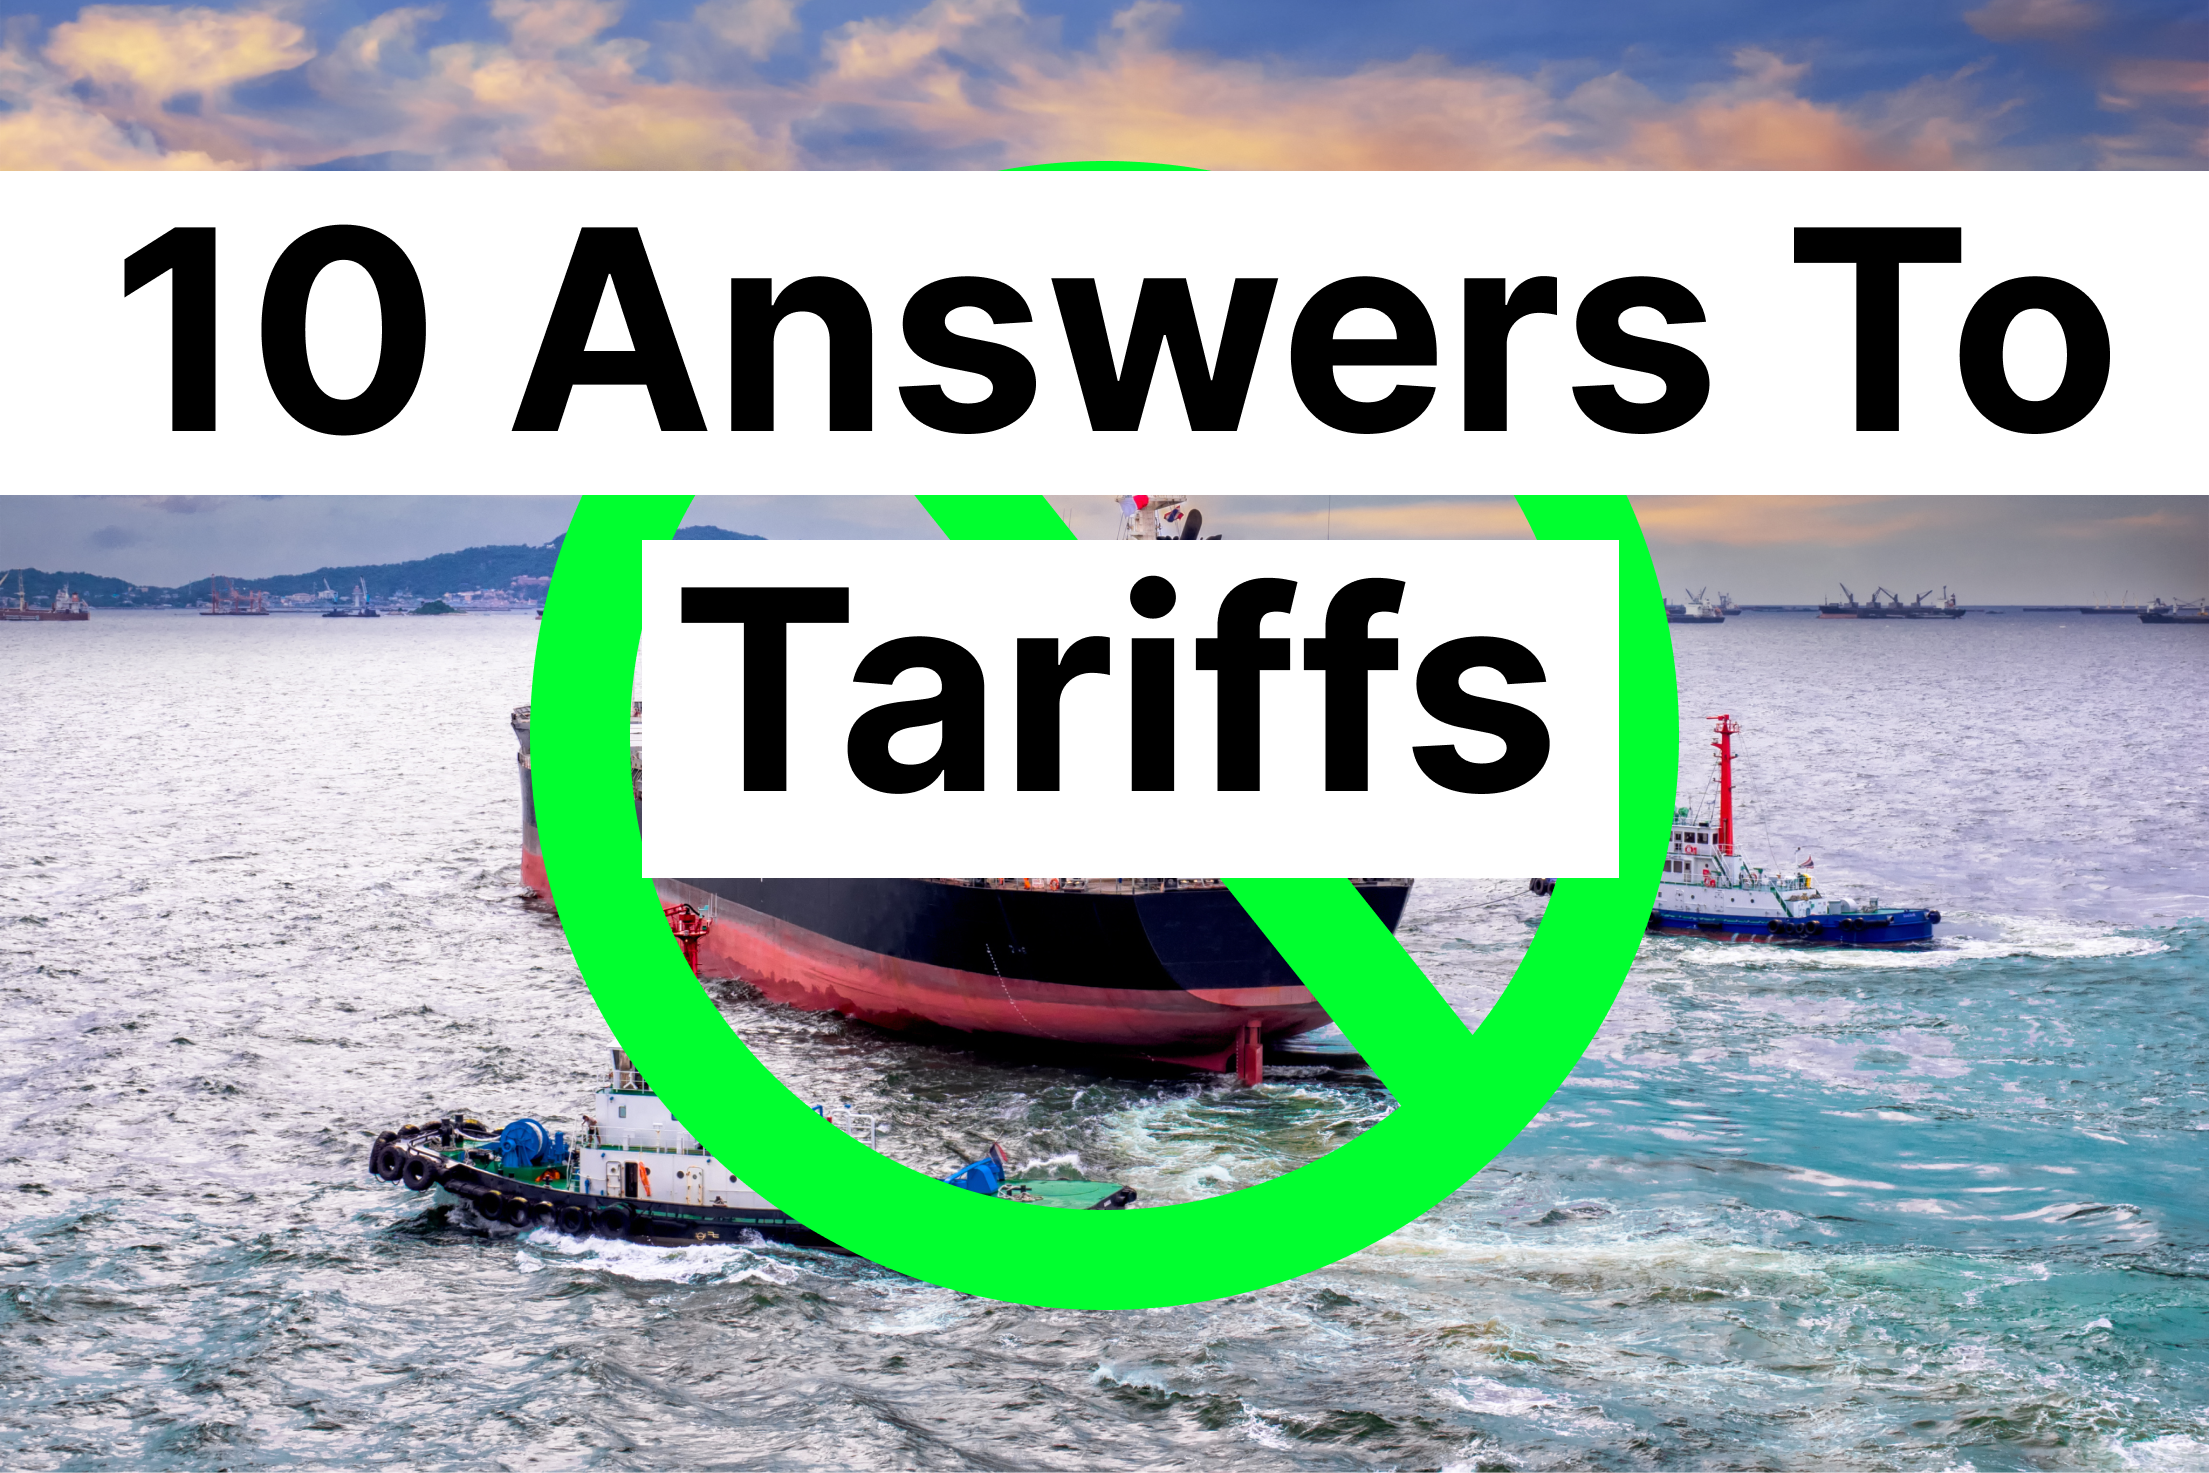
When it comes to custom printing, cutting, and converting, businesses have long faced challenges like rising material costs and supply chain disruptions. Add tariffs on imported goods to the mix, and the cost of doing business with overseas vendors only gets steeper. We’ve been helping our customers sidestep these issues from the start.
Our U.S.-based, all-in-one production model has always eliminated the need for offshore sourcing—no import delays, no surprise fees, no faulty products, and no tariff-related price spikes.
Tariffs may be a newer concern, but the solution isn’t. Delivering tariff-free, hassle-free production for years is just one more reason to move your projects to a smarter, more dependable partner. Let’s dive into our 10 solutions!
1. Sourcing Materials!
Every day, new materials are being introduced to the market, offering fresh possibilities and innovations for your projects. With over 300 years of combined experience, our estimating team and project managers work closely with a large variety U.S. materials vendors to help you avoid the burden of tariffs and sourcing. We also give customers the flexibility to supply their own materials, ensuring high-quality, on-time production without unexpected import fees or delays.
2. All-In-One U.S. Manufacturing
Plain and simple, we give you the most options, centralized in the United States. With all the tools needed to finish a job in-house and vertically overlapped, we can solve any problem, give you exact quality, reduce cost, ship your project quickly, and give you peace of mind with warranties such as the 3M™ MCS™ Warranty.
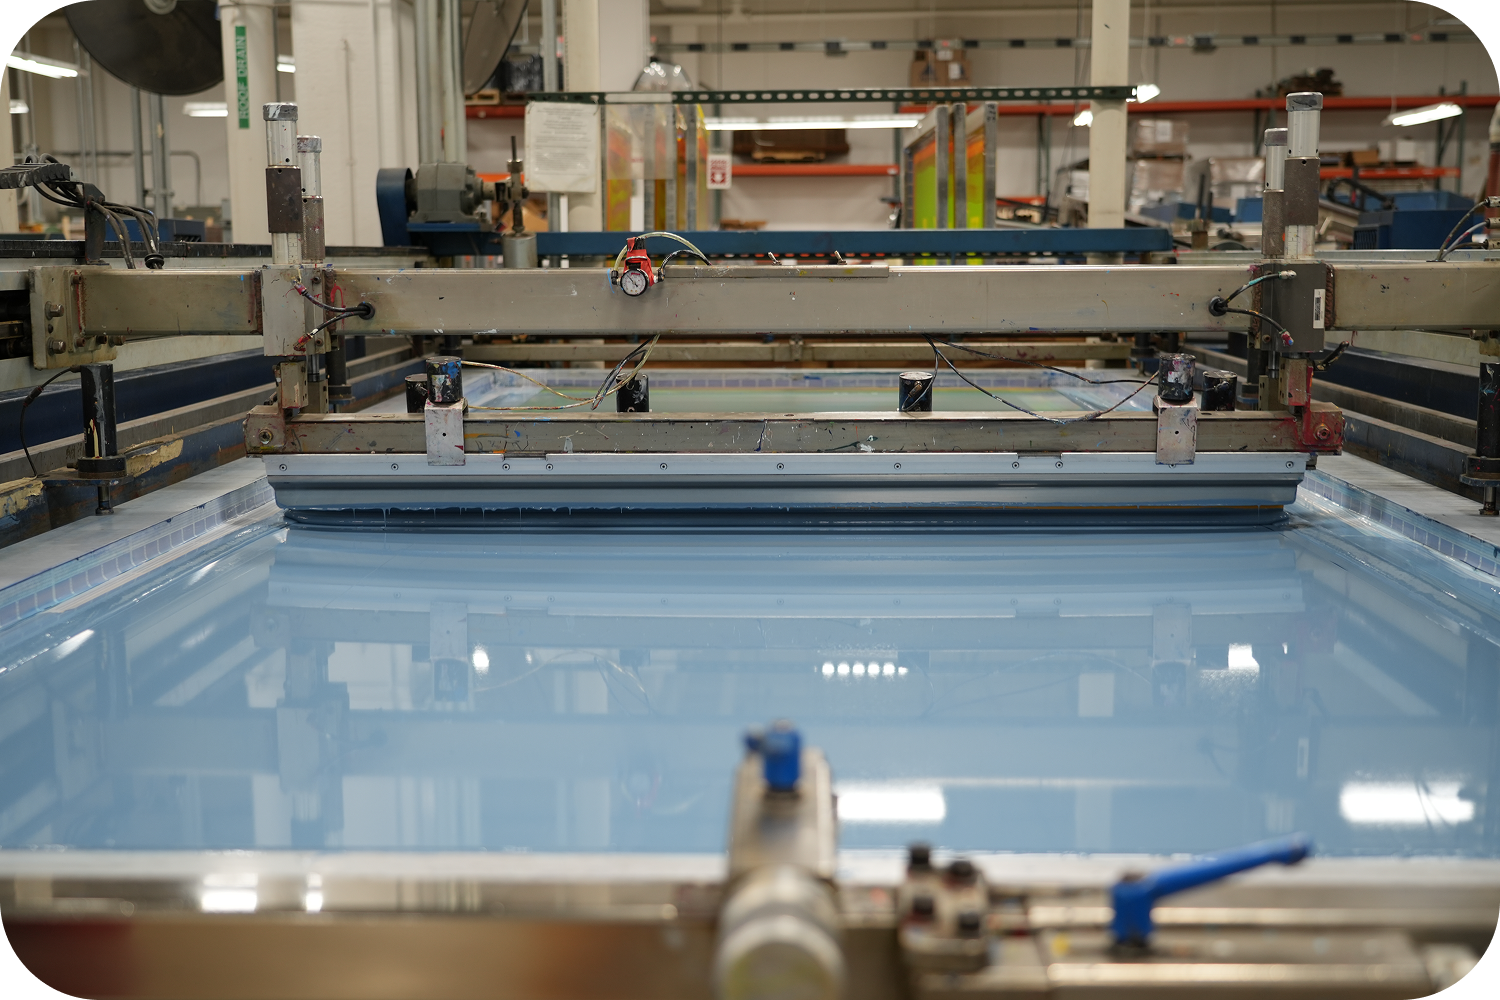
3. Digital & Screen Printing Options
As one of the few printers in the US with both digital printing and screen printing we can quote and offer the best of both worlds — flexibility, quantity, function, quality, color accuracy, and cost-efficiency. By having both options, you don’t have to compromise on your needs or your MOQ (Minimum Order Quantity). We can even interchange processes within that project (screen print + digital printing)! For instance, we can start with digital printing, and if you need a color that falls outside the CMYK gamut, we can add it through screen printing to match it precisely. Do you have a special effect, specialty coating, or an industrial ink – we can do that too!
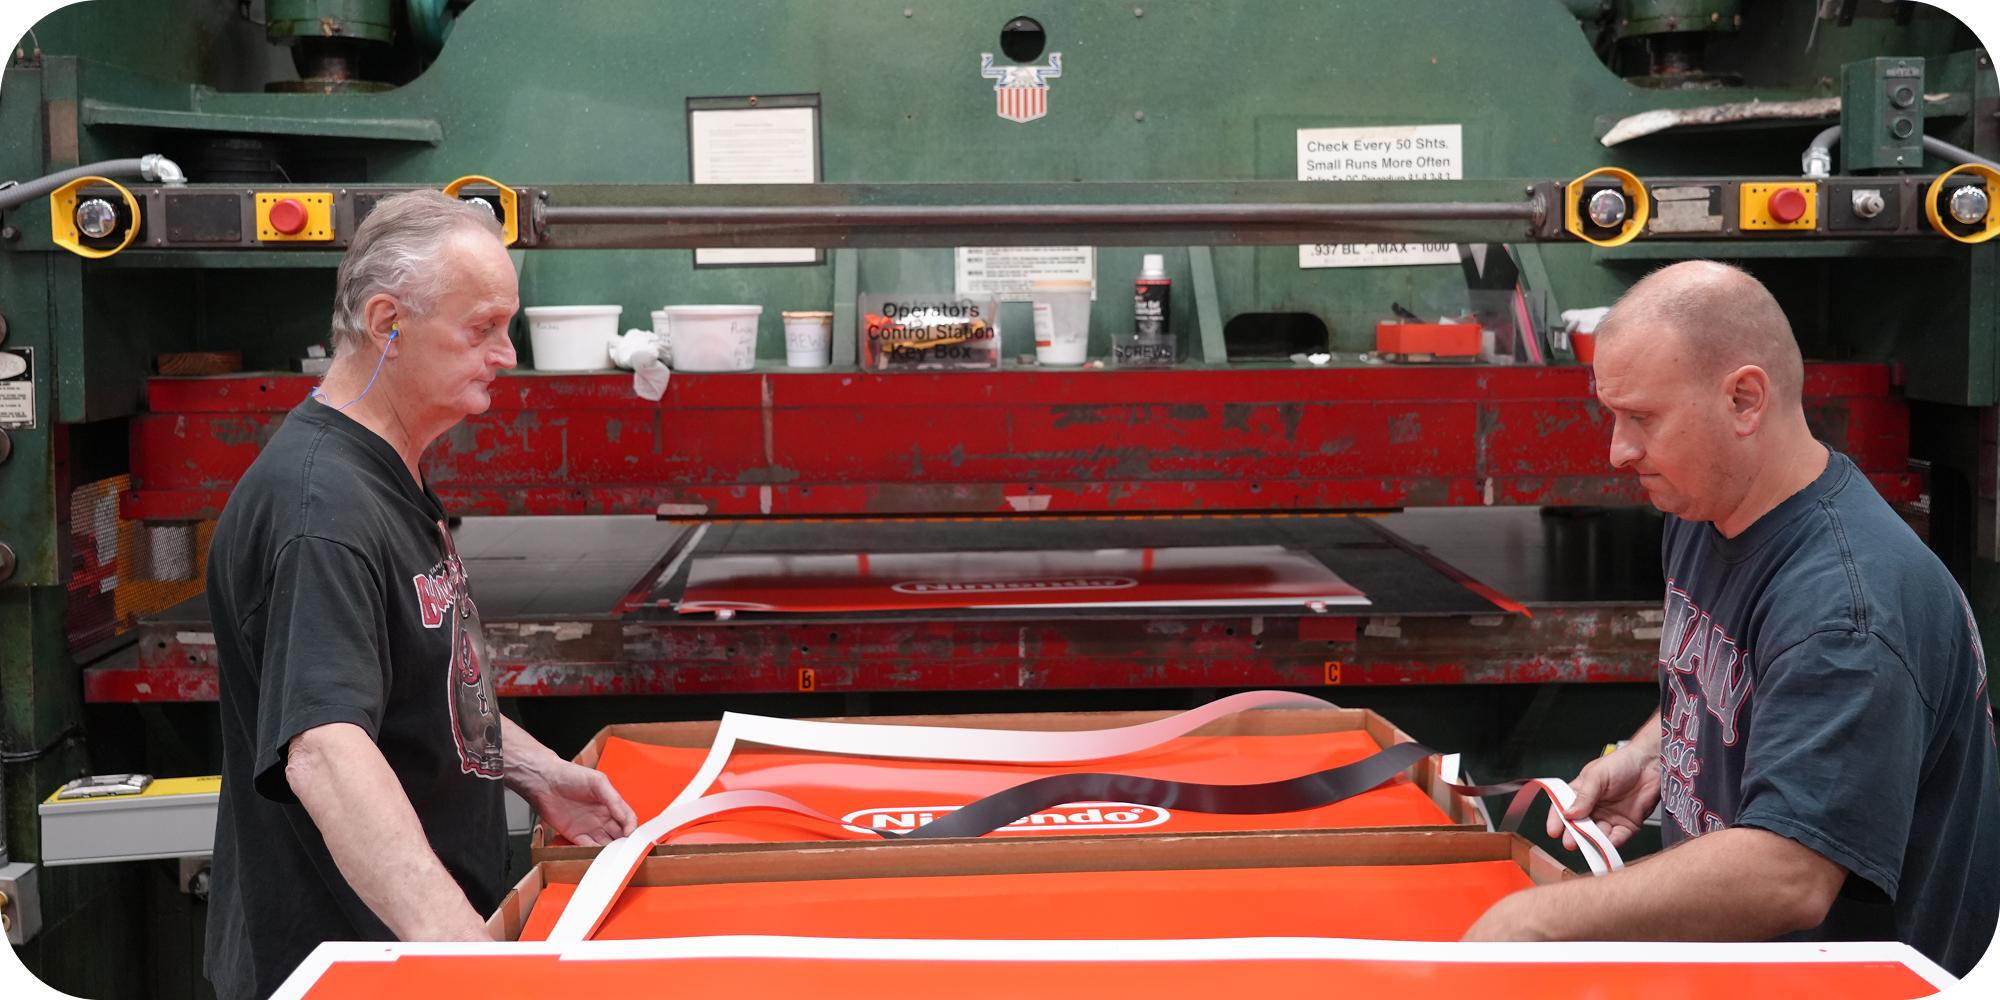
4. Die-cutting & Digital Cutting (Router/ Plotter Cutting) Options
Similar to the value of having both digital printing and screen printing, having die-cutting and digital cutting capability is also rare and invaluable. Other printers have to outsource, transporting product back and forth, which reduces turn around and increases cost. We can cut and fabricate every material with one form of cutting, so you don’t have to bear the additional overhead.
5. Boast Sustainability!
Environmental responsibility has been the fabric of our business model since 2009. Since then, we have reduced our (and our customers’) solvent, material, energy, water, and even gas emissions. We even offer a sustainable material alternative with each project. When you partner with us, you join our movement for a cleaner Earth.
6. Alternate Materials & Material Diversity
As we mentioned, new materials are coming to market every single day. Have a carbon neutrality initiative, need a material that ships lighter, or maybe you just want a substrate that reduces cost? We filter through the noise and curate the best materials for your project. We even have a carbon-negative substrate option!
7. Easy Communication (Personal Assigned Project Managers)
Ever heard of Minnesota nice? Every customer is assigned their own project management team—including a sales representative and customer service specialist—who closely manage your project in our facility, works with QA engineers, and keeps you in the loop every step of the way. We prioritize clear communication, transparency, and long-term relationships.
8. Quick Turnaround
Time is money; our overlapping operations will cut down turnaround time and reduce cost. You don’t have to wait for overseas transfers. With very few limitations in our in-house production, our precision and knowledge keep your project momentum going, bringing in your ROI sooner than expected.
9. Solutions For Every Business Type
We specialize in custom solutions for a diverse range of industries—from aerospace manufacturers to retail brands. Our award-winning Ink Lab formulates unique brand colors that can only be achieved with specialized inks, while our quality assurance engineers measure industrial parts to tolerances that go far beyond the human eye. We’re built for excellence at every step.
10. Proven Track Record
With over 85 years in the industry, Modernistic has built lasting relationships with clients across various sectors, including retail, transportation, healthcare, and OEMs. Our dedication to quality and customer satisfaction has earned us a reputation as a reliable, tariff-busting manufacturing partner.
Ready to Go Tariff-Free?
Grow your company’s revenue while looking good to your boss! Breaking free from tariff burdens is awesome, but it takes more than good artwork or a well-structured design to create a great print product. It’s a balanced recipe of great design, affordable manufacturing cost, clever placement, and judicious use of resources. Stay tuned for next month’s knowledge drop to learn more!
On the other hand, if you can’t wait or want to cure your tariff issues RIGHT NOW – click here, and we’ll talk today!
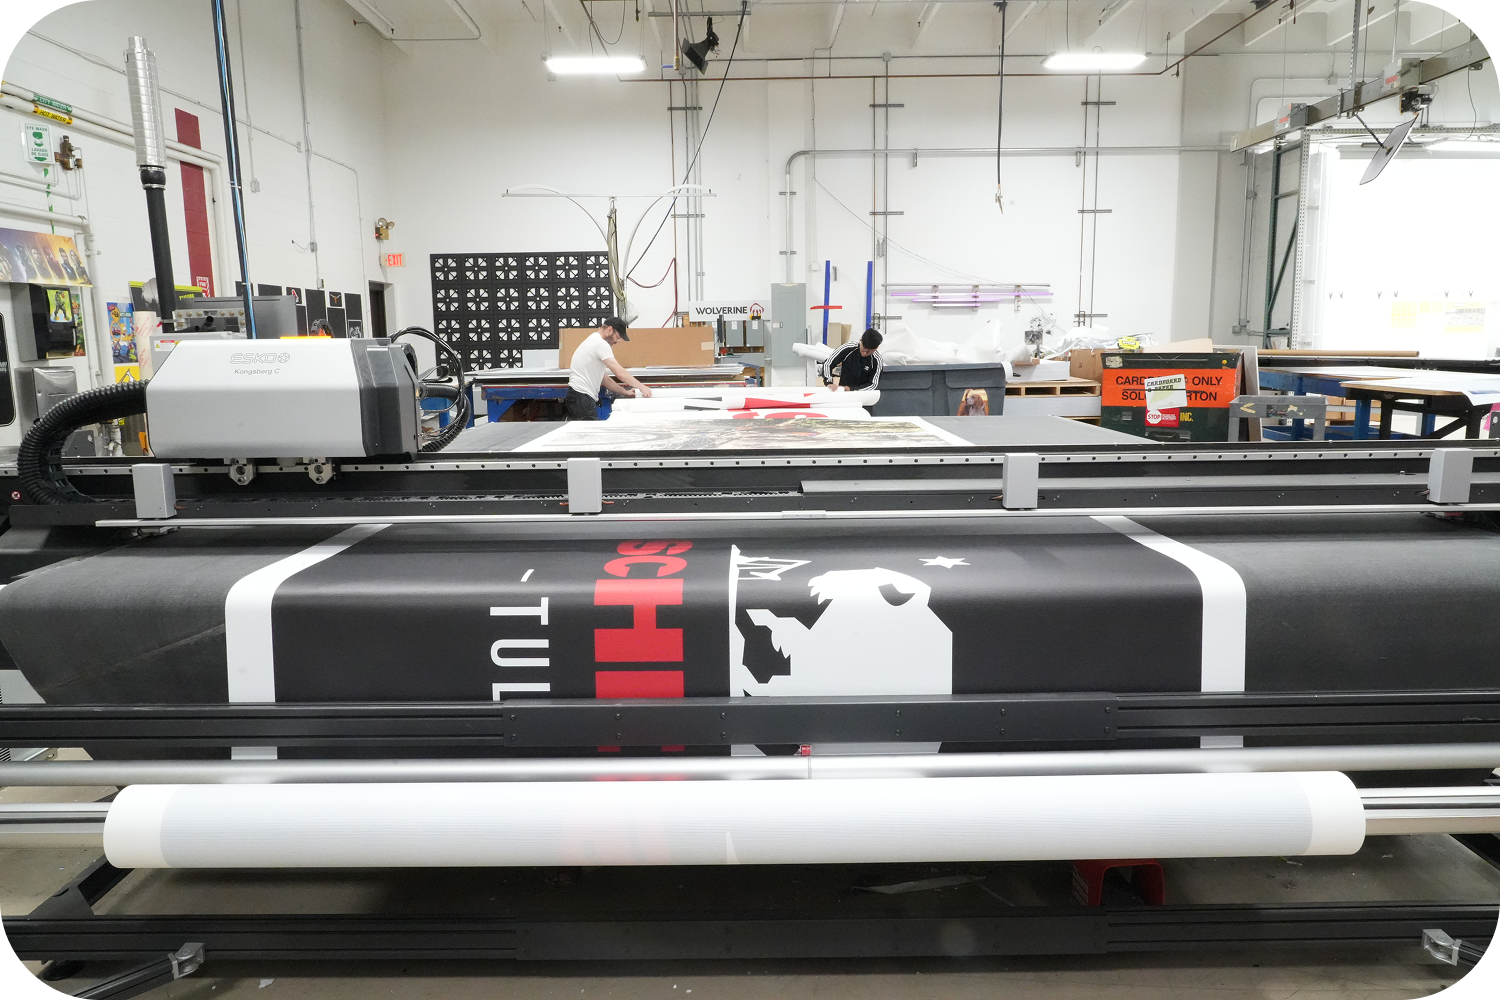
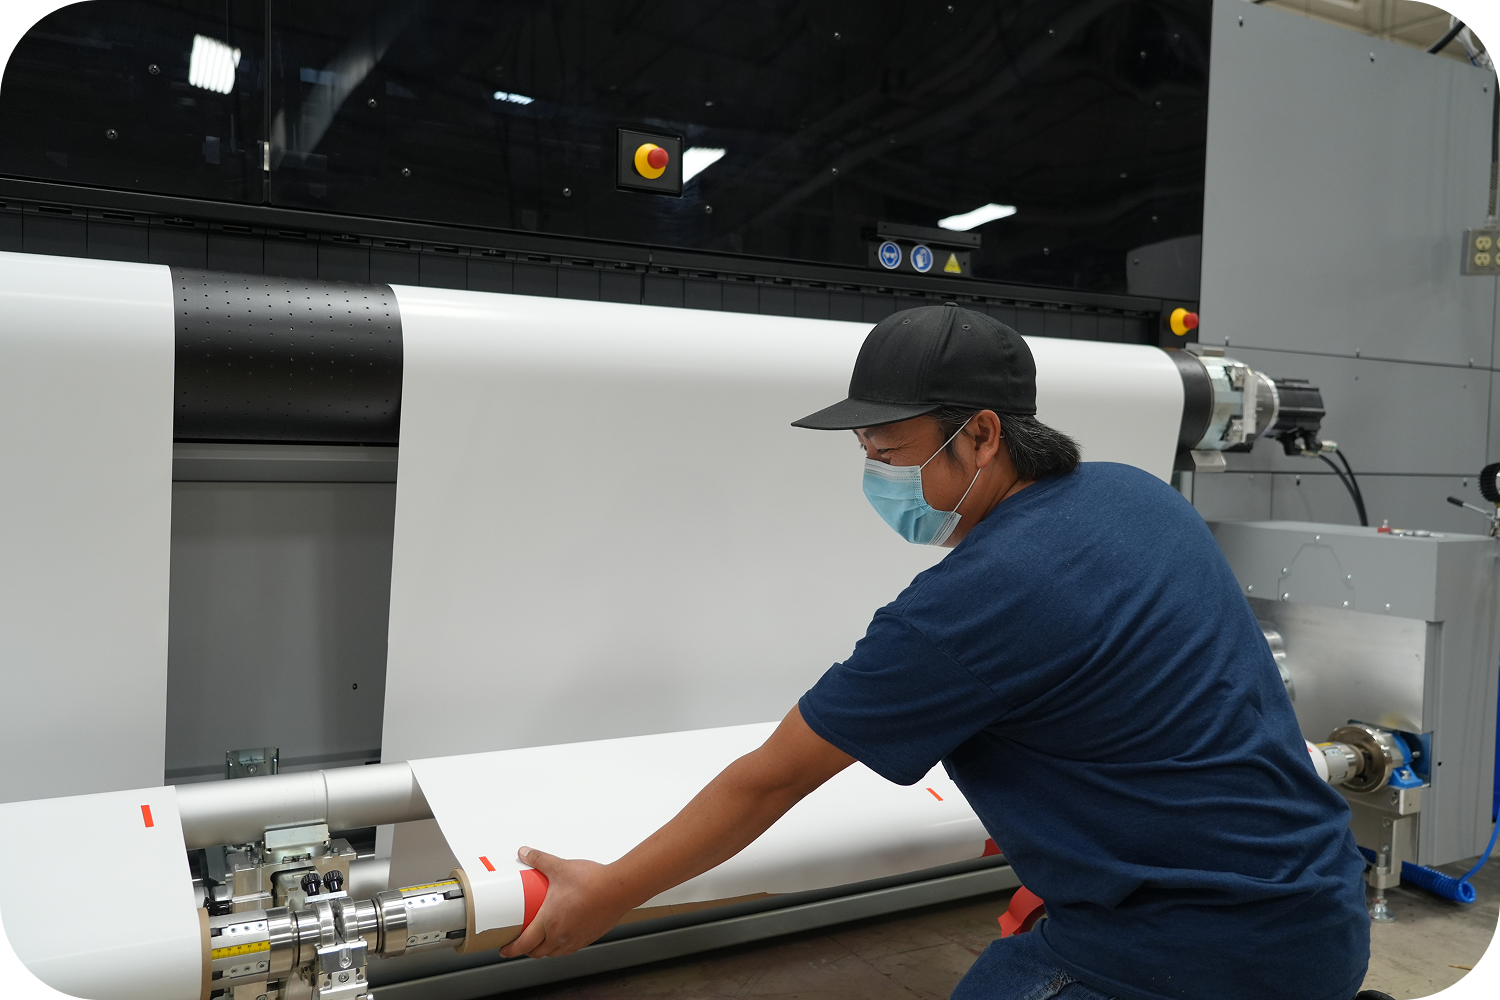
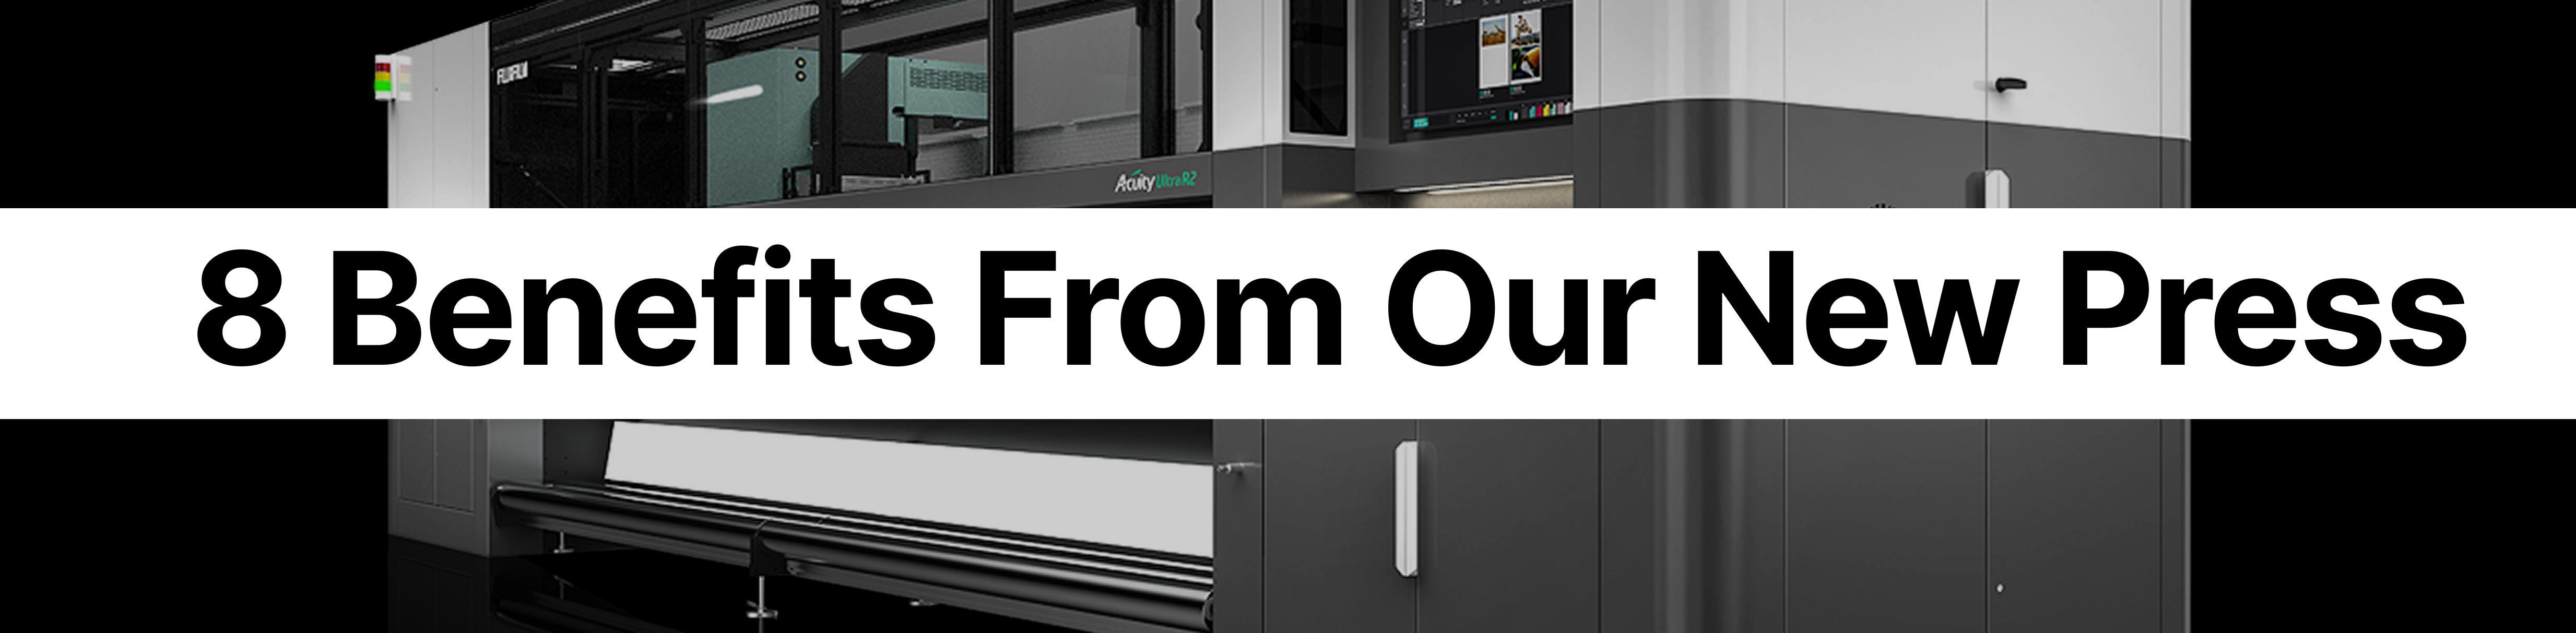
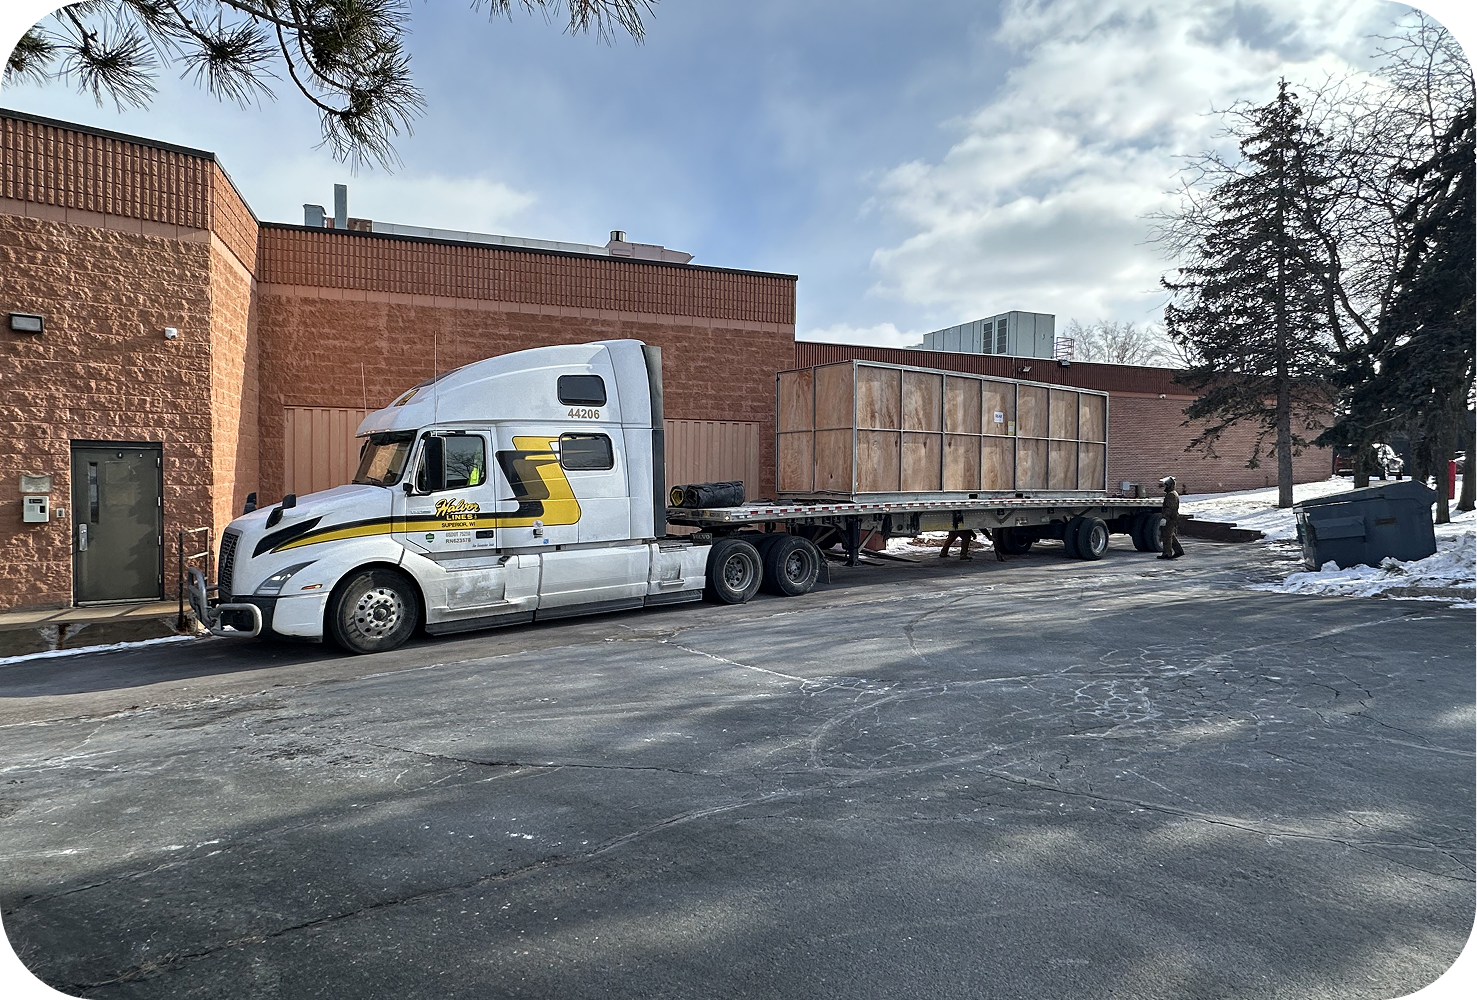
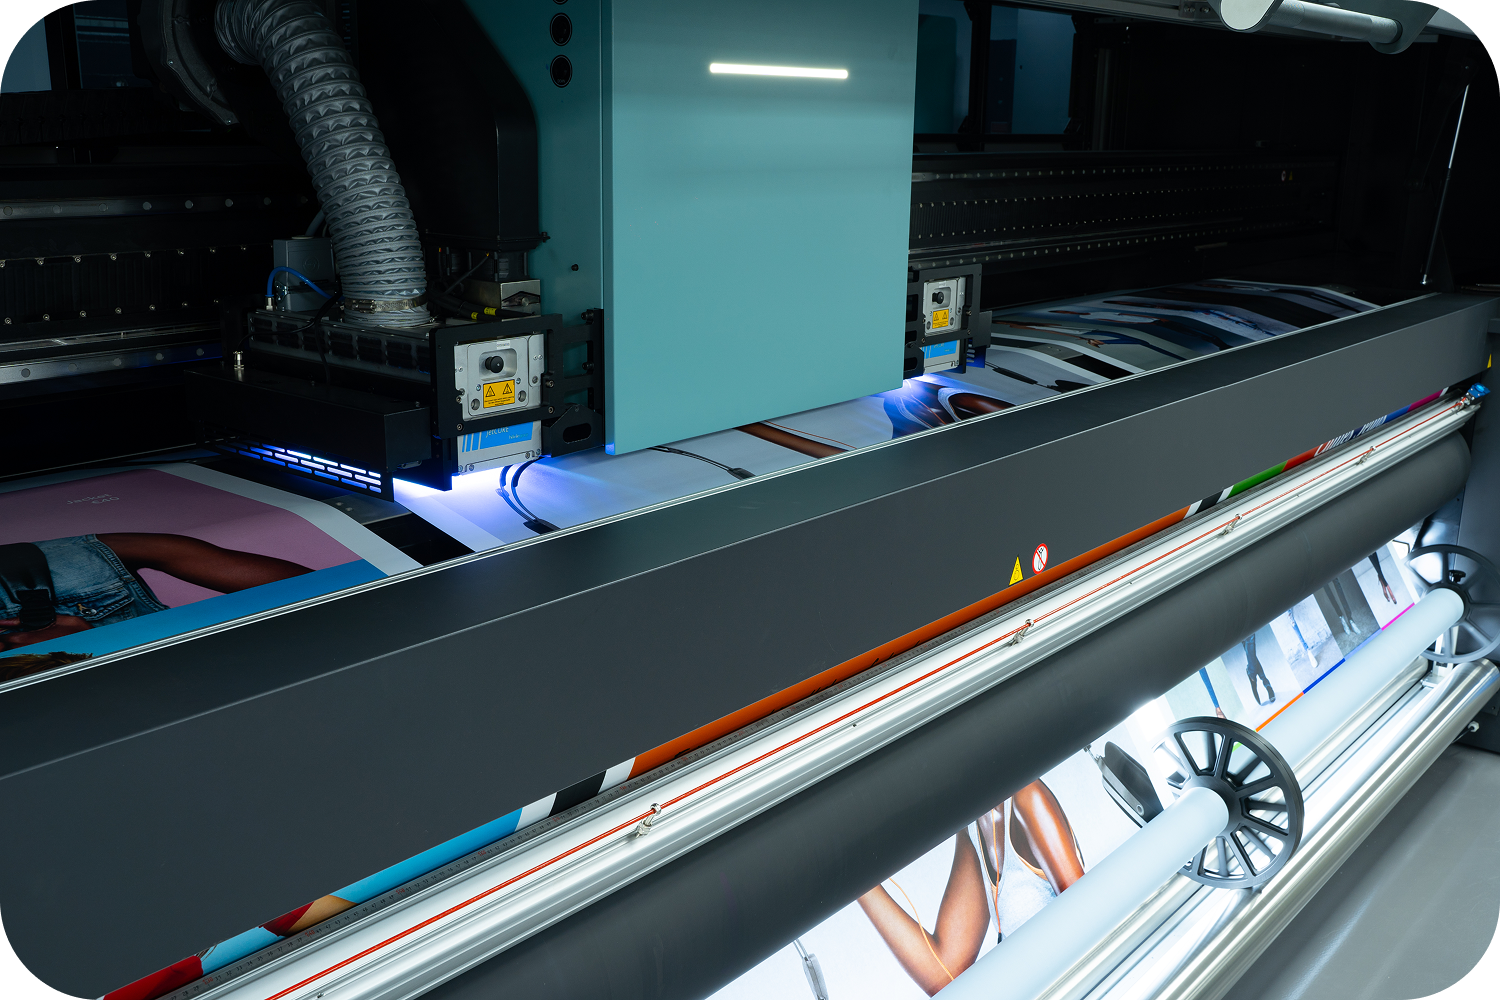
As part of our ongoing commitment to providing top tier print solutions, we’re excited to announce the addition of the Fuji Acuity Ultra R2 into our fleet of printing equipment. At 8.5 tons and 5 meters long, this state-of-the-art printer is not just a game-changer for us; it’s going to bring significant benefits to our print buyers as well.
So, what makes the Fuji Acuity Ultra R2 5044 such a powerful addition to our business, and how will it improve your print projects? Let’s dive in!
1. We Can Print Super-Wide Up to 197”!
For the materials where grand format rolls are available, printing these rolls in full width saves on pre-print slitting conversion costs. Printing on grand format rolls gives us the flexibility to handle super-large format prints with ease. This capability allows for seamless production of large-scale projects like banners and wall decor without the need for multiple panels or seams. It maximizes the use of materials, reduces waste, and ensures that even the biggest projects are completed in one continuous print. For print buyers, it means a smoother, more efficient process and stunning large-format prints with flawless, uninterrupted quality.
2. We Can Print 3 Rolls Simultaneously on 1 Press!
Printing three rolls at once on our digital press is a major time-saver and productivity booster. By printing multiple rolls simultaneously, we can significantly increase output without compromising quality. This capability allows us to handle larger volumes of work in a shorter period of time; especially beneficial for clients with tight deadlines or high-volume projects. Not only does it streamline the production process, but it also maximizes the efficiency of our equipment. For our print buyers, this means faster turnaround times, lower costs, and the ability to manage large orders with greater efficiency, all while maintaining the consistency and quality they expect.
3. We Can Slit The Roll During the Printing Process!
We can now slit during the print process up to 3 independent rolls at once. Inline Y-axis slitting automatically cuts and aligns media as it moves through the printer, ensuring registration and preventing any misalignment or slippage during the printing process. This feature is particularly valuable for multi-wide print jobs, jobs requiring lamination, jobs requiring subsequent screen print durability or gloss clear over-prints, or projects with varying substrate sizes. For our clients, this means faster turnarounds, and more reliable output, even on the most challenging materials.
4. We Can Print Extreme Detail with Variable Picoliter Jetting
We can digitally print incredibly fine detail with variable droplet jetting from 3.5-14 picoliters. Variable picoliters (pL) in printing technology allows for precise control over ink droplet sizes, enhancing both print quality and color accuracy. Through variable droplet size we can achieve finer details, smoother gradients, and better color accuracy. This feature also enables faster printing by using larger droplets for solid areas while utilizing small picoliters where detail is needed. Additionally, variable picoliters optimize ink usage, reducing waste and improving cost efficiency, making it ideal for both high-quality and high-volume printing.
5. We Can Expand Our Product Offering with the On-Board Mesh Kit
A mesh kit is valuable because it can catch jet-through ink on mesh banner that has no liner/carrier. This saves money on material cost (no longer requiring a liner) and allows us to digitally print on a wider variety of challenging or textured surfaces, such as fabrics and flexible materials. It ensures even ink distribution, better adhesion, and prevents smearing, resulting in cleaner, more durable prints. Additionally, it enhances print registration and alignment on uneven substrates, improving overall print precision.
6. Printing Up to 4,000 sq.ft/hr
With speeds like this, we can handle high-volume projects quickly and efficiently without compromising on quality. This impressive speed allows us to deliver large orders in record time, making it ideal for urgent deadlines or time-sensitive campaigns. Whether it’s banners, signage, or bulk graphics, our fast production capabilities ensure that your project stays on schedule, allowing you to meet your goals and stay ahead of the competition.
7. Eco-Friendly Printing with Low Energy Consumption
In addition to the high-quality print results, the Fuji Acuity R2 5044 uses significantly less energy compared to other printing methods. Plus, the use of eco-friendly UV inks contributes to lower environmental impact, making it a great choice for customers aiming to reduce their carbon footprint. Want to learn more about other sustainable wins we had this year?
8. This Is Just 1 of Many Presses
Our new Fuji Acuity R2 is just one of many advanced presses in our ever-growing lineup of capabilities. For nearly 100 years, we’ve been helping customers bring their projects to life, and we continue to expand our technology to meet the evolving demands of the market. Whether it’s large-format retail prints, custom applications, or complex industrial material projects, we have the expertise and equipment to tackle any challenge. Our commitment to innovation ensures that we’re always ready to deliver the best solutions, no matter the scope or complexity of the job. Learn other ways we can help you!
Grow your company’s revenue while personally enhancing your career! New digital printing features are awesome, but it takes more than good artwork or a well-structured design to create a great print product. It’s a balanced recipe of great design, affordable manufacturing cost, clever placement, and judicious use of resources. Stay tuned for next month’s knowledge drop to learn more!
On the other hand, if you can’t wait or want to cure your digital printing issues RIGHT NOW – click here, and we’ll talk today!
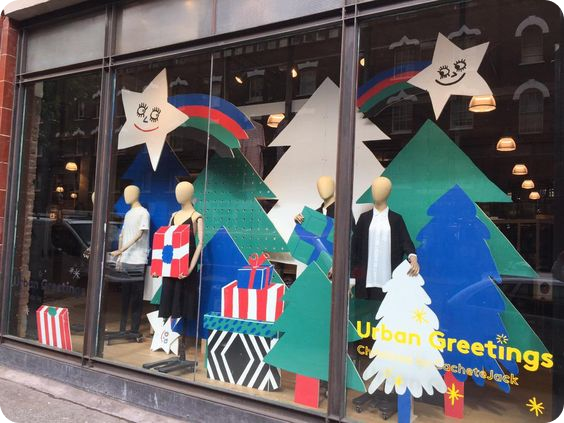
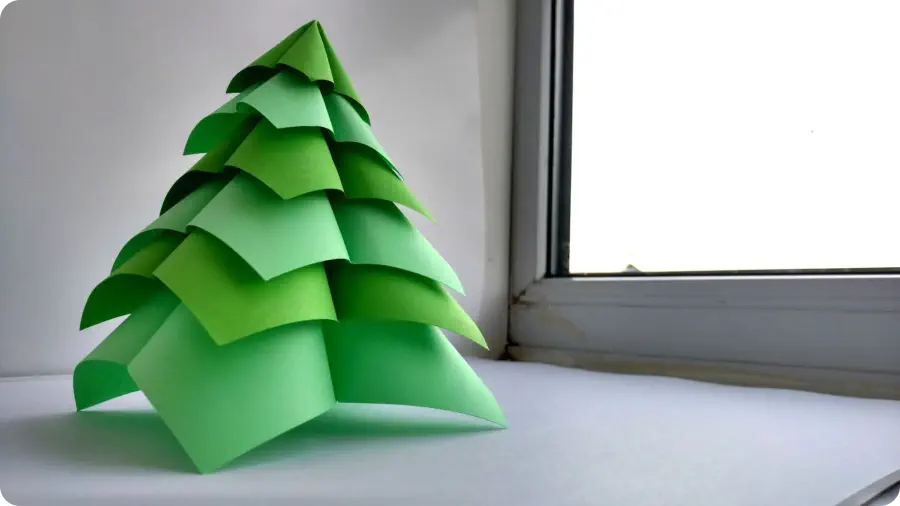
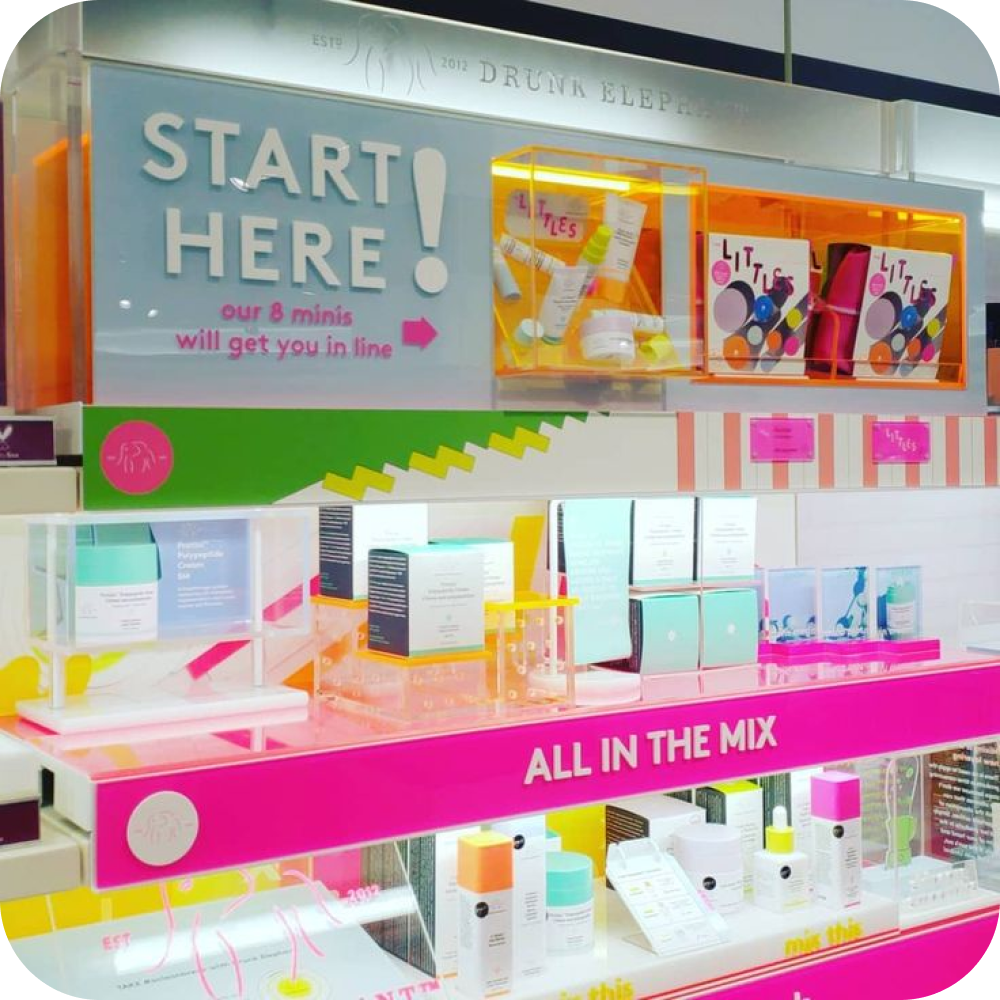
Looking to add some holiday spirit to your environment? Printed Christmas trees offer a unique and innovative twist to the traditional holiday decor, bringing a touch of modern creativity to festive celebrations. These artificial trees, adorned with vibrant and intricate prints, can showcase a variety of designs, ranging from classic holiday motifs to contemporary and personalized themes.
Printed Christmas trees are not only visually striking but satisfy some people’s reluctance to cut down a live tree. And many are sustainable for year after year use. Additionally, they provide a customizable canvas for individuals and families to express their unique style and preferences, allowing for a personalized and memorable holiday experience. With the convenience of storage and reuse, printed Christmas trees offer a sustainable and aesthetically pleasing alternative, catering to those who seek a blend of tradition and innovation in their seasonal decorations.
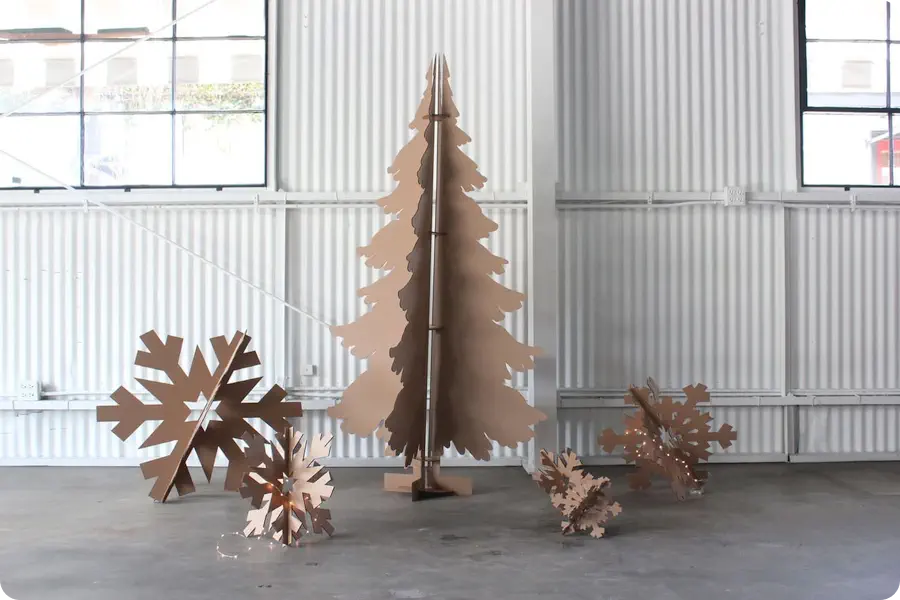
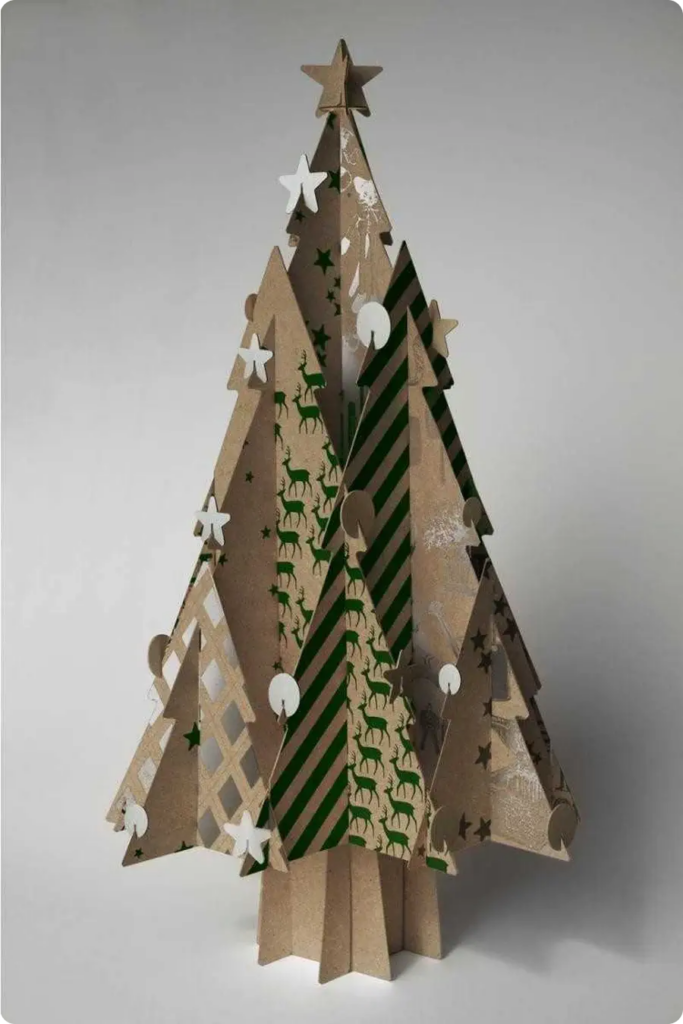
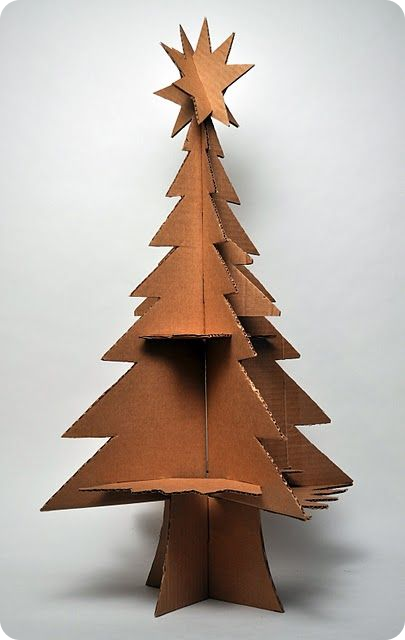
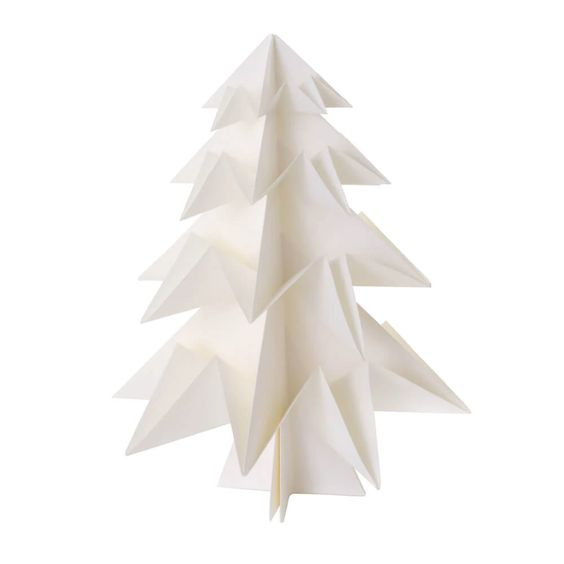
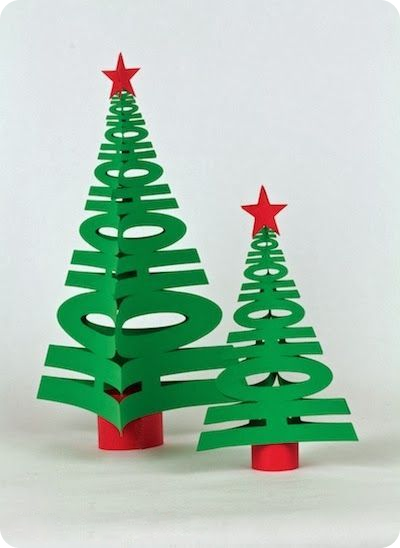
After running thousands of holiday projects for major brands – here are 33 Christmas tree designs we think you should know about!
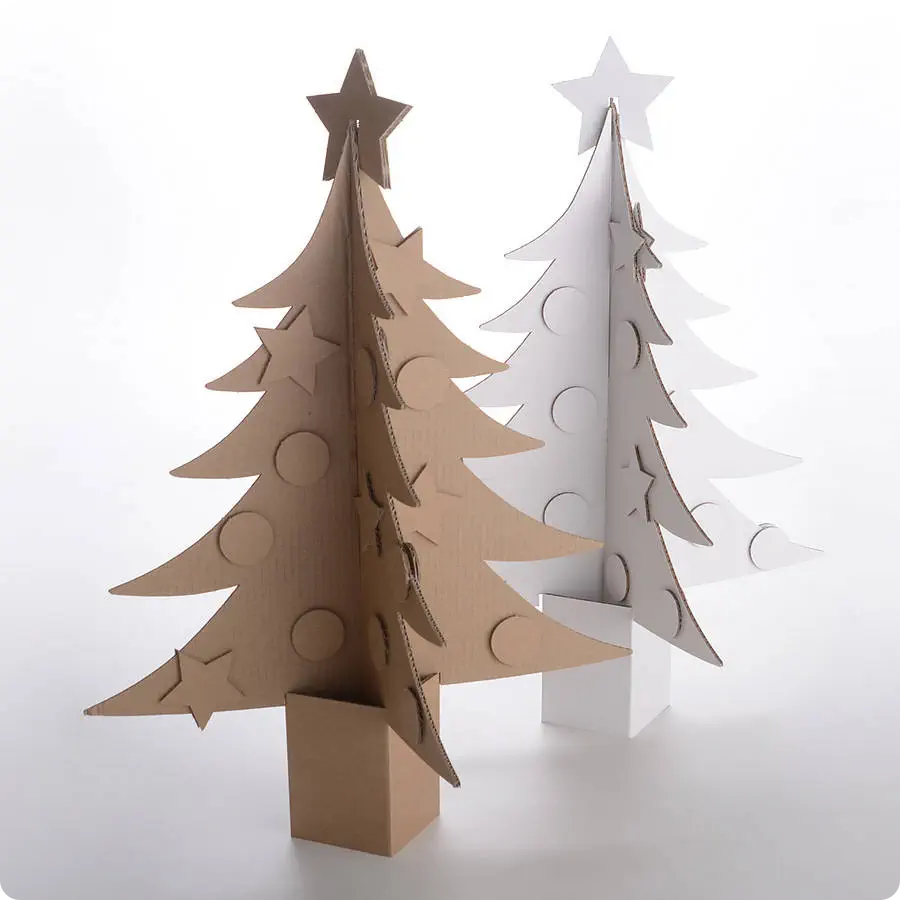
1. Octagonal Curved Tree
This tree uses 8 sheets of material that interlock into one another, with a small base to add stability.
2. Coinciding Triangular Tree
Interlocking triangles create this cool dimensional tree. The assembly is not complicated and can be easily installed in-store.
3. Flat Die-Cut Tree (With Hidden Base)
Need large quantities of trees at a fraction of the price? Nothing beats a perimeter die-cut with no assembly required and a hidden base!!
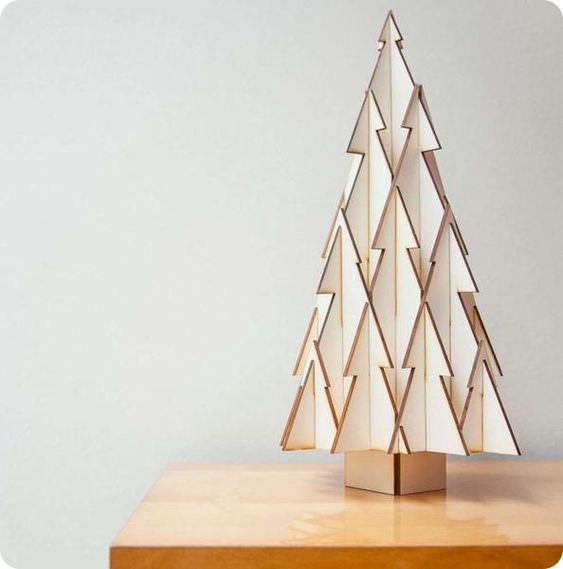
4. Dimensional Acrylic Tree (Product Holding)
This tree used 2 pieces of edge lit acrylic that vertically interlocked into each other, while the 4 intricately cut shelves interlocked horizontally.
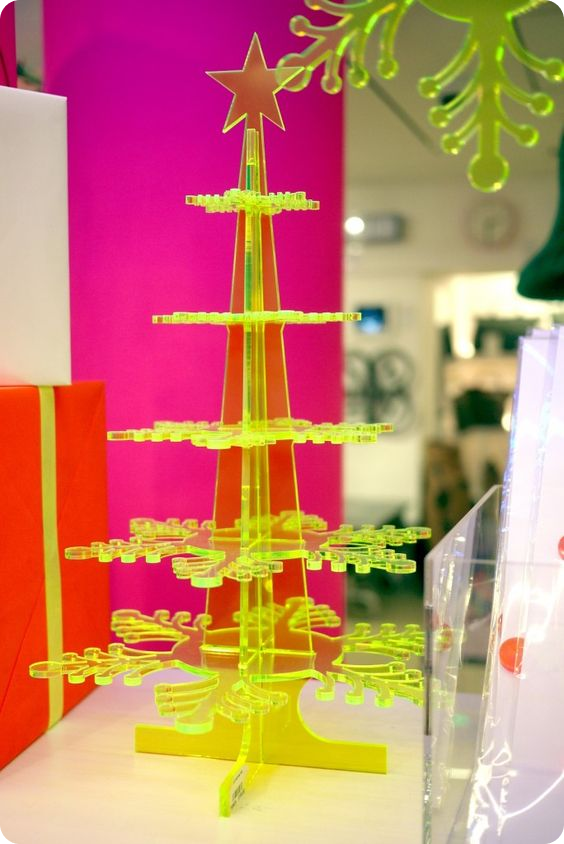
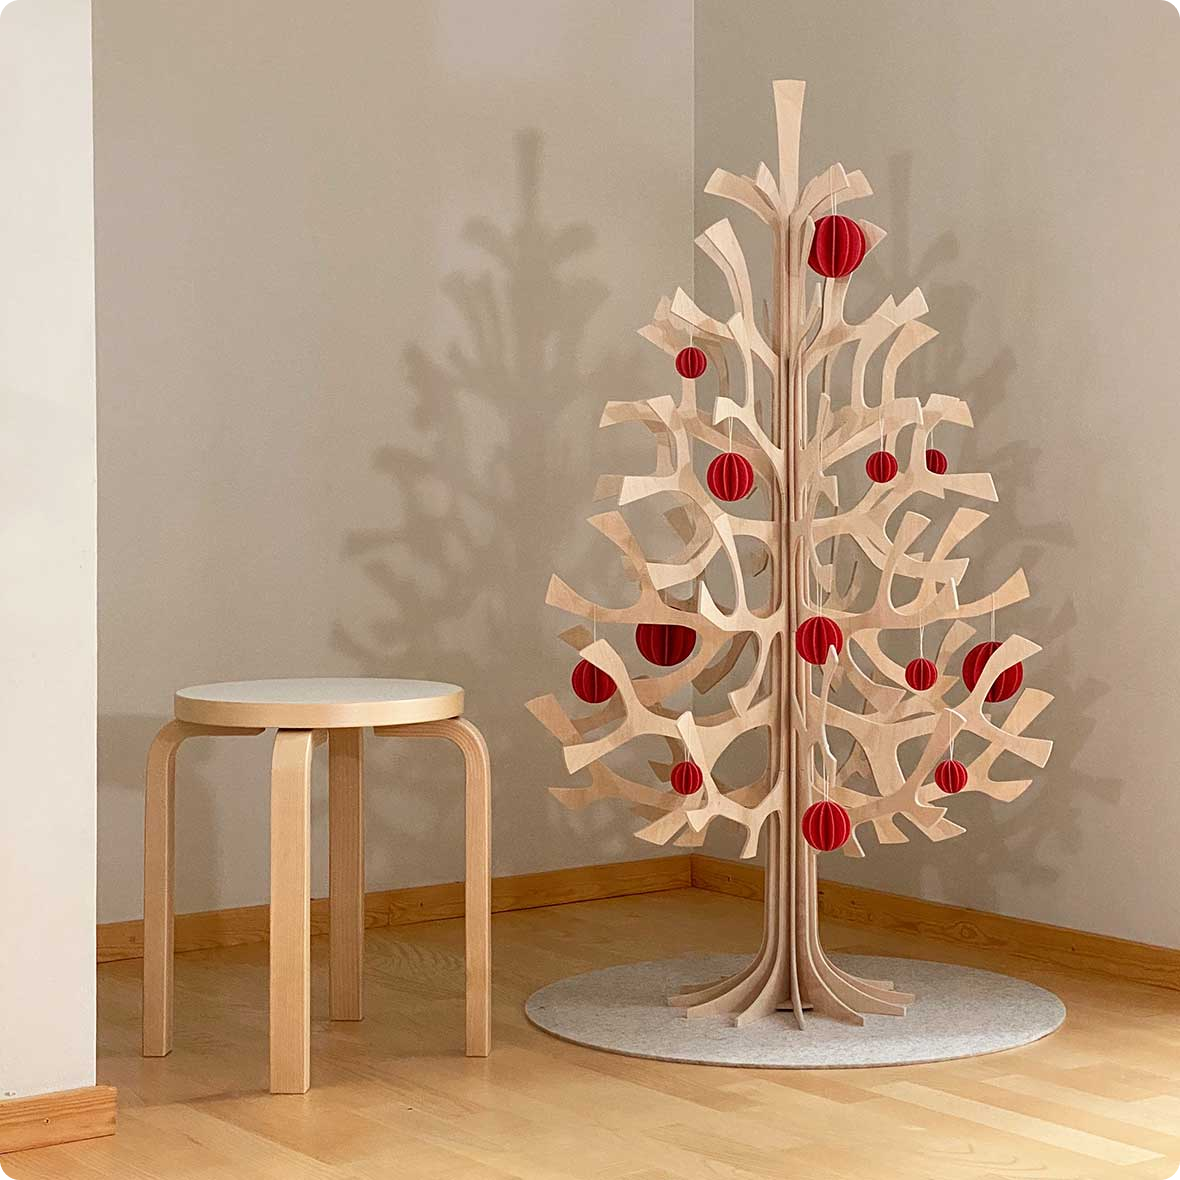
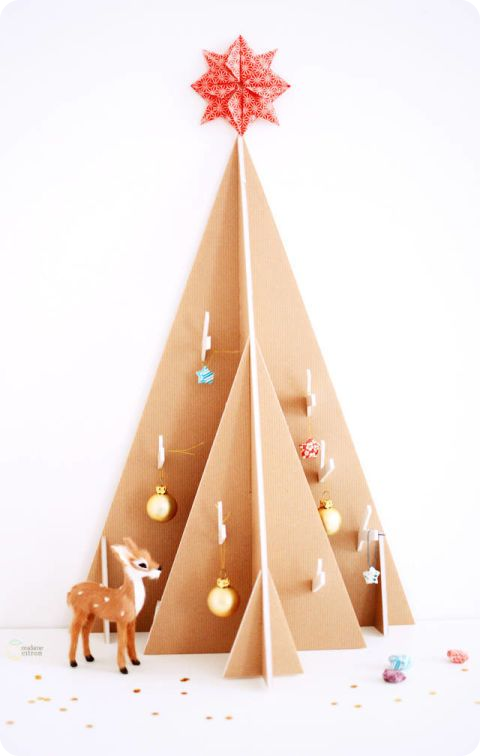
5. Scandinavian Tree
This unique tree only requires a flat sheet of material with an interior interlocking pattern!
6. Routed Flat Tree
A classic and clean look, this was routed with 25mm Sintra. It slid into a PVC base.
7. Simple Interlocking Triangle Tree
This version was digitally printed on 1/4″ falconboard to be easily assembled by store associates!
8. Stackable Angular Tree
This style of tree was routed with 2mm Dibond. For extra “pop” we laminated it with chrome and screen printed on top of it!
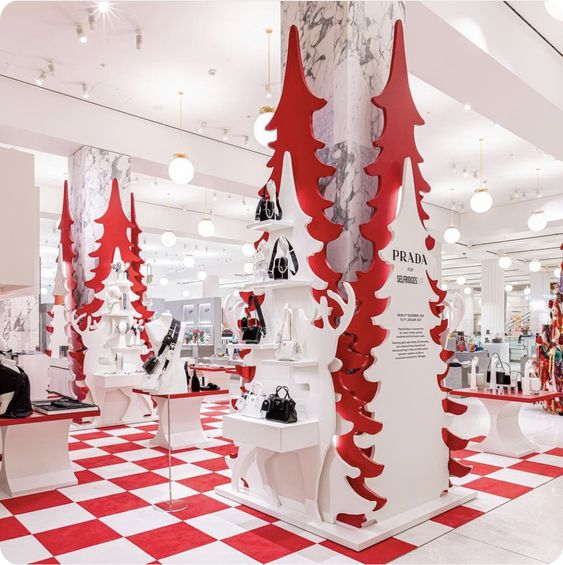
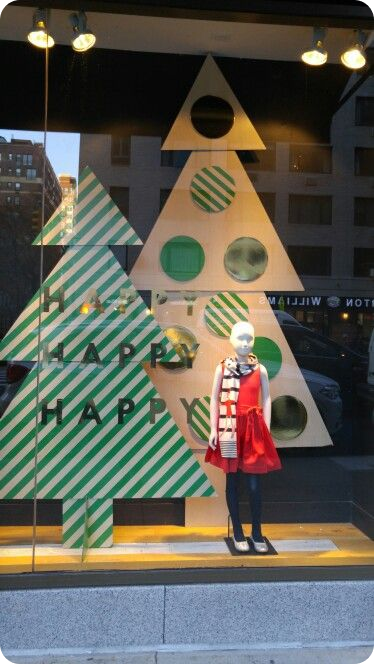
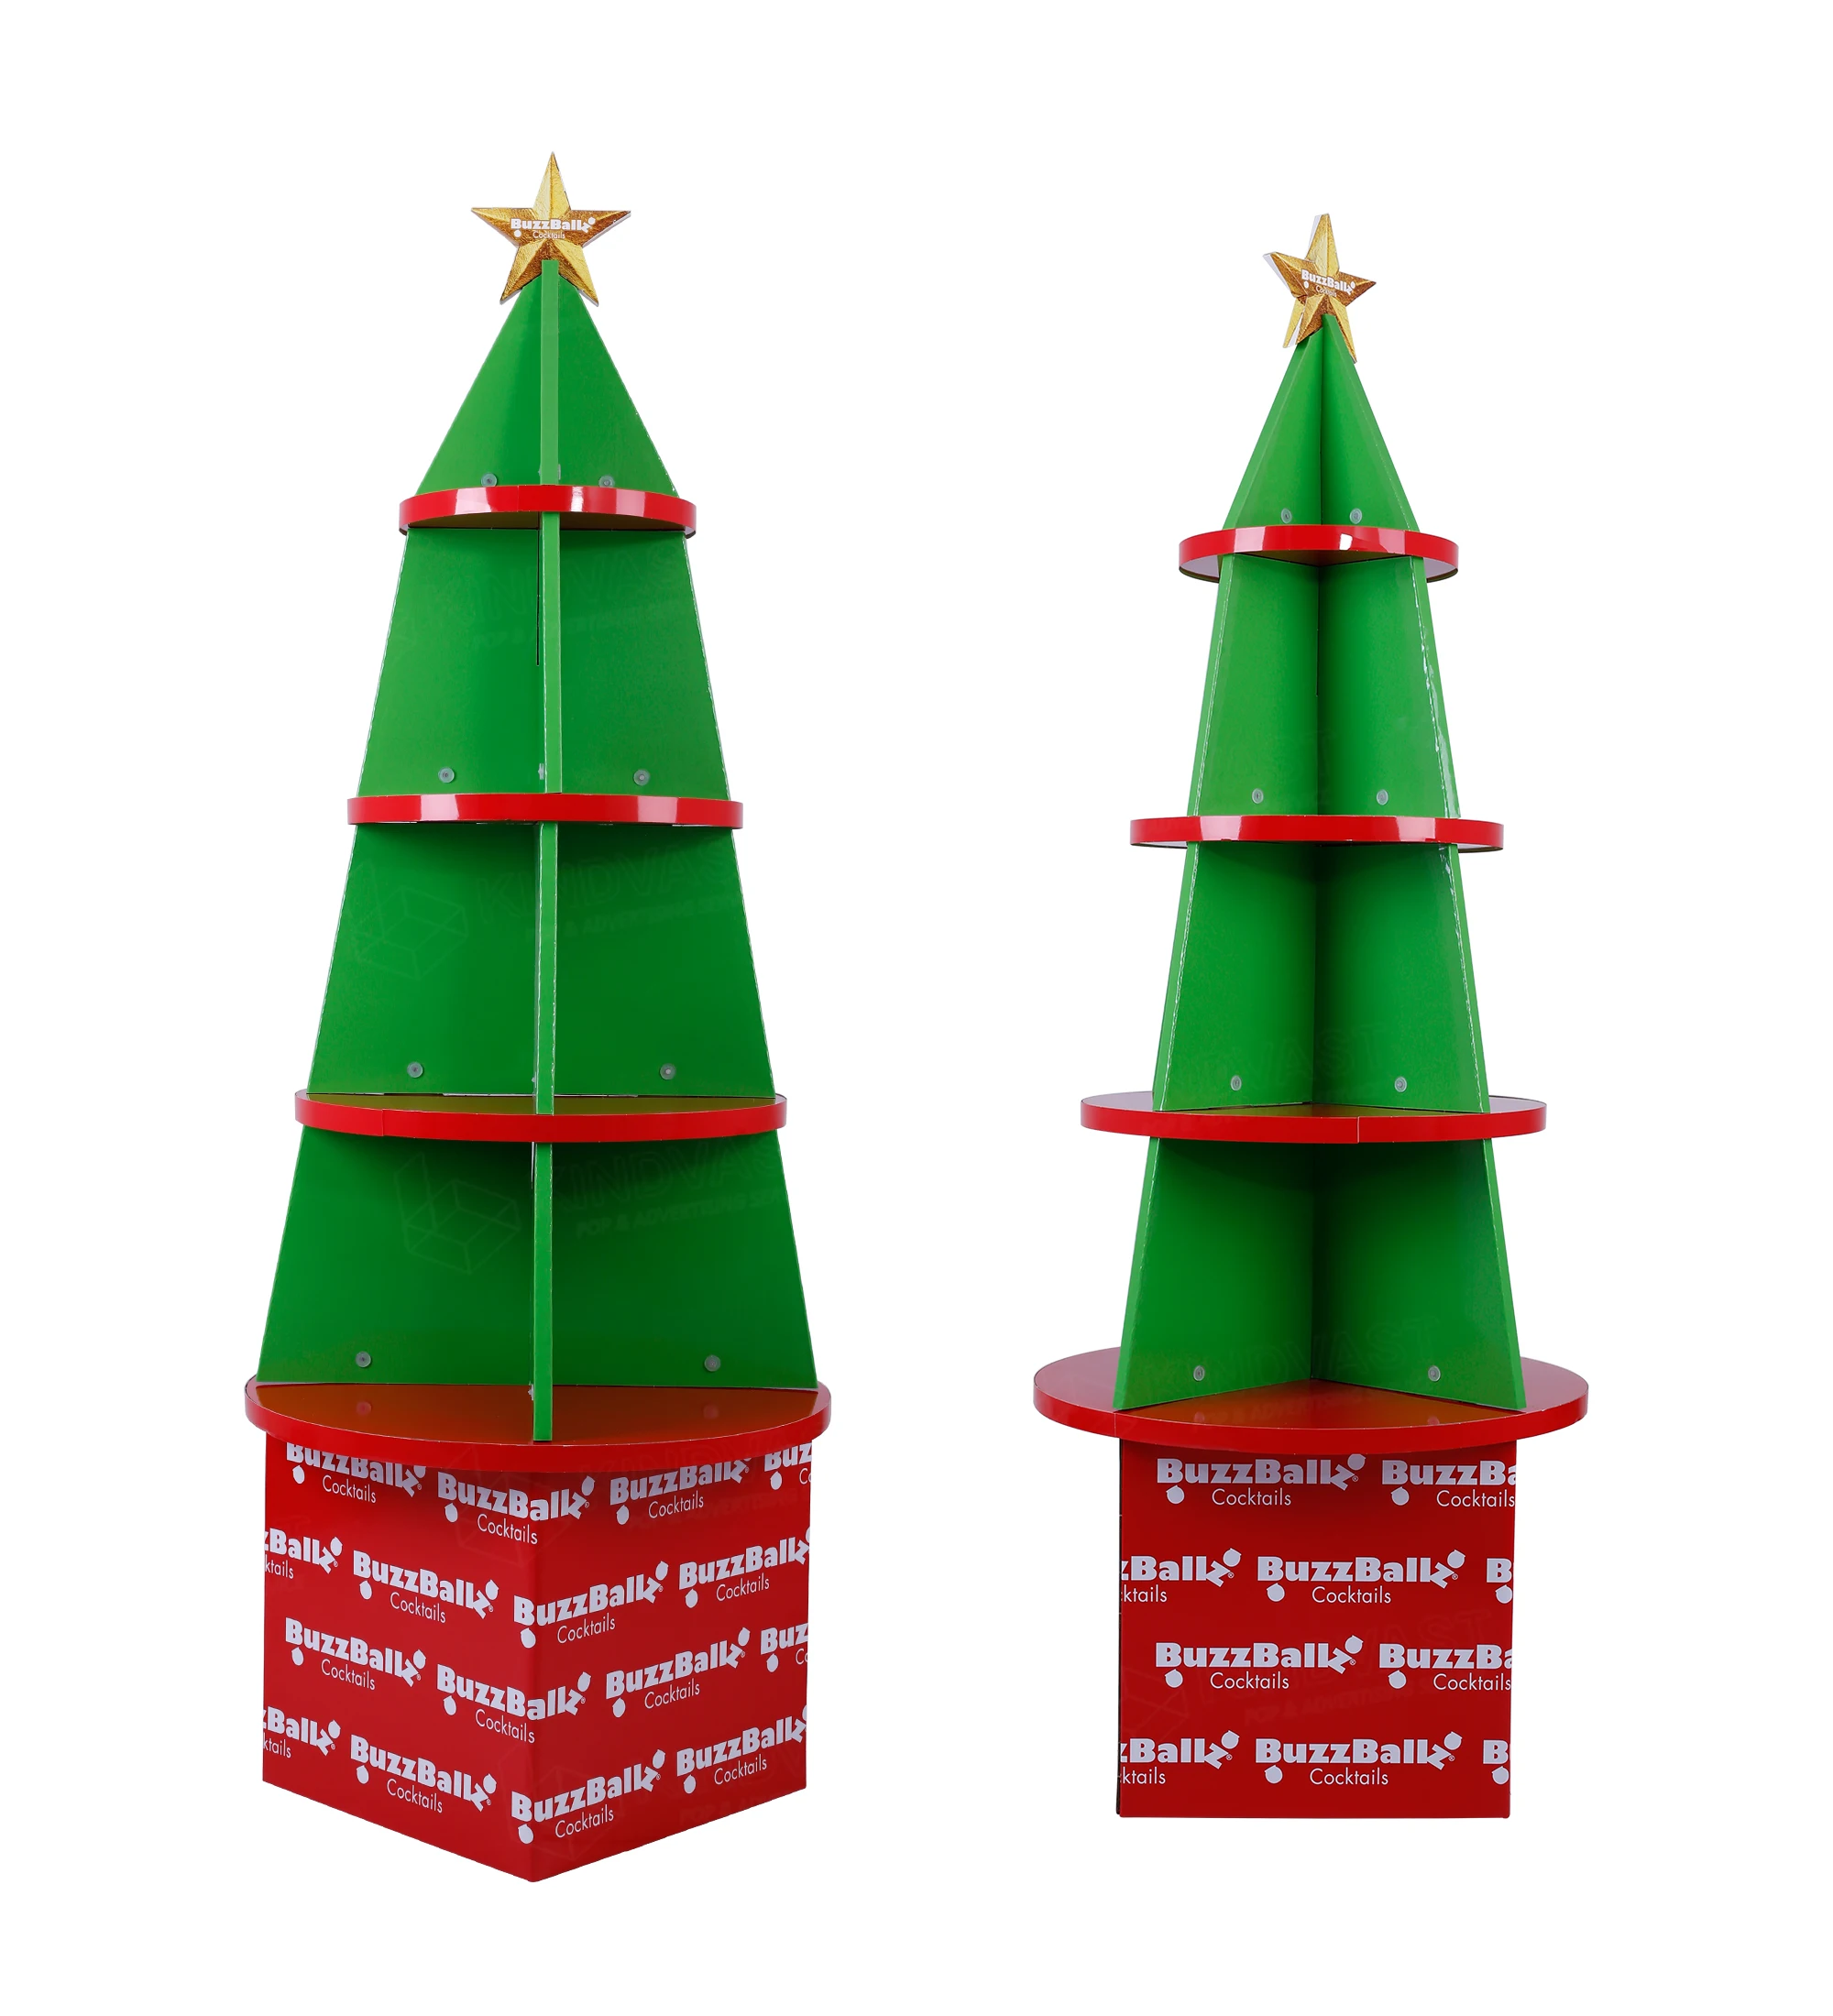
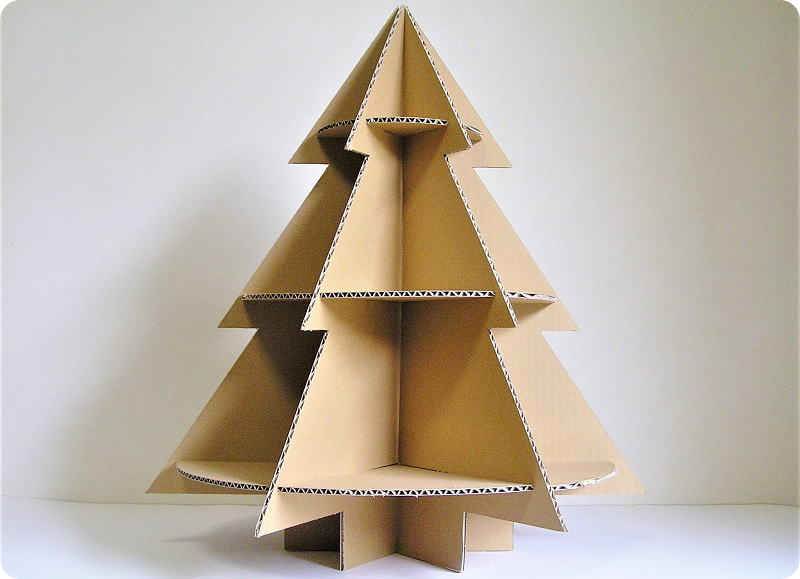
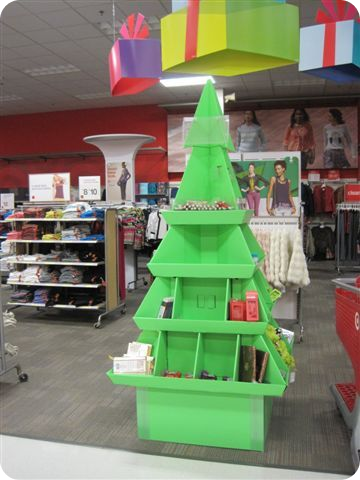
9. Classic Christmas Tree Product Display
A classic shelf POP Christmas tree display that has been successfully implemented for years!
10. Flat Adhesive Backed Tree
This version utilizes printed Dispa that attaches to each other with strip tape. Base added for stability.
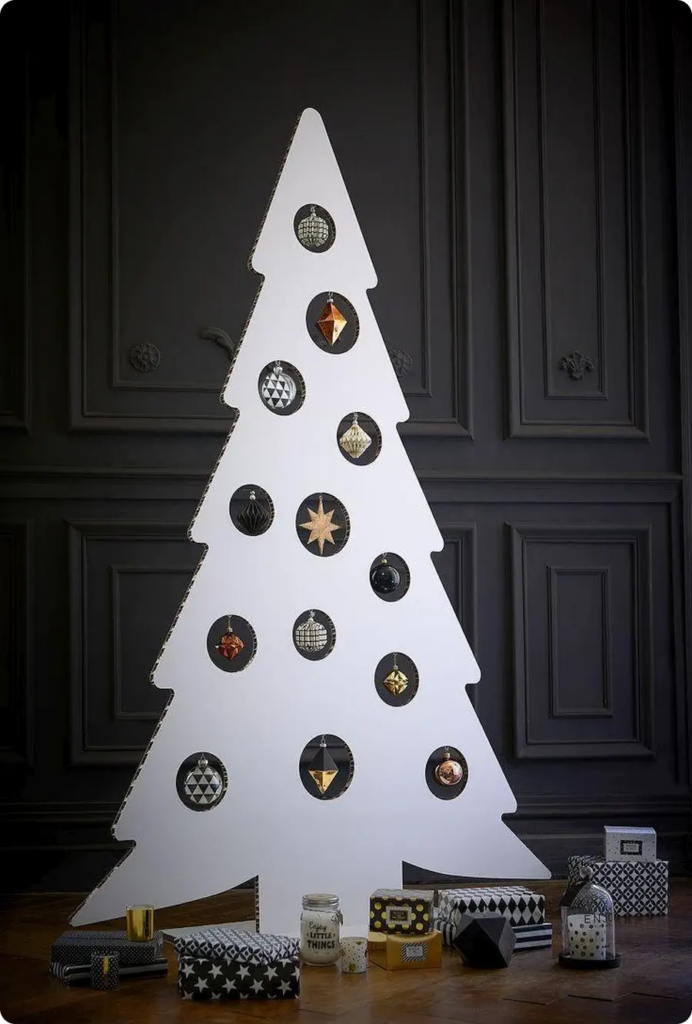
11. Christmas Tree Display
Need to hold a lot of product? This display uses clear post screws, gloss styrene and corrugate in the shape of a Christmas tree to do just that!
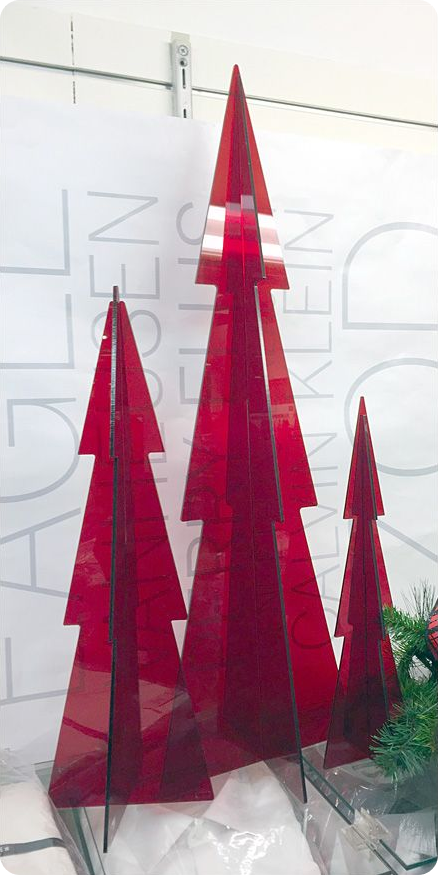
12. Interlocking Acrylic Tree
This version used routed edge lit acrylic to join into itself.
13. Pillowed Polycarbonate Tree
This tree used die-cut crease scores in polycarbonate to create a “pillowed” look. Interior structure needed for stability.
14. Coinciding Tree With Star & Adhesive Backed Ornaments
This version had no print, just die-cutting falconboard.
15. Flat Standee Tree With Cutouts
This tree uses a die-cut flat sheet with interior holes. The rectangular base is also out of the same sheet.
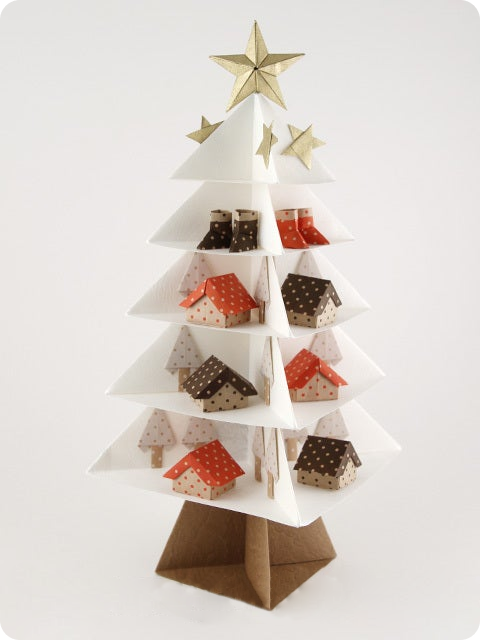
16. Quad Tree With Interior Connectors
Instead of parts sliding together, this utilizes interior pieces cut from the same material to hold the sides together.
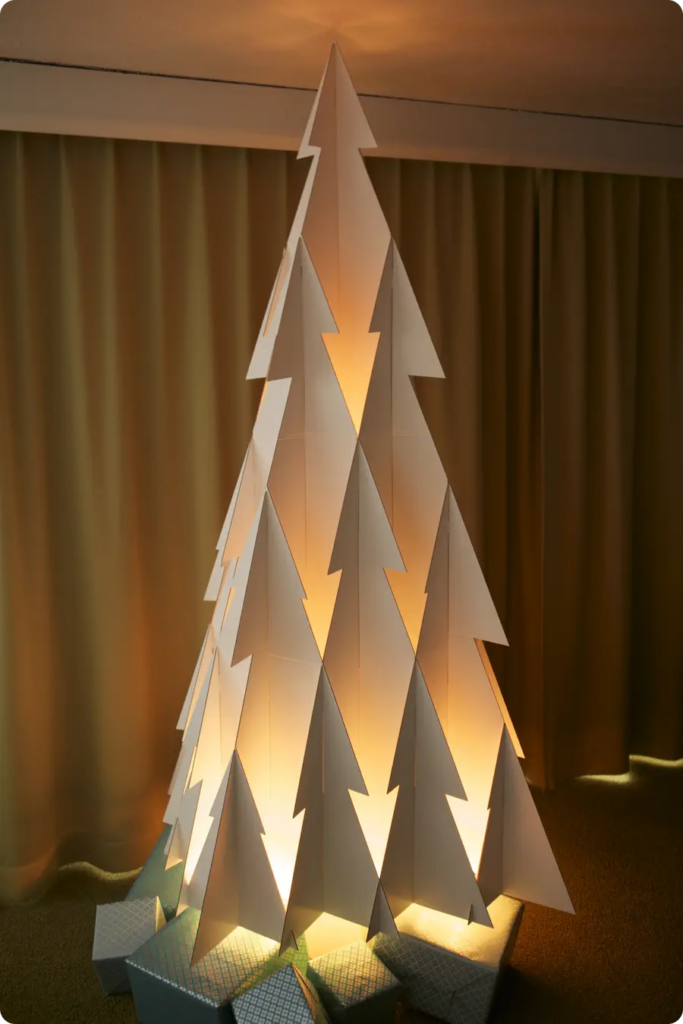
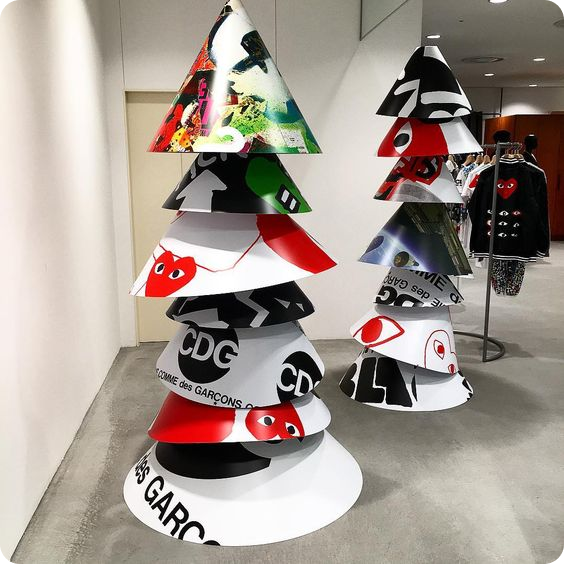
17. Twelve Part Backlit Tree
Achieve this stunning look with 12 interlocking die-cut trees of various sizes with 30pt cardstock.
18. Complex Self-Engaging Tree With Ornaments
This version was screen printed and die-cut on corrugate. Interior base is needed to provide stability.
19. Interlocking Tree (Product Holding)
This version uses 4 trees that fit together vertically, with 2 shelves connecting horizontally.
20. Heat Bent Based Flat Trees
This style is routed Sintra with heat bent bases.
21. Interlocking Heat Bent Angular Tree
This version utilizes heat bending and interlocking parts on gloss ABS plastic.
22. Tri Shelf Interlocking Tree
Designed for 3 vertical interlocking trees with 3 horizontal engaging shelves.
23. Dump Bin Tree
Classic dump bin construction with a reinforced base in the shape of a tree.
24. Interlocking Triangular Tree
For a simple installation, this uses 8 interlocking die-cut triangles of various sizes.
25. Heat Bent Shelf Tree (Product Holding)
Designed to hold heavier items, this shelf uses heat bent acrylic held together with post screws.
26. Complex Rigid Interlocking Angular Tree
Manufactured with 12 printed MDF wood interfacing trees, with a square base.
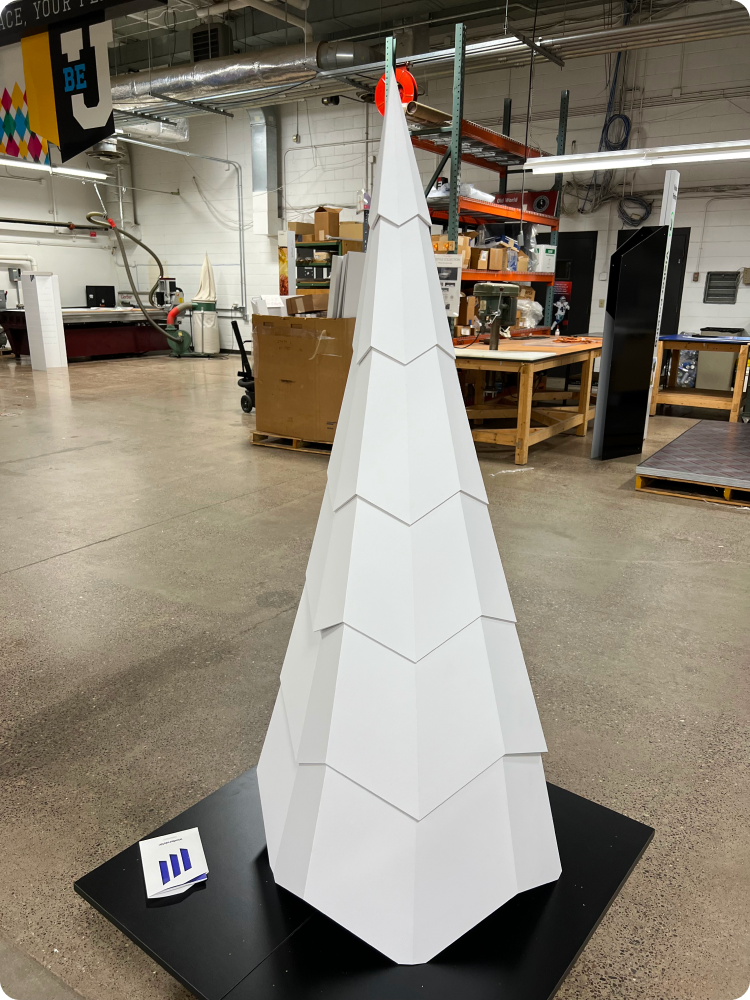
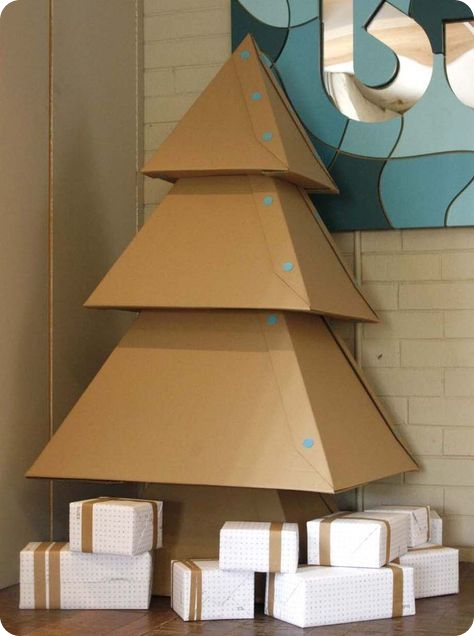
27. Stacked Pyramid Tree
This version utilized 4 stacked pyramids with crease scores to provide dimension.
28. Shaded Dimensional Stacked Tree
Very similar to the stackable angular tree, this uses shaded printing on the interior sides to trick the viewer into seeing an additional dimensional plane.
29. Double Interlocking Tall Tree
This version uses second surface screen printing on clear 5mm acrylic.
30. Stacked Cone Tree
This design uses printed styrene formed into cones with strip tape.
31. Creased & Stacked Angular Tree
This version uses the angular tree design but stacks itself on the opposite edges to give more dimension. An interior interlocking base is required for stability.
32. Die-Cut Lettering Trees
This design uses thru-cuts and crease scores to form lettering for a fun message. Always requires interior base for stability.
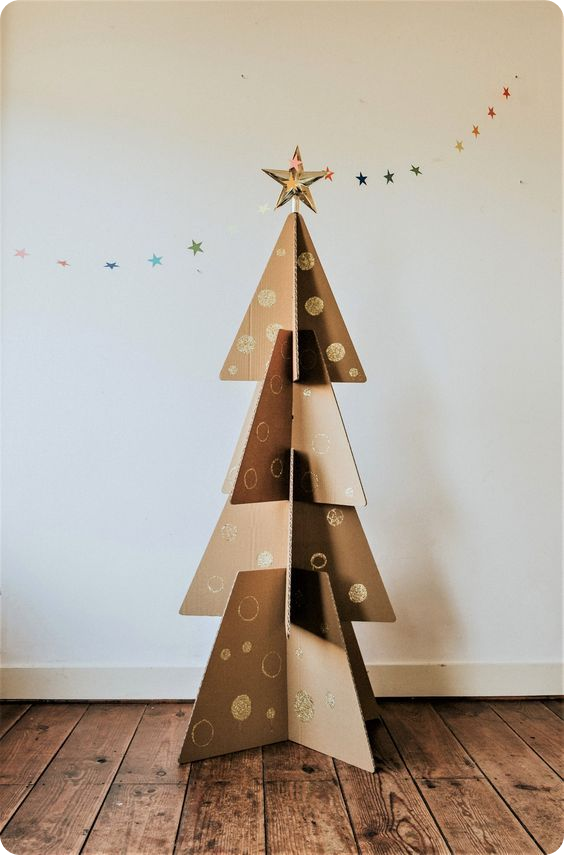
33. Accordion Tree
Designed to ship efficiently this tree accordions up and down. Can’t beat cost-effective and easy to install!
Grow your company’s revenue while personally enhancing your career! Christmas tree displays are awesome, but they take more than good artwork or a well-structured design to entice a consumer to buy a product. It’s a balanced recipe of great design, affordable manufacturing cost, clever placement, and judicious use of resources. Stay tuned for next month’s knowledge drop to learn more!
On the other hand, if you can’t wait or want to cure your display issues RIGHT NOW – click here, and we’ll talk today!
There are thousands of special effect inks, laminates, materials, and tools available. How do you know where to start?!
As one of the largest screen printers in the country, we take pride in our special effects printing. From distinctive textures and unusual substrates, to fragrance and metallic colors – we do it all! In this post we will try to break down some of the special effects we offer…
1. Scented
Smell is the strongest trigger of memory, affecting our emotions and even our mood. Therefore, when scent is incorporated within print media, the message becomes more engaging, evoking an emotional response that goes beyond the visual or written message.
Generally speaking, there are two categories of printable scents and how they are manufactured. There are non-interactive scents and interactive scents and you can manufacture them using a print coating (varnish/slurry) or print ink. A print coating is like varnish for wood. It goes over your artwork as a layer of clear scent or fragrance. While scented print ink combines the fragrance with the colored ink that is on your print media. Read our beginner’s guide on scented printing.
2. Soft Touch
Soft touch is a type of printing finish that creates a velvety, matte texture on print substrates. You can achieve this finish through a soft touch ink, soft touch laminate, or utilizing pre-coated soft touch material. Want to know more about the differences? Learn more about soft touch by searching it on our faqs.
3. Chalkboard
Printed chalkboard graphics are a great tool for combining temporary writing and permanent graphics. This is achieved by using a chalkboard screen print ink or base chalkboard material.
4. Dry Erase
Similar to printable chalkboard graphics, dry-erase graphics are also a great tool for combining temporary writing and permanent graphics. This can be achieved with a laminate, or by printing on a base material.
5. Scratch-Off
Printed scratch-off is an opaque ink designed for overprinting. It can be removed easily with finger or coin scrape and does not powder.
6. Glow in the Dark
Glow in the dark graphics are what they sound like – graphics that are most visible in the absence of other light. The “glow effect” is called phosphors, which absorb light from the sun or high-powered lights and then emit the light, which really pops in a dark room.
7. Translucent
Translucent graphics or translucent printing is essentially utilizing space, design, and print process to create see-through graphics. YThis is accomplished through using a base translucent material, design, or translucent inks.
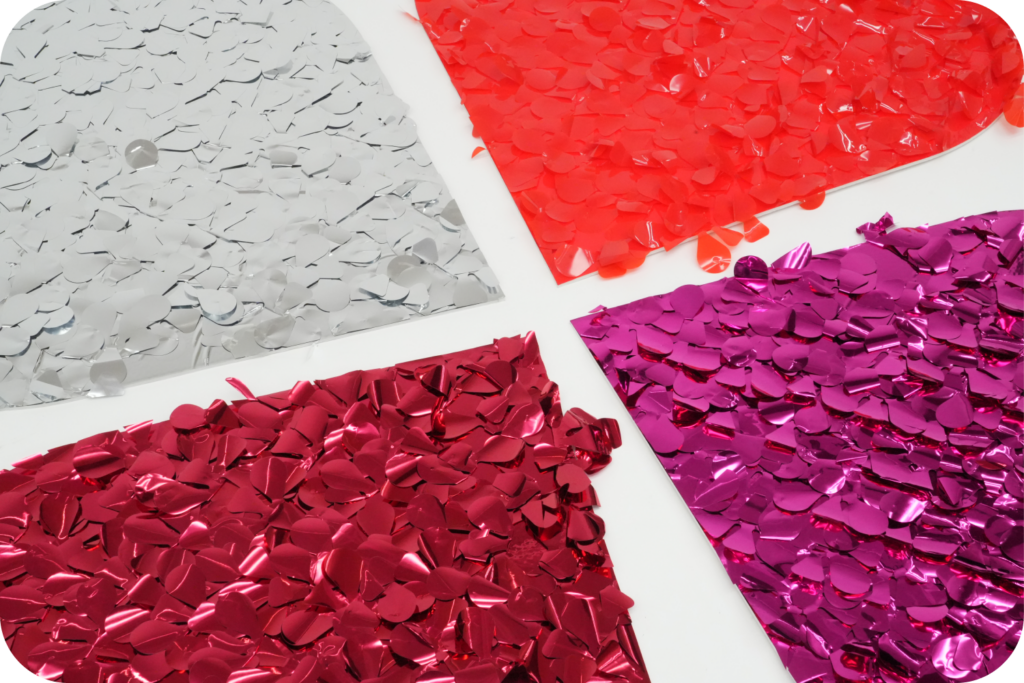
8. Glitter
Glitter: the product that is essential in many sparkly Christmas decorations, children’s artwork, horrendous pranks, and special effects printing. Printed Glitter graphics are an assortment of flat, small, reflective particles reflect light at different angles, causing the surface to sparkle or shimmer. There are many different ways to achieve glitter; through inks, adhesives, hand assembly, laminate, or base glitter materials. Glitter inks incorporate slightly bigger flecks, similar to the common glitter flakes, than those in shimmer inks.
9. Lenticular
Lenticular special effects printing utilizes design and lenticular ridges to produce a printed graphic with an illusion of depth, or the ability to change or move as they are viewed from different angles.
10. Pearlescent
Pearlescent printing (coined from natural essence of pearl which also produces the same light-refracting effect) creates a colorful and vibrant shimmering pearl-like impression on any printed graphic. The pearlescent effect is created from water based, solvent based or UV coating pigments structured with transparent layers. Their different refractive indices and optical wavelengths amplify or absorb light depending on their thickness, creating the iridescent sheen.
Using a discrete particle of a shimmering pearlized compound with the right base, we can print pearlescent in many different hues for your project.
11. Mirror
Printed mirror special effects are similar to metallic and chrome special effects but are much more smooth. Typically this is accomplished through lamination and then printing, or by printing over a base mirror material.
12. Metallic
Metallic special effects printing is similar to pearlescent but is applied to metallic colors like silver, gold and bronze. This finish is achieved through inks, coatings, hot and cold foil stamping, foil laminations, and/or base metalized material. We recommend using spot print if the desired result is in specific precise areas (reducing waste and saving time).
13. Chrome
Chrome special effect printing typically refers to a technique which applies a layer of metallic or chrome-like ink to printed materials. This process creates a shiny and reflective appearance similar to polished metal, adding a unique and eye-catching effect to the printed piece. This finish can be attained through inks, coatings, hot and cold foil stamping, foil laminations, and or base metalized material.
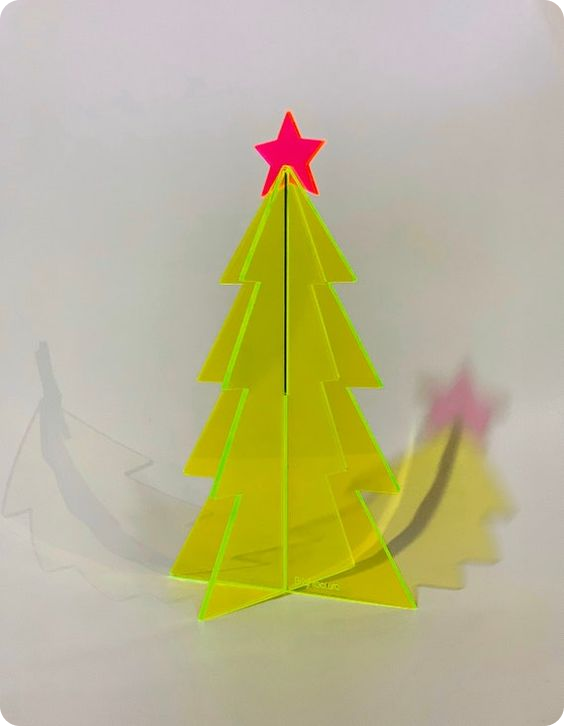
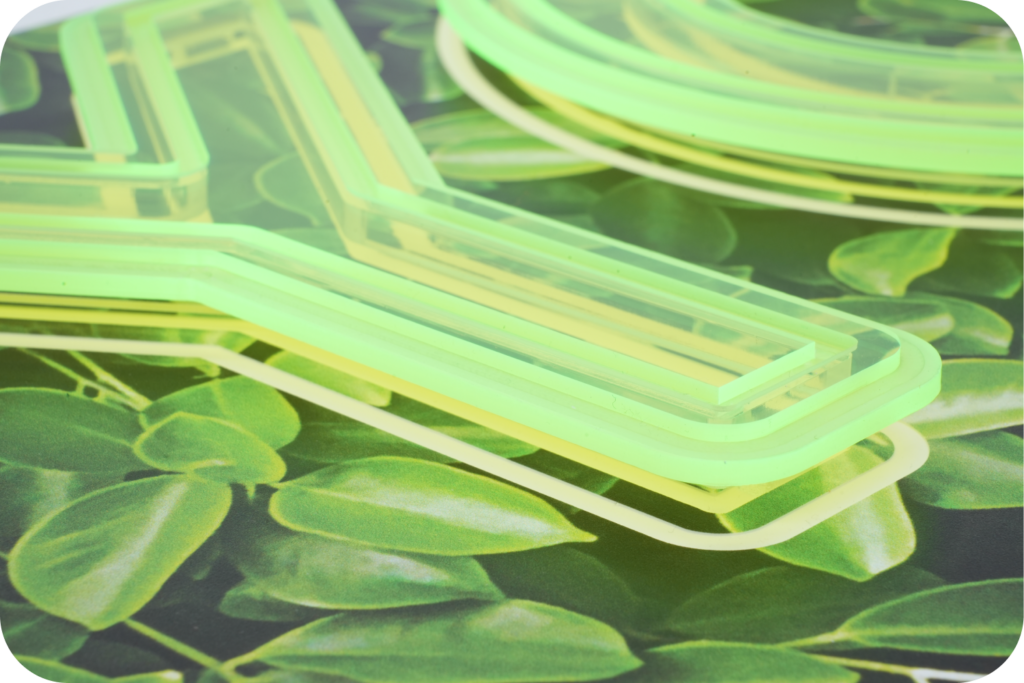
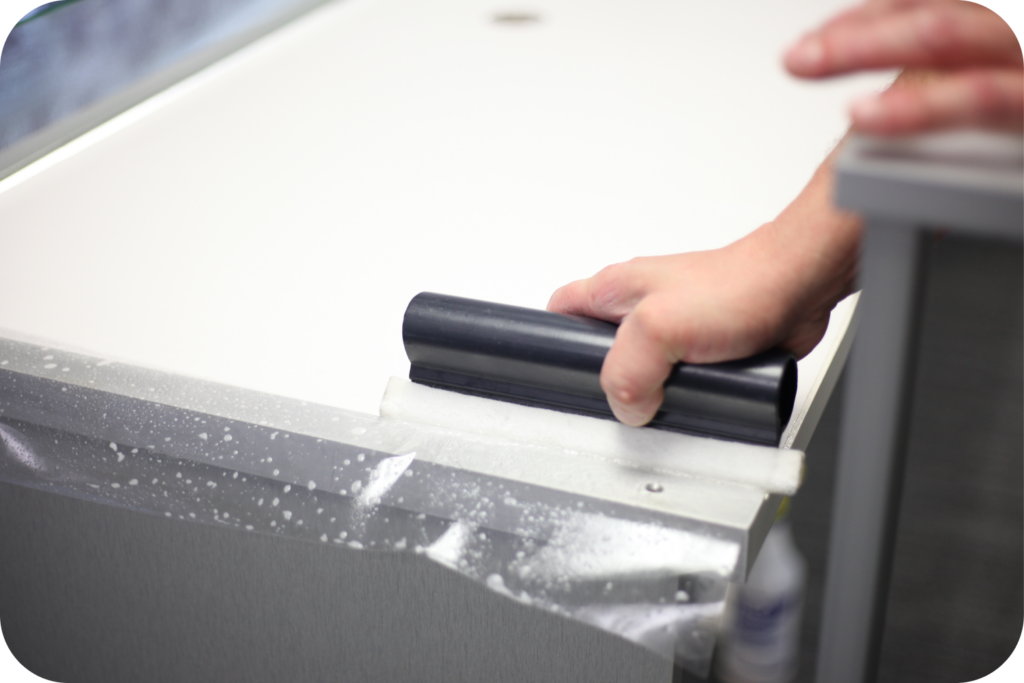
14. Edge Lit
Our edge lit graphics are made with a fluorescent acrylic that uses natural light to illuminate itself, without needing any power input. On this versatile, glow-emitting material we can print, route, drill, laser etch, and form (heat bend into 3D shapes) to create unique and distinct marketing touch points.
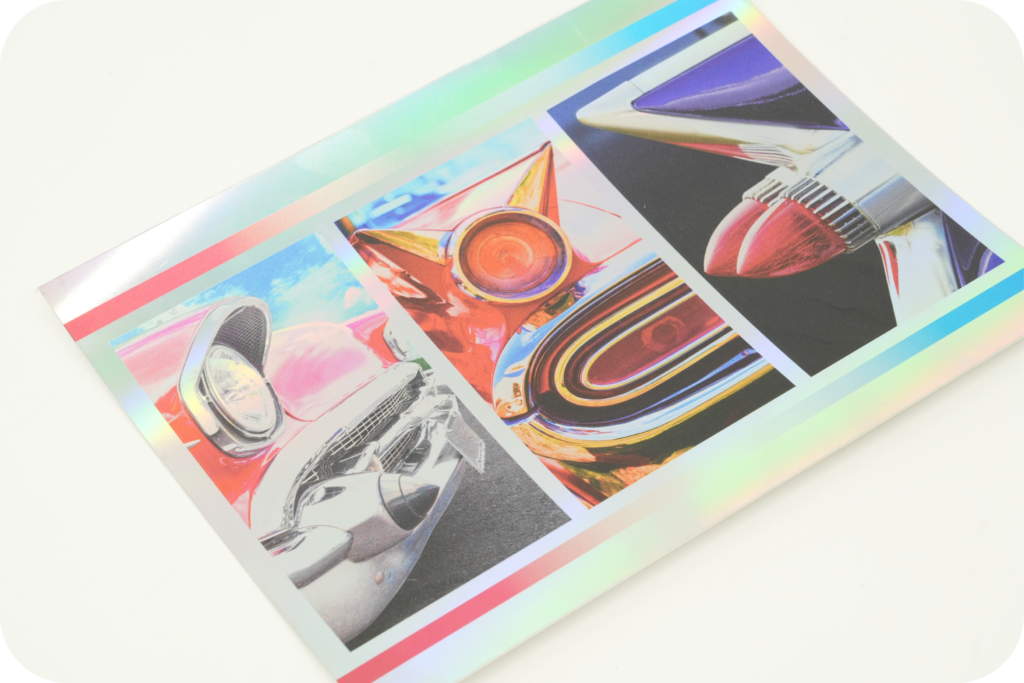
The printed hologram special effect is created by metalizing the surface substrate with a thin layer of shiny silver aluminum. The surface diffracts the light into many colors and reflects the light. This look can be achieved through lamination, printing on a prizmatic base material, or metallic screen inks.
16. Prismatic
Similar to holographic printed special effects, printed prismatic special effect is created by metalizing the surface substrate with a thin layer of shiny silver aluminum. The surface diffracts the light into many colors and reflects the light. This look can be completed via lamination, printing on a prismatic base material, or metallic screen inks.
17. Fluorescent Spot Color / Neon
Fluorescent or neon-printed colors are super bright because they contain pigments that absorb ultraviolet light that then reflects back out. Neon inks are printed as spot colors – a pure color in its own right, rather than created with four color process (CMYK) printing. This special effect is achieved through inks, lamination, or base material. We like to say if your eye can see it, we can hit it.
18. Matte + Gloss / Spot Gloss / UV Spot
Spot coating is the technique of applying a high gloss, semi-gloss, or matte gloss to a selective area on a printed piece, rather than coating the entire sheet. This draws attention to the specific portions of the artwork – even if it is the same color as the background.
UV Spot coatings are cured with UltraViolet light, resulting in a deeper more vibrant look than conventional coatings.
19. Raised Surface / Heavy Deposit Clear
Similar to a spot UV we can control the timing of exposure to the UV light and varying screen making parameters, we can also create raised profile gloss and matte coatings, which give dimension and texture to these effects. We can also get this texture by printing on a textured base surface or by printing second surface on a clear raised surface.
20. Thermochromic
Printed thermochromic special effects change color based on temperature, often being used for mood jewelry, toys, and sticker thermometers. The ink we use is a type of dye that changes color when temperatures increase or decrease. It is a great way to add a little interactive element to your graphics!
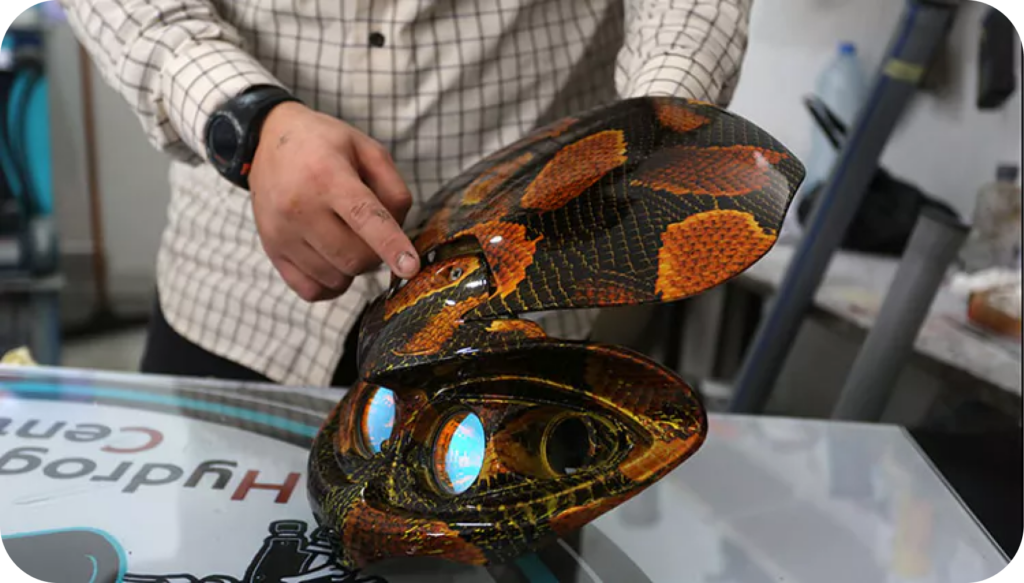
21. Hydro Dip / Hydro Graphics
Hydro dipping, also known as water transfer printing, hydrographic printing, or immersion printing, is a method used to apply intricate patterns and designs to completely wrap three-dimensional objects. We first print on a hydro-dip film, clean the part, apply the film onto water, dip the part into the water, dry, and finally apply a clear coat to the part. This a popular technique used for dimensional signage, automotive parts, electronics, sports equipment, firearms, and more.
22. Custom R&D
Don’t see what you’re looking for? We specialize in customization and help develop new and unique printed products for our customers every day.
Honorable Mentions…
23. Antimicrobial
Antimicrobial film is a type of film or coating that contains substances that inhibit the growth and spread of harmful microorganisms such as bacteria, viruses, and fungi. The antimicrobial properties of the film are designed to protect the surface or material to which it is applied, reducing the risk of contamination and providing a hygienic solution for a variety of applications.
The film works by releasing antimicrobial agents that kill or inhibit the growth of harmful microorganisms. These agents can be a variety of substances, including silver ions, organic acids, or other active ingredients that have antimicrobial properties.
Antimicrobial films can be used in a variety of applications. For example, we have applied antimicrobial film to print media, countertops, table graphics, table easels, and touchscreens to prevent the growth of harmful bacteria and other microorganisms. Read how we were able to wrap an NFL stadium’s tables in less than 48 hours.
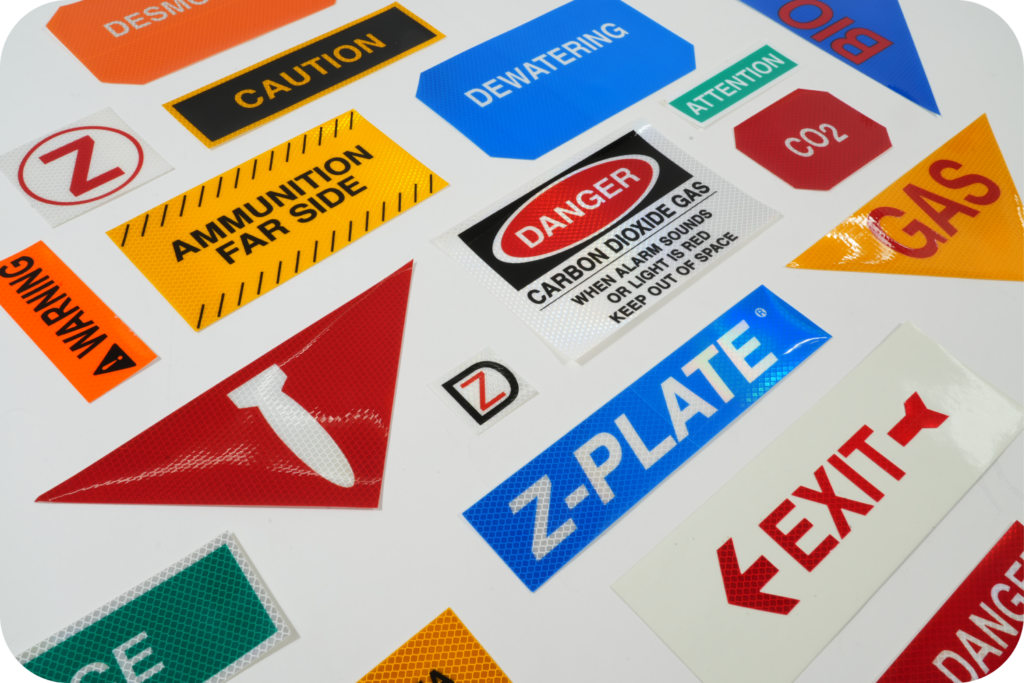
24. Reflective
Reflective printing enhances visibility by reflecting light, making the printed design appear brighter and more noticeable when illuminated by headlights, flashlights, or other light sources. We print this effect by using reflective materials, or inks that can reflect light, especially in low-light or dark conditions. This type of printing is commonly used for safety applications, such as signage and equipment that needs to be visible in situations where lighting might be limited..
25. Anti Slip
These can be as basic as custom-sized stair treads, or branding and advertising non-slip patches in indoor and outdoor aquatic centers. Anti Slip graphics are often used for branded foot-landing steps on lawn, construction, and agricultural equipment. Learn more here.
26. Adhesive
There are obviously many different ways to apply adhesive, however did you know we can print adhesive too?
Screen printable adhesives allow us to apply adhesive directly onto a part with bond lines as narrow as 0.5mm. Why do this instead of tape or other adhesive methods? It results in more product versatility and increases efficiency by reducing the need to order assembly tooling, die-cut parts, and extract waste. Learn more here.
Grow your company’s revenue while personally enhancing your career! Special effects printing is awesome, but it takes more than good artwork or a well-structured design to entice a consumer to buy a product. It’s a balanced recipe of great design, affordable manufacturing cost, clever placement, and judicious use of resources. Stay tuned for next month’s knowledge drop to learn more!
On the other hand, if you can’t wait or want to cure your special effects printing issues RIGHT NOW – click here, and we’ll talk today!
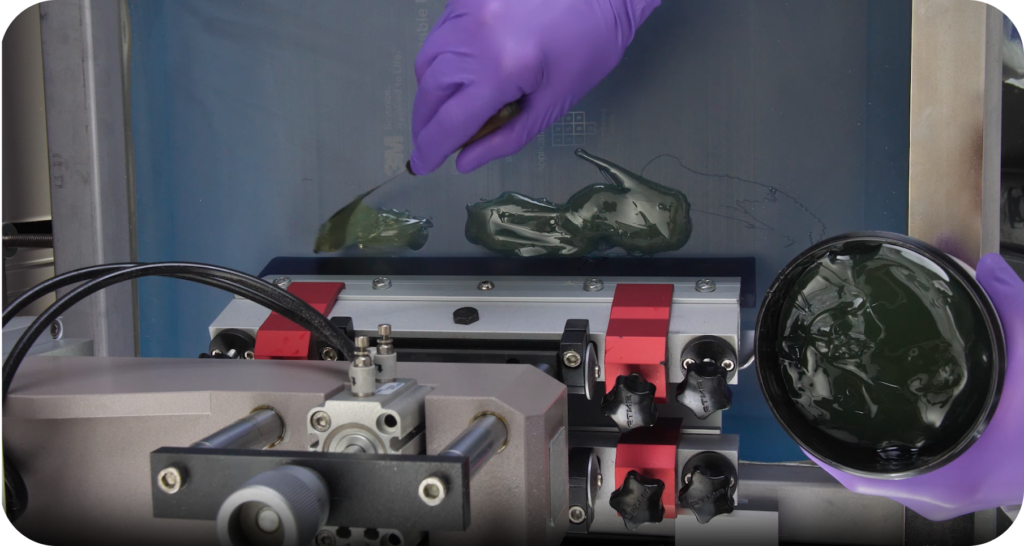
Have you ever been asked to request an ink drawdown, press check, or color drawdown? These are all print industry terms for the same thing. Essentially, an ink drawdown is testing how the colors appear on the material you want to use. Think of it as a paint sample you would get when deciding what color to paint your room. Except, in an ink drawdown you are also testing the material it is on as well.
These samples are important because ink is extremely capricious and will be affected by even the smallest changes (like a change in the material). Understanding these changes will help us create an updated ink recipe to combat those changes so that the ink on the new substrate looks exactly how you want it to. Knowing how the colors will react to the material before performing a full production will also decrease chances of rework and cost. This is why we always perform internal drawdowns even if our customers do not request one. This is not always the case for printers and print management companies, make sure to advocate for yourself or utilize an attentive printer. We are extremely confident to say that we have the best ink formulation team in the nation so if you have any questions feel free to contact us.
Cutting techniques can make or break a project budget. That is why it is important to learn when to use the right machine for the job. Otherwise, you could be losing unnecessary money. We will look at what die cutting is and when you should use it!
Simple Answer:
In its simplest form, die cutting is essentially just a large cookie cutter for your design. It’s meant to pump out parts fast and precisely. Similar to screen printing, the setup for die-cutting takes longer but is faster on the production end. Its sweet spot is large quantities with substrates less than .5” thick. If you have a thicker substrate or smaller quantities that’s okay! There are plenty of other cutting options and we have even die-cut foam up to 3” thick! That is why it’s important to have a printer with the knowledge and alternate cutting capabilities in-house.
A die-cutting project has 3 elements.
1. The Die Line
The die line is essentially the guide for us to make the cuts or creases. These die lines can be very tricky to read, but it is imperative that they are correct.
2. The Cutting Die / The Die
A die can either be curved or flat. We typically used a curved die (aka a rotary die) when the parts are small and there is a dramatically higher volume (think sticker size). Every cutting die has a base with blades sticking out of it. Some of those blades are sharper to cut straight through and some are duller to score the material in case you need it to fold or bend. The rubber pieces are to help the blades cut evenly.
3. Die-Cutting Machine
There are 3 major die-cutting machines: roll fed die-cutting, sheet fed die-cutting, and rotary die-cutting. Typically, a die-cutting machine is 4 feet wide so you would want the dimensions of the die-cut part to be less than 22” x 32”. We don’t believe in being held back and that is why we have some of the largest format die-cutting machines in the US.
The more you are under budget, the more revenue you produce. It is important that you are using the most efficient method based on your project specs and not constrained by machine capabilities. Otherwise, it can limit your budget and weigh down your bottom line. Shameless plug: If you want to know if your project is as efficient as it could be, we would be happy to give you a 2nd opinion! Our scope of equipment ensures that you are using the best method for your project.
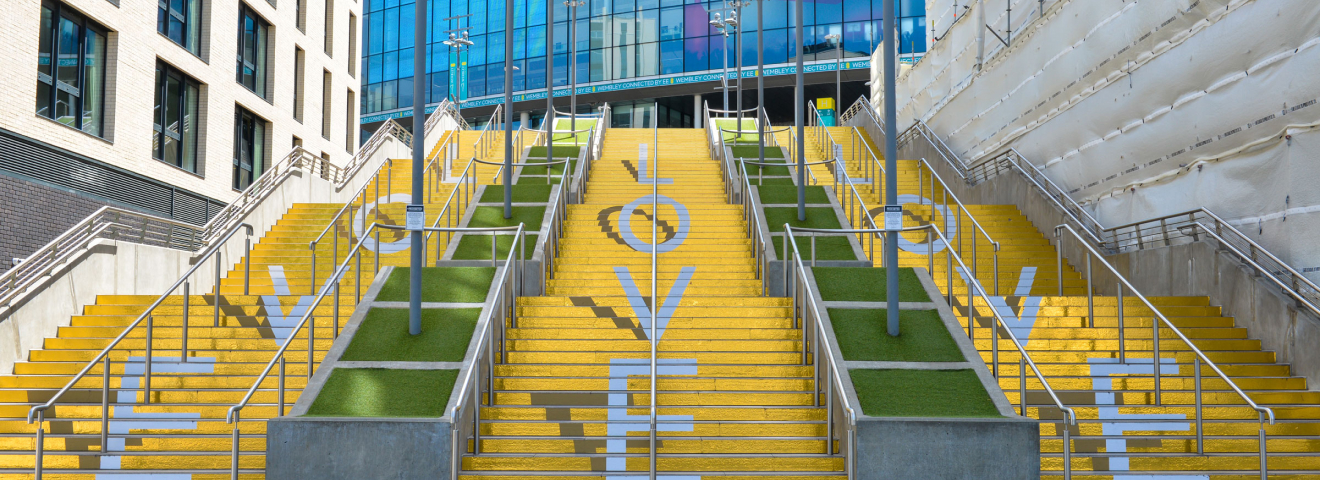
Plan and implement a winning strategy by utilizing Stair Graphics to communicate your brand and/or messaging!
Create success with every step
Promotion companies, marketing, and advertising agencies along with specialized media companies are always on the lookout for innovative concepts for making advertising campaigns as effective as possible. The objective is to create a targeted and simultaneously extensive advertising presence, by locating the campaign on the attractive and mostly underutilized / unexpected advertising format. Both a design element and a branding opportunity, stair graphics are being used for events, premier parties, and galas.
On the commercial side, brands have been popping up on heavily traveled staircases all over the world displaying massive ads for their products and services.
Schools allow the transformation of ordinary flight of stairs into a striking visual that reinforces behavior expectations, supports school spirit, and promotes student success.
Transform an arena from average to a standout amongst its competitors, by taking away blank space and turning it into art. Possibilities include championship teams photos, alumni images, opening days or other seasonal events. Additional options for stair messaging includes murals, motivational quotes, along with core value messaging.
Stair graphics do not have to be used for athletics and can be functioned to fit all projects a school desires. Graphics can be used on any staircase, including residence halls, dining halls, academic buildings, and dorms.
Add the unique, yet not over the top design, that turns a blank space into a completely different point of interest. The attention drawn from the graphics can take an average, or even outdated part of a venue, and create what feels like a newly renovated area.
A stair graphic treatment is surprisingly affordable and can be completed with no harm done to the structure itself.
While stair graphics are dramatic, the product itself is economic, easy to install, clean and will last for years.
Do not overlook the option of “Stair Graphics” – especially when your audience needs to go that direction every day. It’s a great use of space that definitely gets noticed!